Fees

January 05, 2026
Depending on your state laws, certain products may have required fees. For example, items with plastic packaging in California usually have the California Redemption Value (CRV) fee. The IT Retail system enables you to create and attach the Fees you need for your products. Keep reading to see for yourself how easy the process is!
Creating Fees
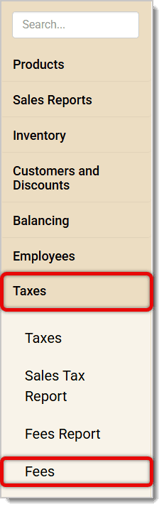
To create and edit Fees, go in the IT Retail Back End to Taxes > Fees using the main menu.
Here is how to work with the Fees page:
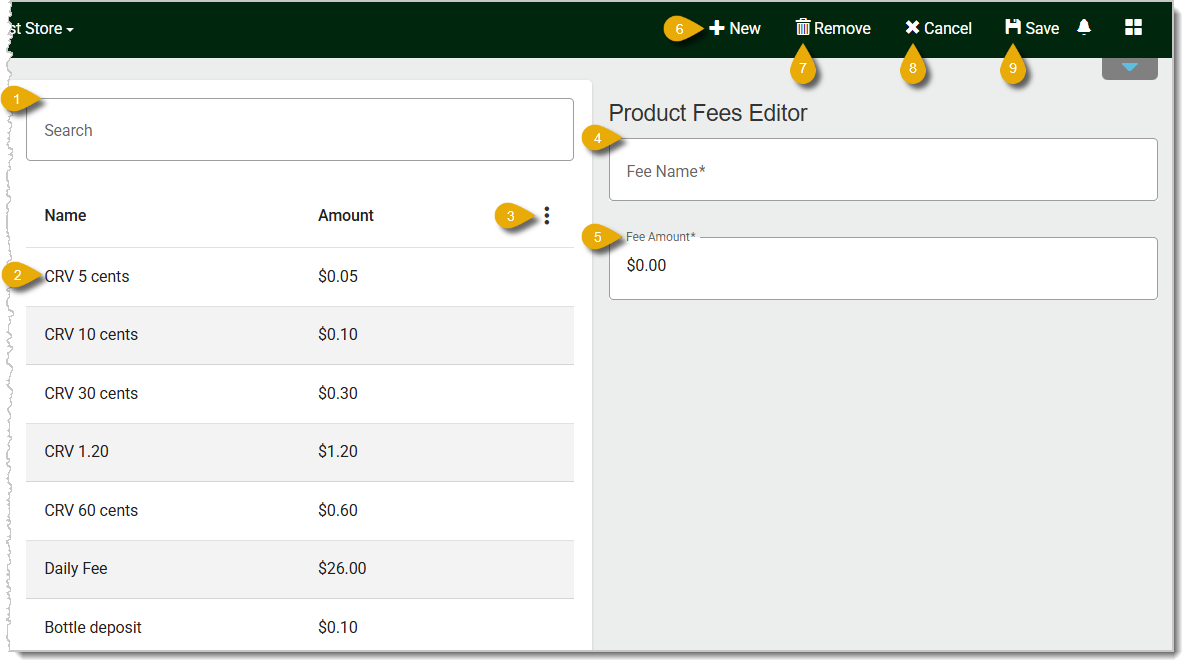
- Search — If you're having trouble finding a specific Fee, you can use the Search bar. Enter the Name of the Fee and matching results will display in the list below.
- Select — To edit a Fee, first select it by clicking on it. The selected Fee will be highlighted, and on the right, its information will populate. You can adjust the Fee Name and the Fee Amount (described below). If you make changes you want to keep, be sure to click Save in the upper right when you’re finished.
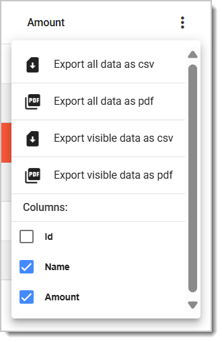
- Action Menu — Click on the Three-Dot Stack icon on the right to open the Action Menu. You can export a CSV or PDF file of your Fees. You can also select columns to hide or show.
- Fee Name — Under the Product Fees Editor, enter or edit the Fee Name. This should be short and easy to identify at a glance, like 'CRV 5' cents or 'CRV 10 cents.'
- Fee Amount — Enter or edit the dollar amount of this Fee.
- New — If you've already selected a Fee and want to create a new one, click on the +New button. The Fee Name and Fee Amount fields will clear so you can enter the new Fee information.
- Remove — If you want to delete a Fee, first select it and then click on Remove. A window will ask you to confirm that you want to delete it.
- Cancel — If you want to cancel your changes, click on Cancel.
- Save — After you've added or edited all necessary details, be sure to click on Save in the upper right to save your changes. Otherwise, you'll lose your work.
How to Attach Fees to Products
If a customer purchases an item with a Fee attached, the Fee will be printed on the receipt for their reference. Here is how to add Fees to your products:
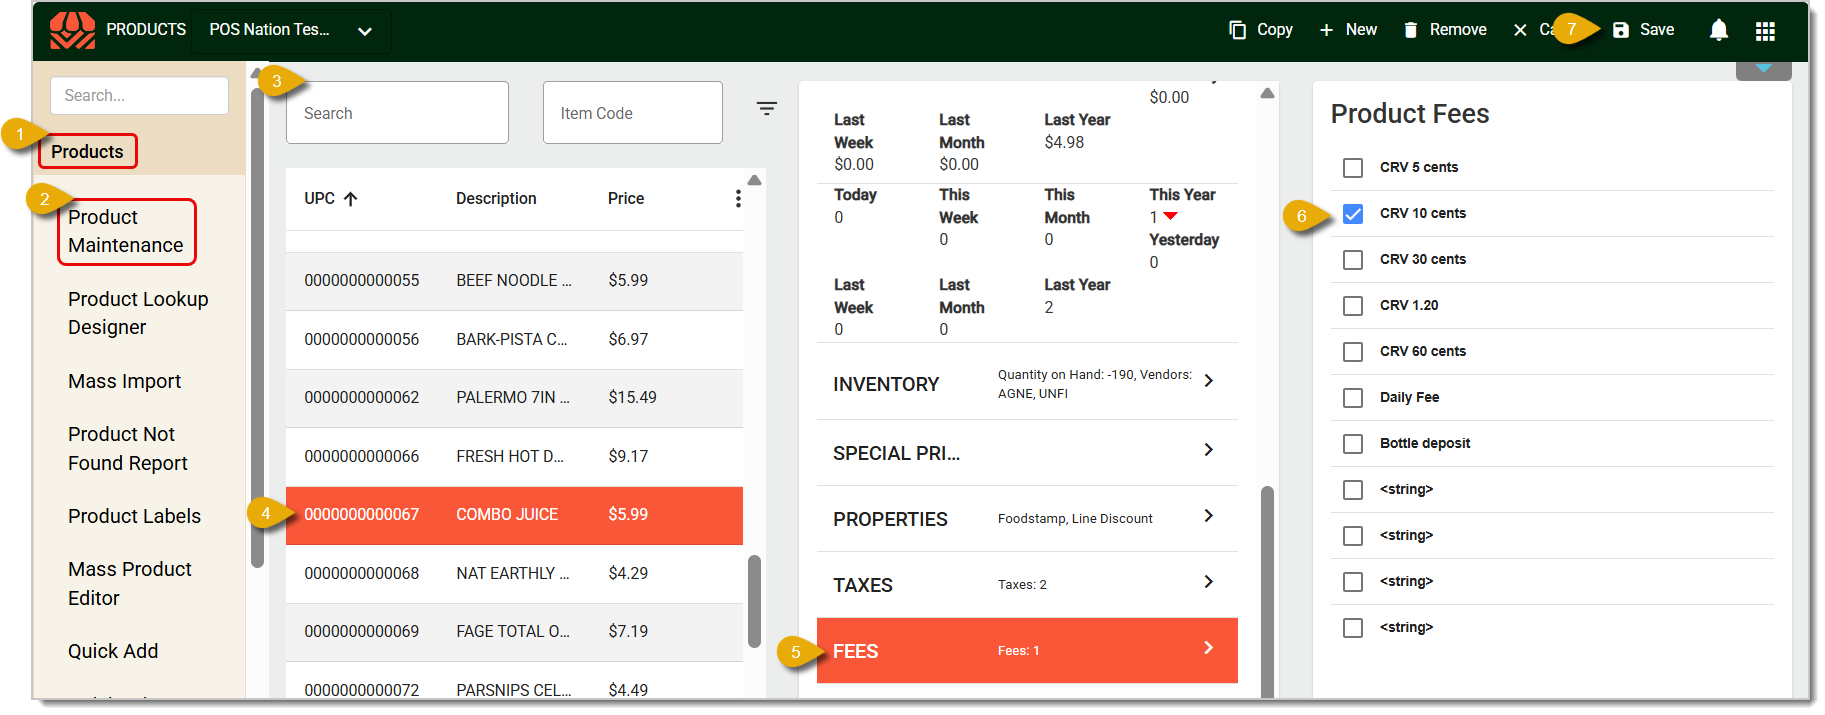
- In the IT Retail Back End, click on Products in the main menu.
- In the Products menu, click on Product Maintenance.
- Search for the product you want by its Name or Description, or you can scan in its UPC Code. If you use Item Codes, you can scan or search in the Item Code field. Matching results will load for you.
- Click on the Product you want to highlight it. Its information will load in the Products Editor on the right.
- Scroll down until you find the Fees tab and click on it.
- Check the boxes for each Fee you need to add to the item.
- Click on Save in the upper right of the page.
Related Articles
Fee Report
Frequently Asked Questions
Q: I have a question, but I can't find my answer here. How do I get more assistance?
A: If you need immediate assistance, the IT Retail team is available 24/7. Feel free to contact our support team at 877-752-0625. You can also email us at support@marktpos.com, and we will respond within 24 hours.
The IT Retail system makes it easy to add or update your products in the Back End. This article deta
The IT Retail Sales Tax Report shows your store's data on everything tax-related. You can view infor
If your store attaches fees to certain products, like CRV fees for plastic packaging, you can view t








Is this page helpful?
×Help us improve our articles