If you have too much of a product in stock, or you want to promote one, you can create buy-one-get-one (BOGO) deals to catch a customer’s attention. Setting up BOGO coupons is easy in the Back End and they are easy to apply in the Front End, so read on to see how to do it yourself!
Setting Up Buy-One-Get-One Coupons in the Back End
Here is how to set up a BOGO coupon in the Back End:
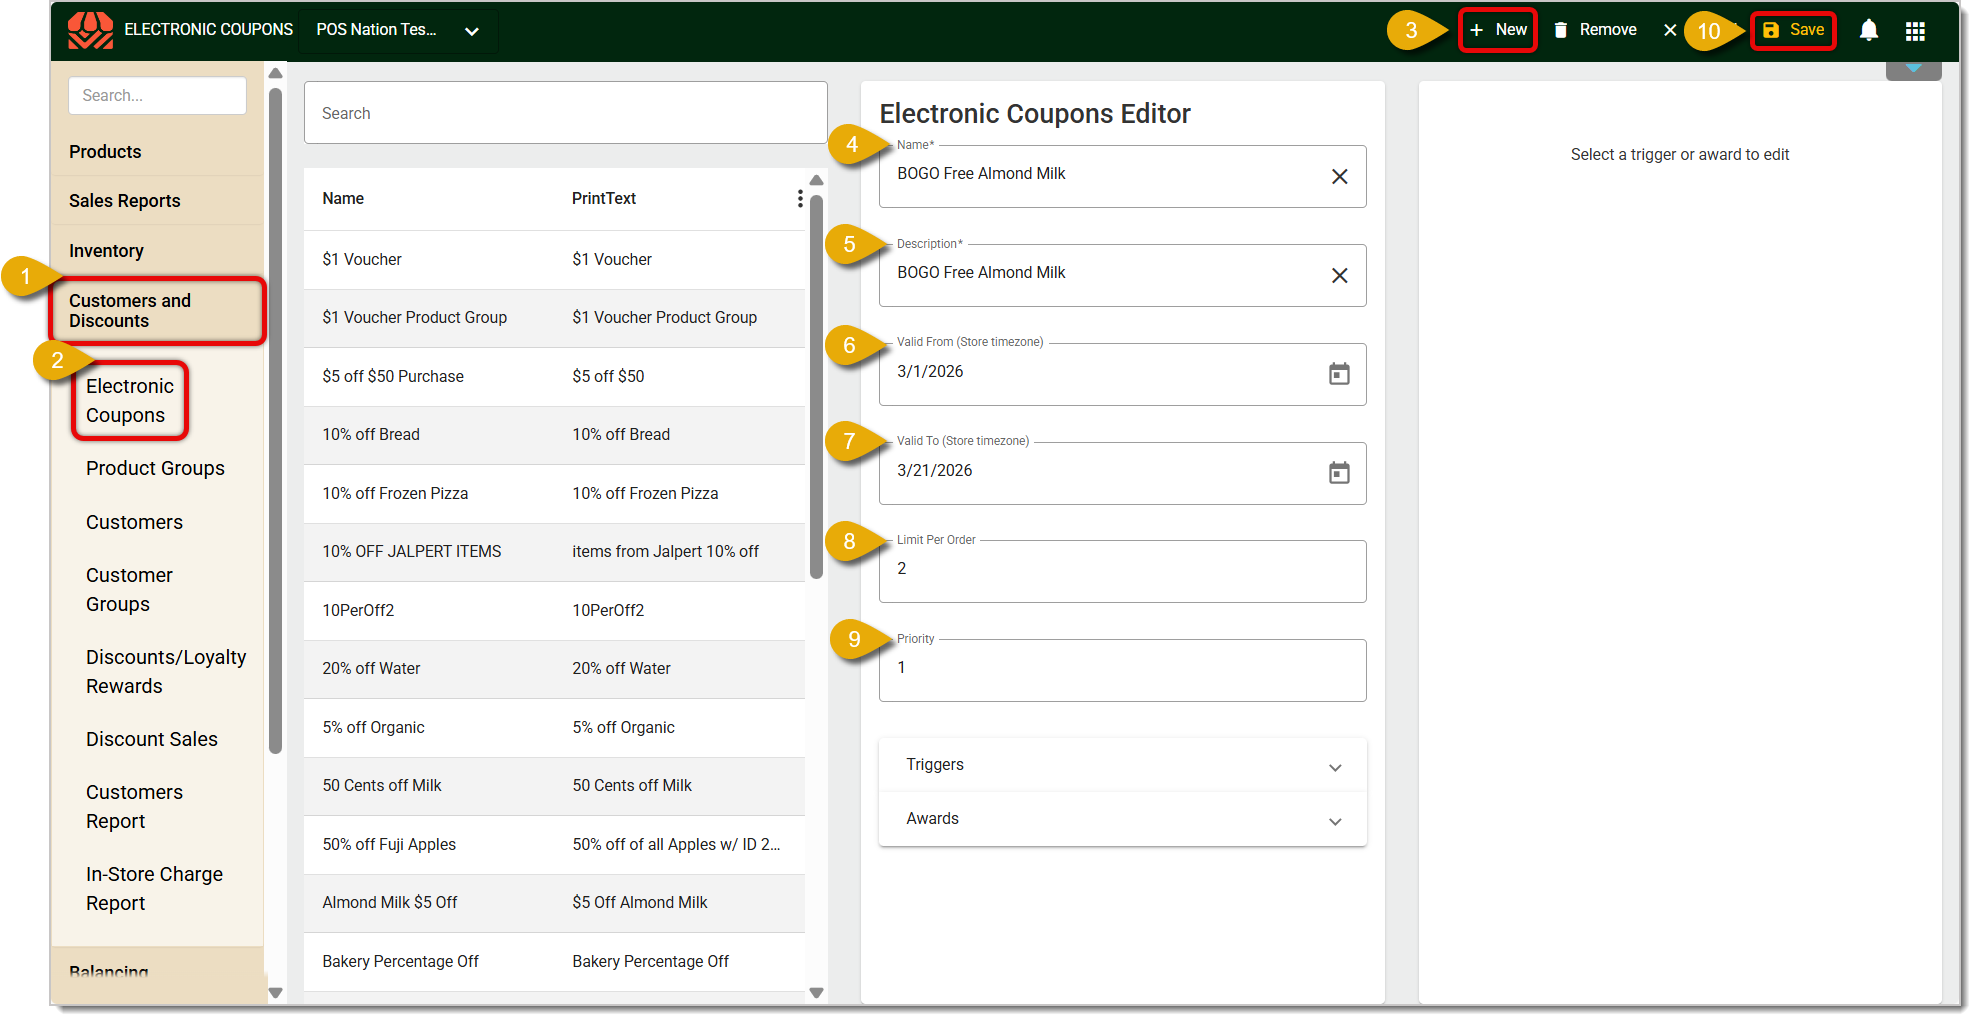
- Customer and Discounts — From the backend, first click on Customers and Discounts in the main menu to open your options.
- Electronic Coupons — Click Electronic Coupons to view and edit all existing coupons, as well as create new ones.
- New — Click on the New button in the upper right corner to make a new coupon.
- Name* — Under the Coupon Editor, fill out the Name of the coupon.
- Description* — Enter the Description of the coupon.
- Valid From — Enter the first date this coupon will be valid.
- Valid To — Enter the last date this coupon will be valid.
- Limit Per Order — Enter the number of times this coupon can be applied per order. While this field is optional, we recommend filling out a limit, since not filling this out would allow a coupon to be used an unlimited number of times until a trigger or award is met.
- Save — Whenever you make a new Coupon or edit an existing one, be sure to Save it.
- Triggers — After you’ve set up the main details of your coupon, click on Triggers, which is directly below the Coupon Editor fields.
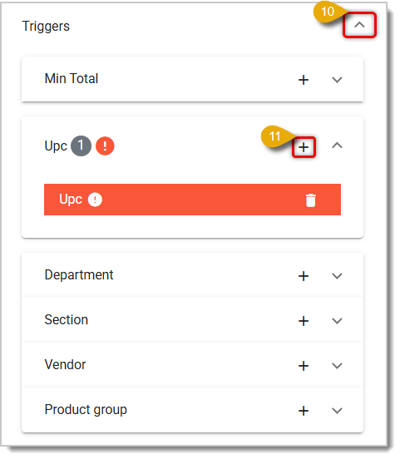
- Add Trigger — Click on the Plus sign next to UPC. You’ll see a new panel prompting you to enter the UPC trigger information directly to the right.
- Select Product* — Enter the Product UPC number or the name to find the corresponding product.
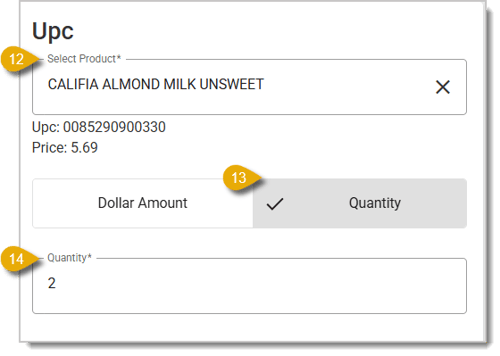
- Quantity — Click on the Quantity button to change the trigger condition.
- Quantity Field* — Enter 2, since a customer will have to buy 2 of this item to trigger the BOGO coupon.
- Awards — Scroll down to Awards, which is directly below Triggers.
- Open Awards — Click on Awards to expand the menu.
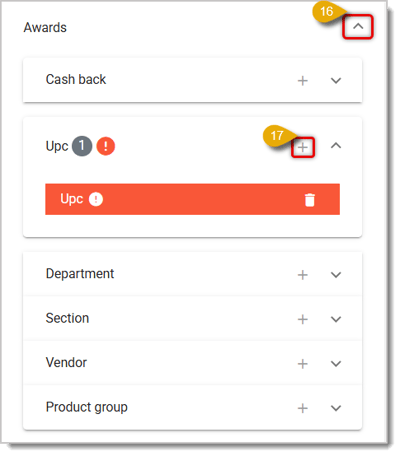
- Create an Award — Click on the Plus sign next to UPC to add an award. You’ll see a new panel to the right where you can enter the Award details.
- Select Product* — Enter the Product’s UPC number or its description to find the existing product for this coupon.
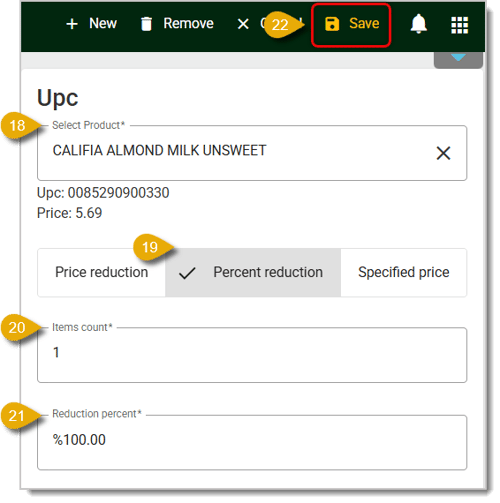
- Percent Reduction — Click on this to select this type of award.
- Items Count* — Enter the number of this item that will be discounted. In this case, this is a BOGO coupon, so we’ll go with 1.
- Reduction Percent* — In percentage points, enter how much of a discount this award will give. In the case of BOGO Free coupons, enter 100.00% to mark the other item as free. However, you can enter any percentage.
- Save — Once you’ve entered all of the coupon’s details and settings, click on Save in the upper right corner to save it.
* Required Field
Your changes will not sync to the Front End immediately, so if you need the new coupon right away, in the Front End in Manager Functions, click or tap the Synchronize button to update the change. Once your coupon has synced, it will automatically apply to a transactions that meet the triggers.
Applying Buy-One-Get-One Coupons in the Front End
Now that you’ve made your coupon, here’s how to apply it at the Register.
-
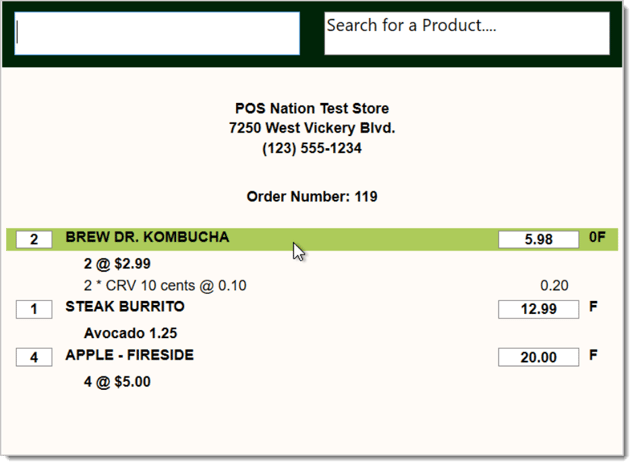
Click or tap to select the item to which you want to apply the coupon in the transaction. The selected item will be highlighted, as in the image below.
-
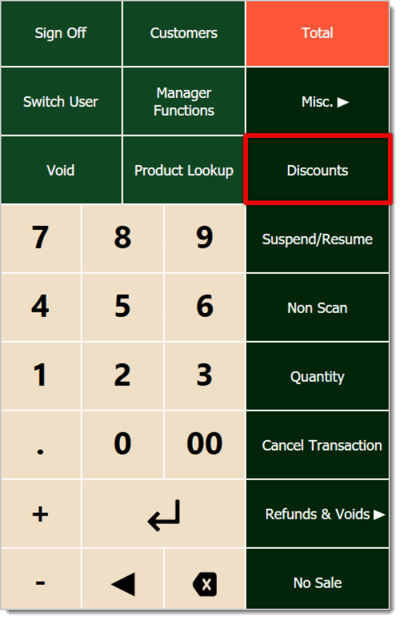
Click or tap on Discounts on the far right.
- A window will open showing your store’s coupons. Click or tap on the coupon you want. You can use the Next or Previous buttons to navigate through your coupon pages.
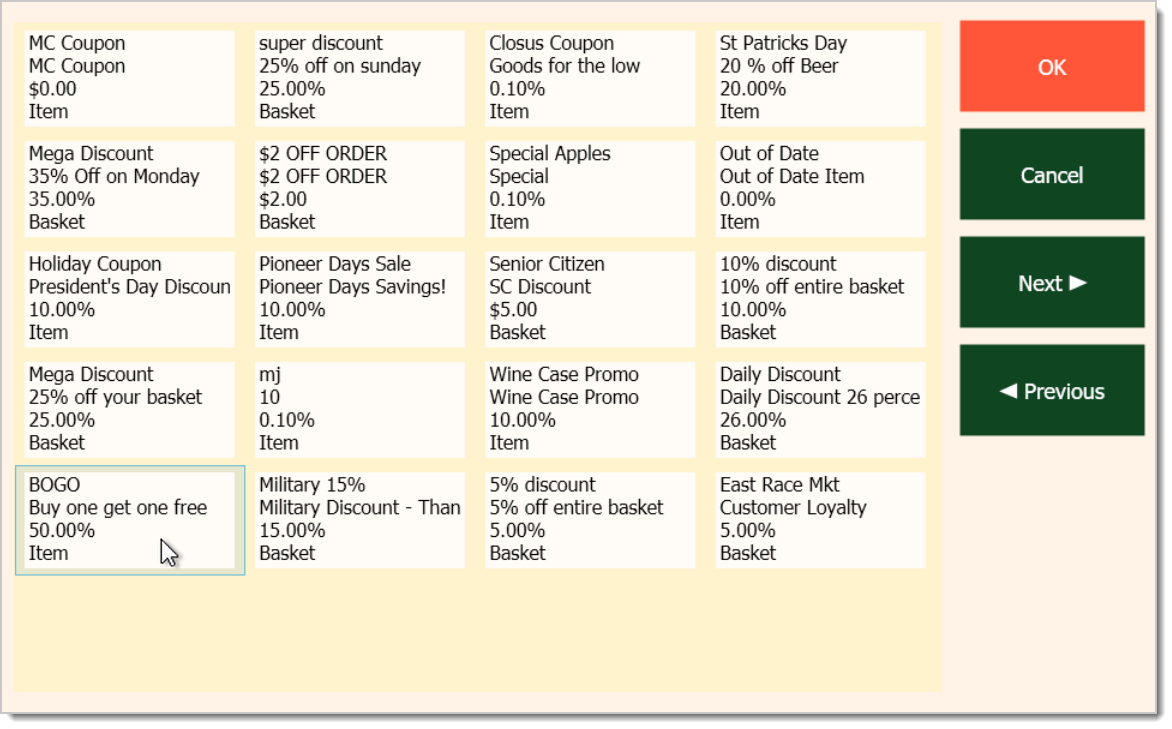
- Once you've selected the coupon, click or tap on OK in the upper right.
- The coupon will be applied to the selected item or to the transaction (for basket coupons). You’ll see the discount reflected underneath the line item in the transaction, as shown below.
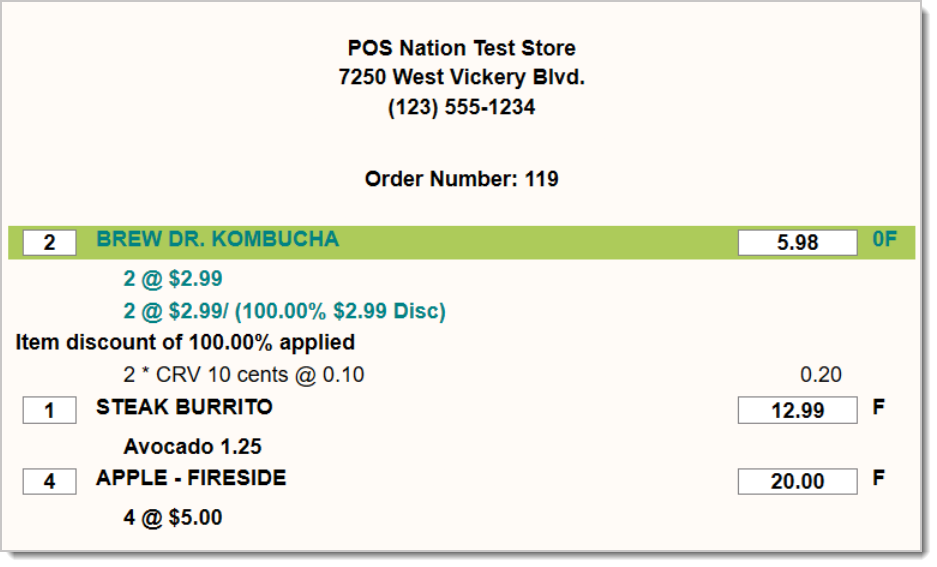
Applied coupon discounts will also appear on receipts for completed transactions.
Related Articles
Giving Customer Reward Coupons in the Front End
How to Apply a Coupon in the Front End
Customer Membership Expirations in the Front End
Special Product Pricing
Frequently Asked Questions
Q: How do I make a coupon that just always applies to an item's pricing?
A: For product pricing that doesn't require a coupon to be applied in the Register you will use Special Product Pricing. You can set a product's Special Pricing in the Products menu on the Product Maintenance page's Special Pricing tab. Click on the Special Product Pricing article link above for full details.
Q: I have a question, but I can't find my answer here. How do I get more assistance?
A: If you need immediate assistance, the IT Retail team is available 24/7. Feel free to contact our support team at 877-752-0625. You can also email us at support@marktpos.com, and we will respond within 24 hours.








 December 05, 2025
Is this page helpful?
×Help us improve our articles