Adding products to a customer’s transaction is straightforward. Below is a step-by-step guide on how you can easily add items to any transaction.
Here is what you'll learn to do:
Add Products
Method One: Scan Items
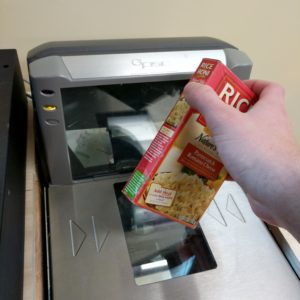
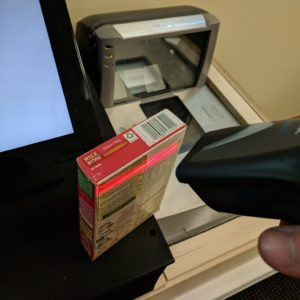
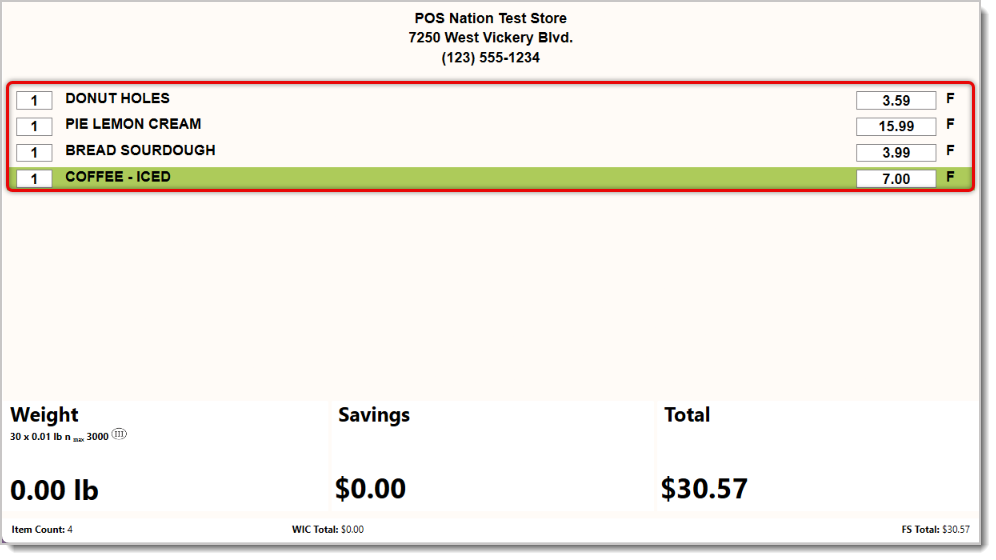
For items with barcodes, simply scan them with your handheld or integrated scanner. Scanned items will appear in the POS system as line items in a list. This means each scanned product becomes its own list item, even if you're scanning multiples of the same product. This is useful if you're using a BOGO coupon. To learn how to use quantities, read the Add Quantities section below in this article.
Method Two: Search Product
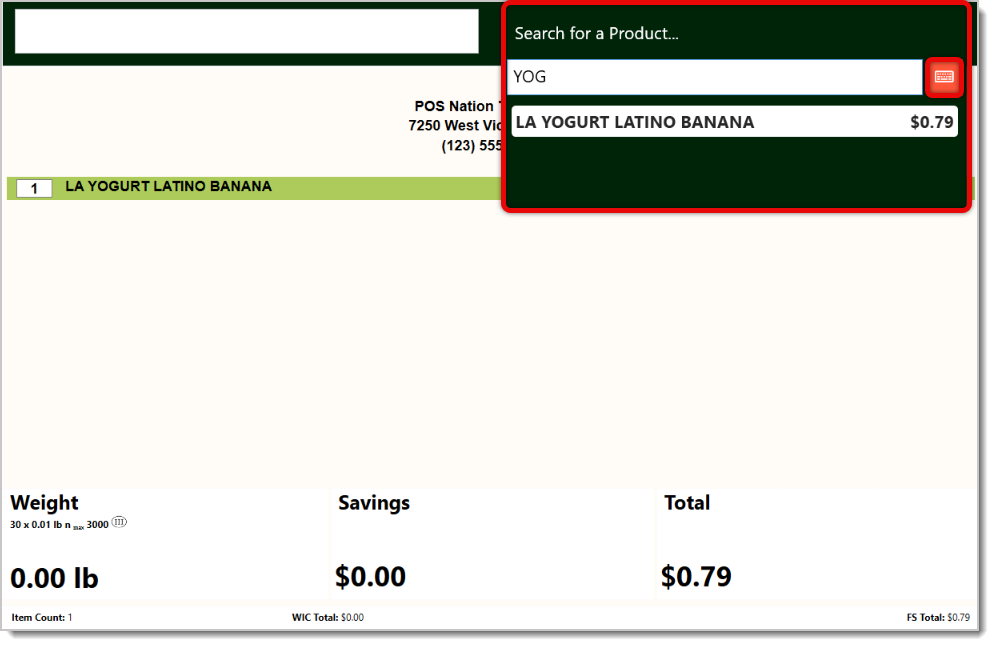
Another way you can add items is to use the Search Bar from the main POS screen. This is located on the top. Enter the name of the product you’re looking for, and click or tap on the appropriate item to add it.
This function is only usable for items that do not have a UPC code. To instead search for products using general keywords, go to Manager Functions > Product Search in the Front End.
For registers using a touch screen, click or tap on the red Keyboard button to the right of the search to open the on-screen keyboard.
Method Three: Product Lookup
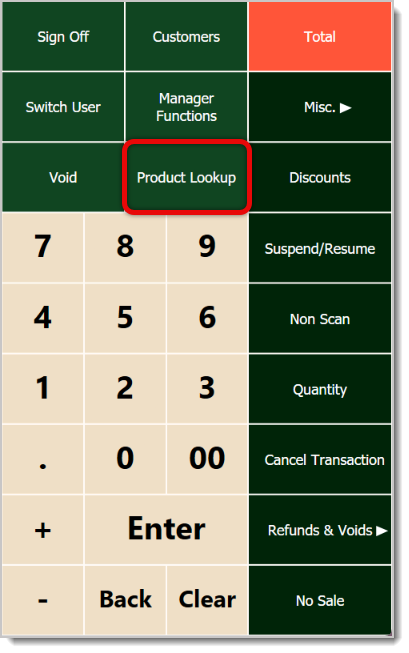
You can also search for items that are registered in the Product Lookup Designer. On the right side of the screen, click or tap on Product Lookup.
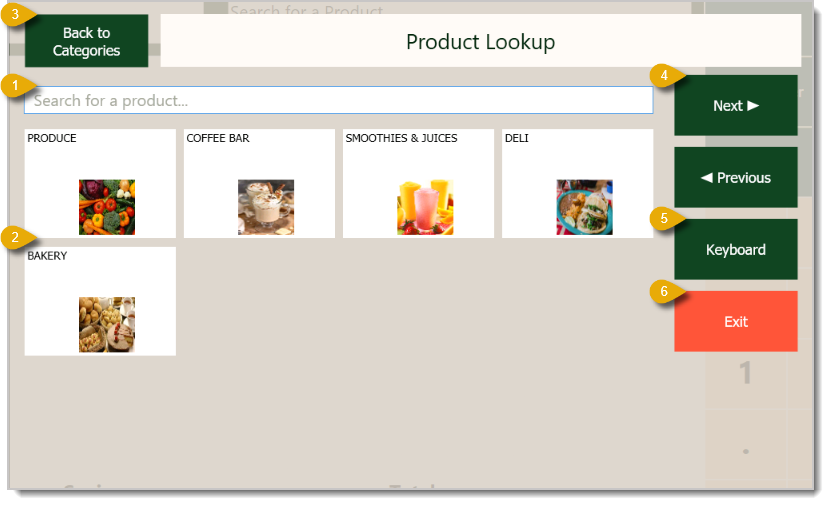
This will load a window where you can find individual products by searching or browsing for them. Here’s what each function on this page does:
Please Note: This area displays items you have set up using the Product Lookup Designer in the Back End. It will only display items you have set up in this way. Please see the article linked below titled Product Lookup Designer for more details.
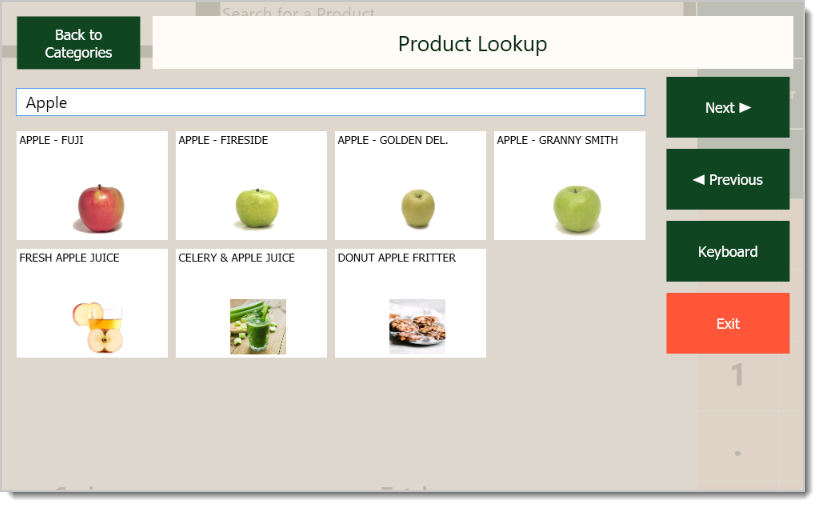
1. Search — Look for a specific product you’re looking for by entering key terms in the search bar, and matching results will load. From these results, simply click or tap on the product you were looking for to add it to the transaction.
2. Categories — If your store categorizes items, you can click on one of the categories to search for the product you need.
3. Back to Categories — Click or tap on this button to go back to the Categories window.
4. Next / Previous — If your store has more products or categories that don’t fit on one page, you can browse through pages using the Next / Previous buttons.
5. Keyboard — Click or tap on this button to open the on-screen keyboard so you can type. This is mostly useful if your register device is only on a touch screen and lacks a physical keyboard.
6. Exit — Click or tap on Exit to go back to the main POS system screen.
Add Quantities
There are two ways you can add or change the quantities of products in the transaction. One method happens before you add a product to the transaction, while the other happens after you do so.
Method One: Enter the Quantity Before Adding an Item
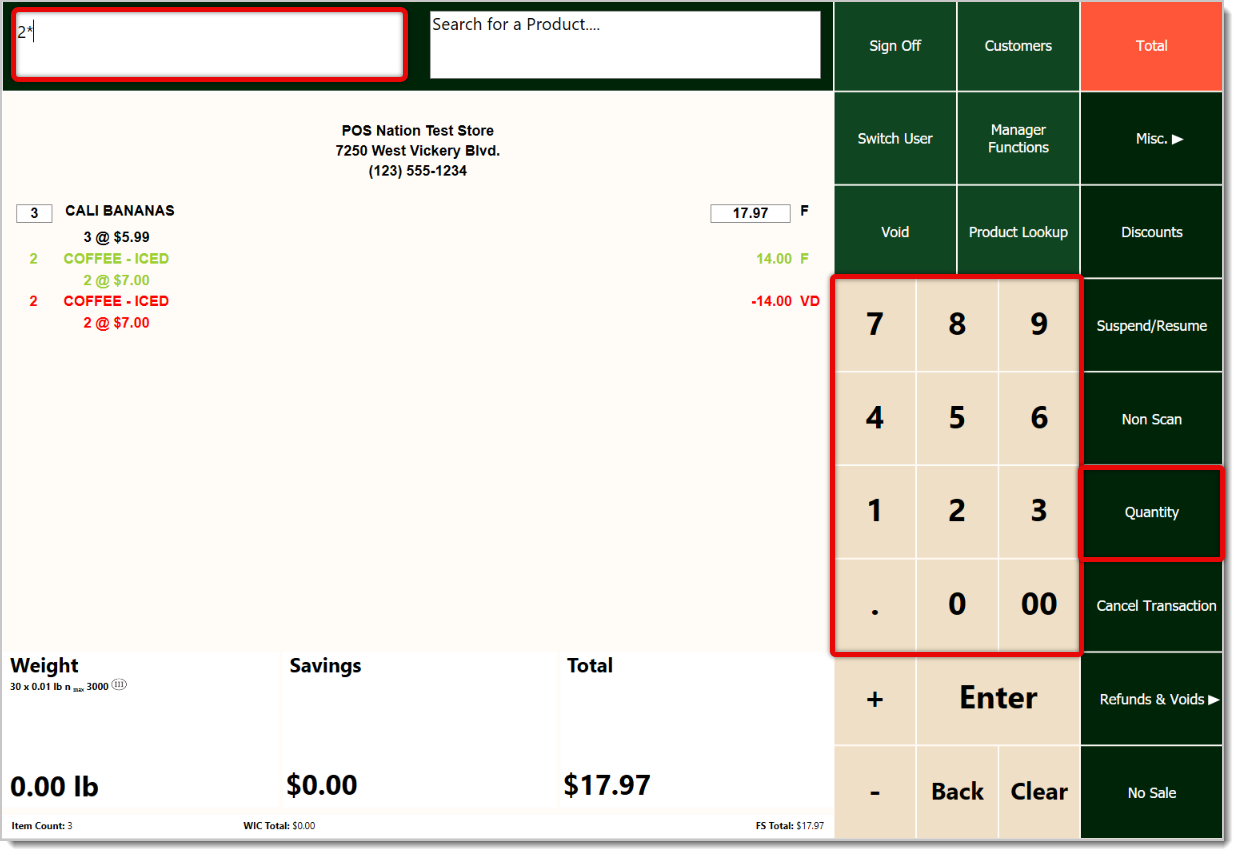
For this method, you’ll use the keypad to the right of the Register area. First enter the quantity into the main product scan field using the keypad, then click or tap on the Quantity button highlighted below. You’ll see the quantity and an asterisk (*) in the scan field so you can verify you’ve entered the right amount.
Next, add the appropriate item using one of the methods detailed above, and this will add the item with your quantity.
Method Two: Change Quantity of an Item
Another way is to just change the quantity within the product list of the transaction.
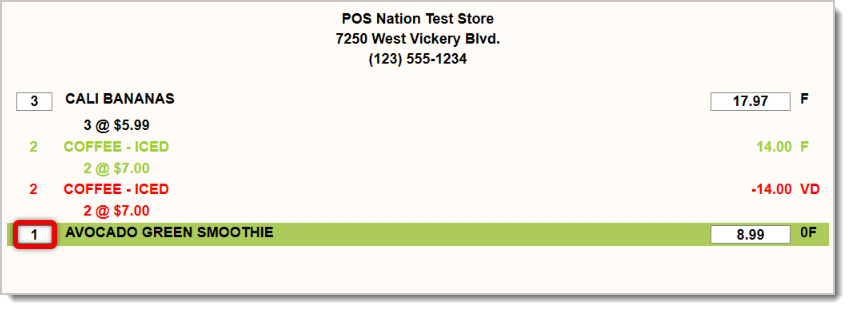
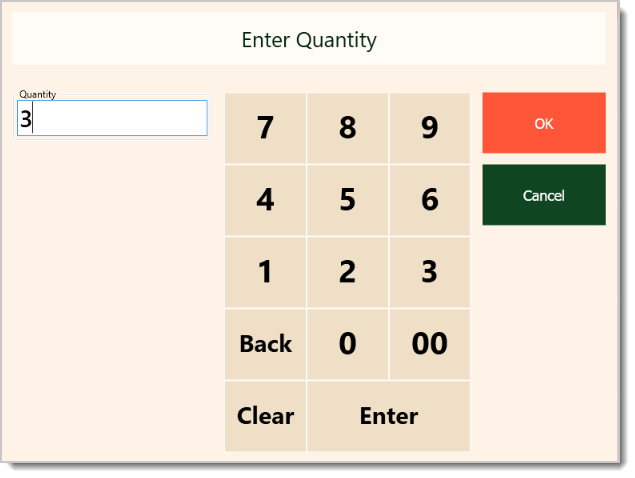
After you’ve already added an item, you’ll see the quantity on the left of the item name. Click or tap on the number, and an Enter Quantity window will pop up, allowing you to enter a different quantity. Use the keypad to enter the number, then click or tap on either the OK button or the Enter button to update it.
If you don’t need to change the quantity after all, simply click or tap on the Cancel button.
Change Prices
There are multiple reasons why you might want to change the price of a product, whether it’s because of cashier error, customer change of heart, or some other reason. When you add an item to a transaction, you’ll see the prices listed to the right of each product, as pictured below.
Please Note: For cashiers to do this, you have to enable permission in the Back End. Do so by navigating to Employees > Roles > Cashier > Transactions tab > Price Override.
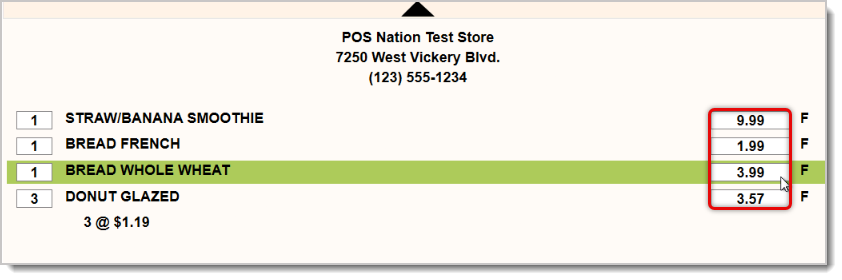
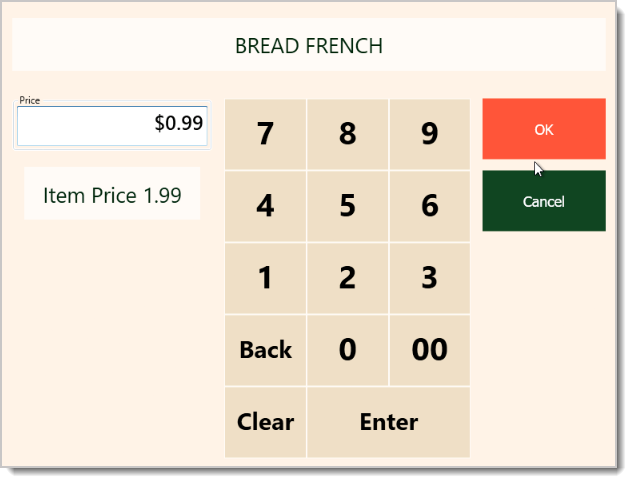
Click or tap on an item’s price to open a new window where you can enter the price you need. Once you’ve entered the price, click or tap on either the OK button or the Enter button to update it. Otherwise, click or tap on Cancel.
Void Products
If a customer changes their mind about something or if a cashier accidentally scans the wrong item, you can easily void it in the POS system. Here’s how to void an item:
-
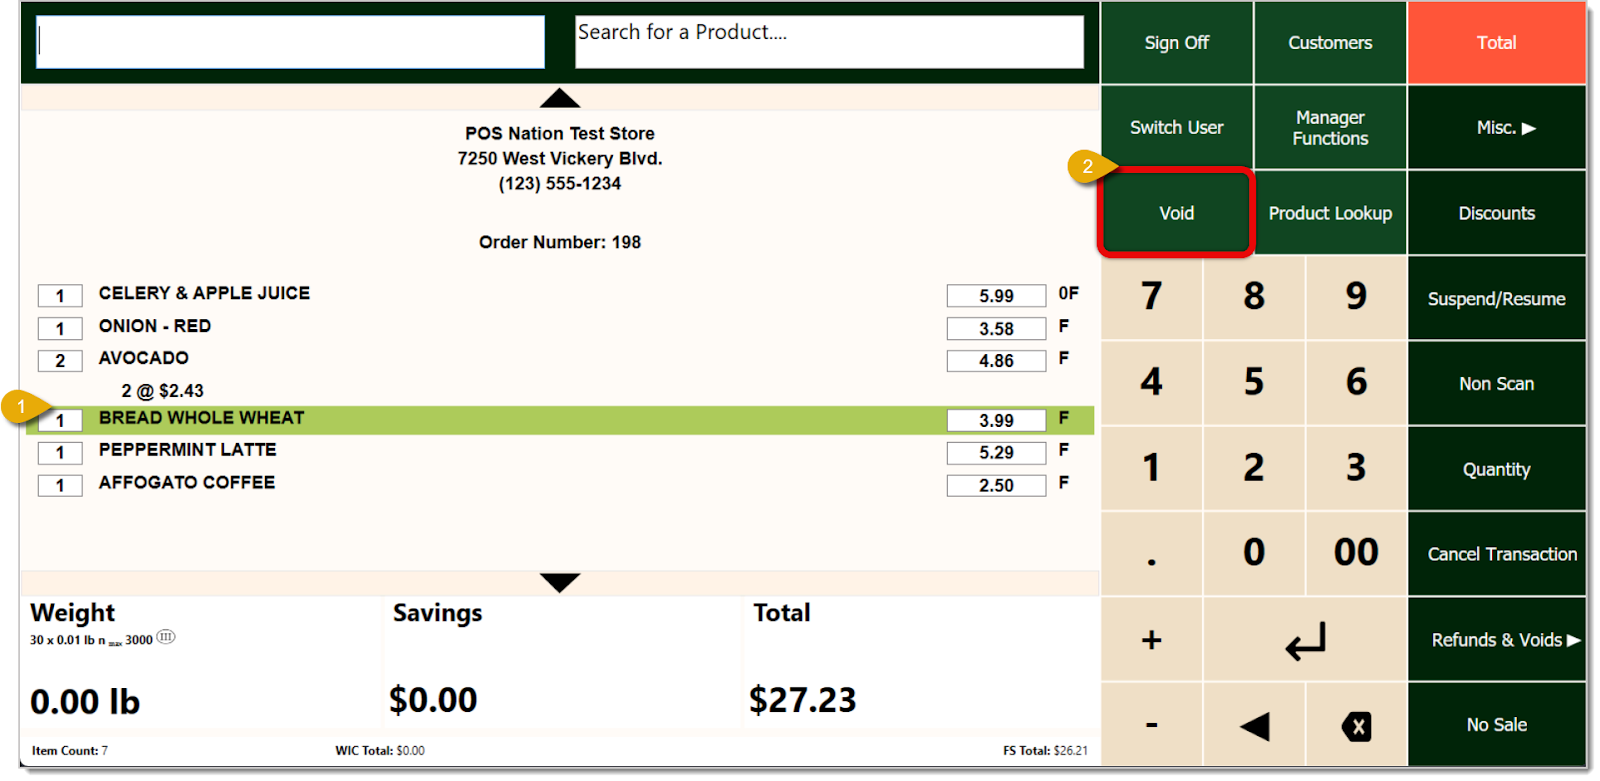
Click or tap on the item you want to void. You’ll know it’s selected if the item is highlighted, as in the image below.
-
Click or tap on Void.
-
The item will display at the bottom in red with the letters VD to show it as voided, and the price will be negative. The original line item will remain but not be active; it will only display in green for reference. 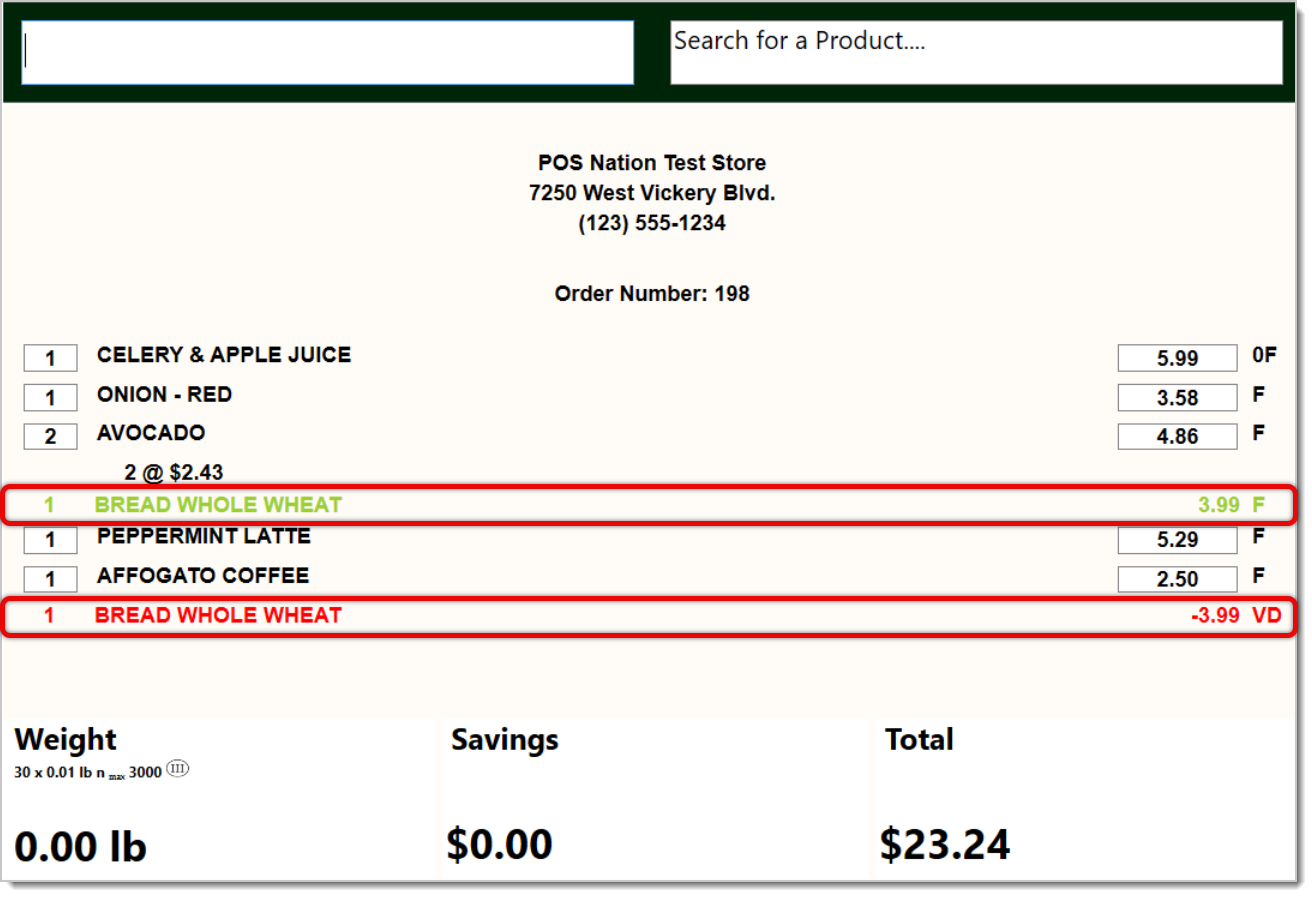
Edit Products
You sometimes might want to edit products from the POS system because details such as prices or item descriptions have changed. An administrator can grant permission for this action to certain roles by logging into the Back End and going to Employees > Roles > Admin > Add Product (despite the name being Add Product, this permission also allows employees in that role to edit a product).
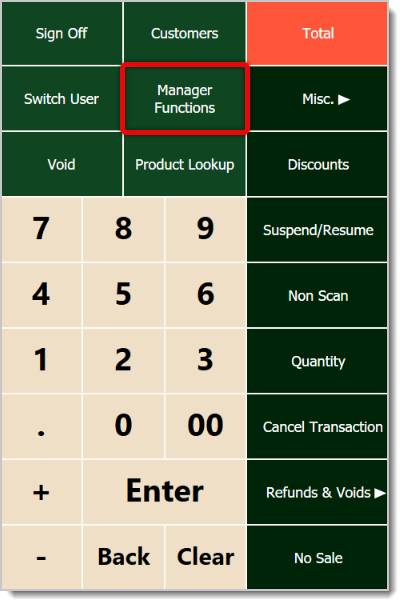
To start, click or tap on Manager Functions in the right-side panel.
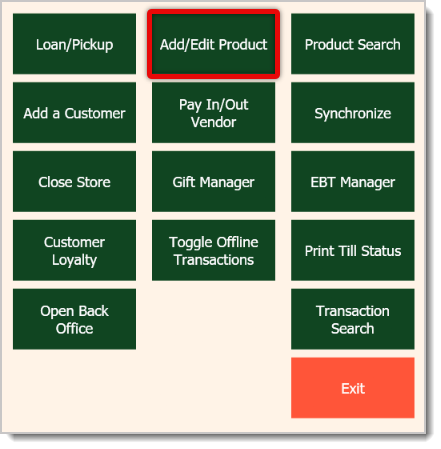
After the Manager Functions window opens, click or tap on Add / Edit Product.
Details about the product will load, as pictured below.
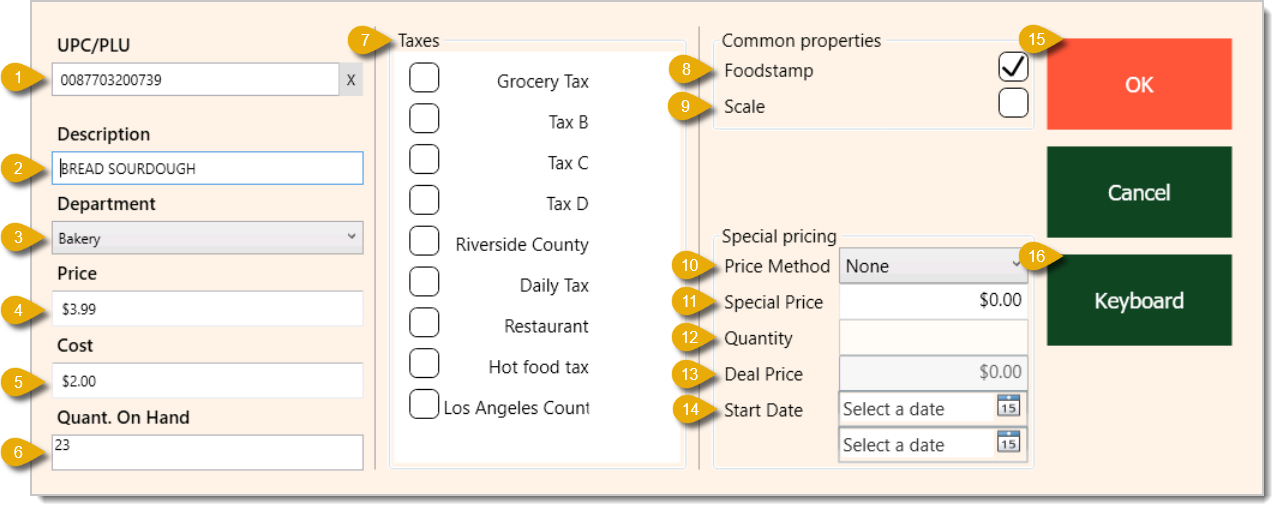
- UPC / PLU — Enter or edit the UPC / PLU Number of the product.
- Description — Here is where you can edit the Description of the product, which is what will display in the transaction when it’s added.
- Department — Select the Department for this product from the drop-list.
- Price — This is where you can modify the price of the product.
- Cost — Edit how much per unit this item costs your store.
- Quantity On Hand — Edit how much of this item you have in stock.
- Taxes — Check each box for taxes you want applied to this item.
- Foodstamp — Check this box to make the item eligible to be paid for with EBT / SNAP / Food Stamps.
- Scale — Check this box if the item will be priced and sold by weight.
- Price Method — Everything under the Special Pricing section of this window is meant to configure special pricing. Here, select from the drop-list the type of Special Pricing Method this item will have, if any. These are your options:
- Unit Pricing — This is the default pricing method and is meant to place a single item on sale, usually for a set period of time. For example, the normal price of an item could be $6. With special pricing, you can instead set it to be $5.50 starting from December 1, 2026 until December 31, 2026, after which the price will go back to normal. When the product gets scanned, the POS will show the price as $5.50 and tell the customer they saved .50 cents.
- Split-Package — With Split Package pricing, product units are bundled together for a discounted price. For example, a deal where a customer buys 3 items for $1 total would be split-package pricing. When the customer chooses to buy 3, the pricing per unit will be divided into $0.33, $0.33, and $0.34, which will equal to $1 when added up.
- Group Threshold — With Group Threshold pricing, the customer will pay for a product according to its unit pricing until they reach a specific quantity. Once they reach that threshold, the POS will adjust the price to its Group Price. For example, the normal price of an item could be $1.69. You can set a Buy 2 Get 1 Free deal, meaning there would be a total of 3 items for the price of 2.
- Group-Adjusted — In the case of Group Adjusted pricing, the customer will pay the unit price until they reach a specified quantity, like with Group Threshold pricing. What is different about Group Adjusted Pricing is that then they’ll pay a different price per item once they reach the threshold. If they buy more than the threshold, the POS will continue applying the group price to each subsequent item. For example, let’s say one donut at your store normally costs $1.50. You can set up a deal so buying 5 donuts together will be $5 total. If a customer chooses to just buy 4 donuts, they will have to pay $1.50 for each one.
- Limited Quantity — Limited Quantity Discount pricing is different from other Special Pricing methods in that after reaching the threshold, subsequent items will go back to normal pricing. Like the example above in Group Adjusted pricing, let’s say one donut at your store normally costs $1.50. You can set up a deal so buying 5 donuts together will be $5 total. If a customer chooses to just buy 4 donuts, they will have to pay $1.50 for each one.
- Special Price — Enter the item’s standard price. This will follow whatever Price Method you select in #10. For example, in the case of the Group-Threshold pricing, the special price would be $1.25.
- Quantity — Enter the quantity a customer would have to buy to get special pricing.
- Deal Price — Enter the discounted price the item would have according to the Price Method in #10. For example, in the Group-Adjusted example from #10, the deal price here would be $5.
- Date — Enter the starting and ending dates for the special pricing, which would start at the beginning of the first date and end at the end of the second date. Setting dates is optional, but this special pricing will run continuously if you don't enter anything.
- OK — Click on the OK button once you've finished configuring the product.
- Keyboard — If your registers are on touch screens, you can tap on Keyboard to open an on-screen keyboard. This will let you enter anything in this window.
Add Modifiers to Products
For items that can be customized, like hot ready-made foods or the deli counter, cashiers can add modifiers to them so customers are fully satisfied. Here’s how to add modifiers in the Front End:
Please Note: These steps only cover adding modifiers to products in Front End transactions. To create preconfigured modifiers in the Back End, navigate to Products > Product Modifiers. Read our article on Product Modifiers linked below to learn more.
- In the Front End, a cashier will scan in an item. If it has Modifiers available, a window will pop up so the cashier can add them. If your register doesn't have an attached keyboard, you can click or tap on the Keyboard button, located on the far right of the window, to open an on-screen keyboard.
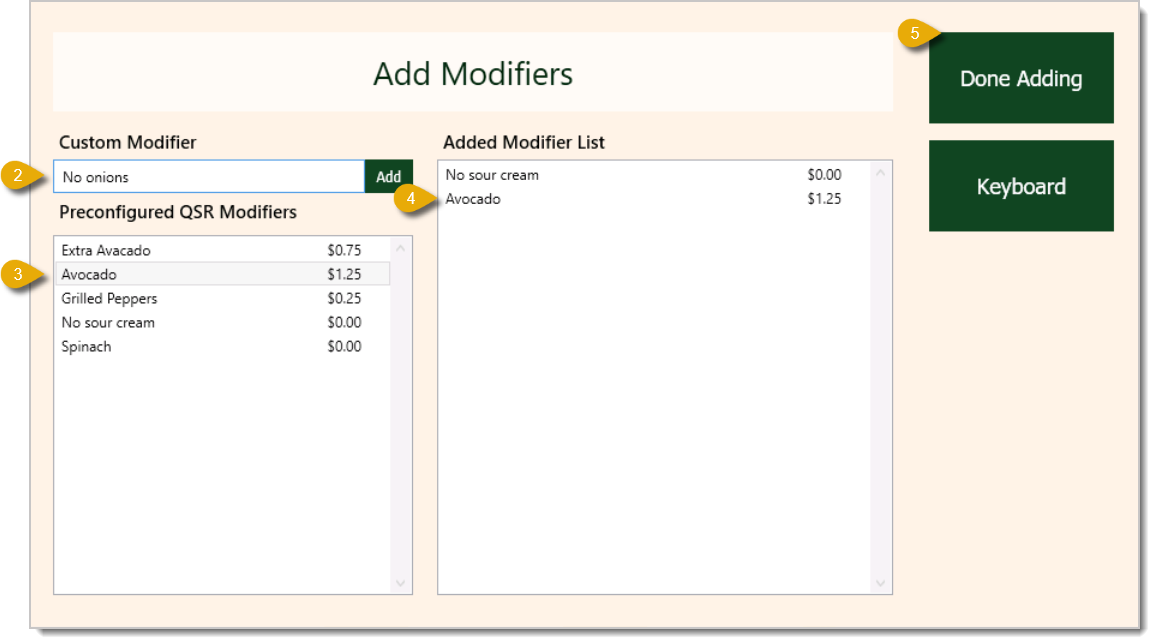
- If a customer requests something that isn't already preconfigured, you can add a Custom Modifier. This is directly above the list of preconfigured modifiers for the product. Enter the modifier, such as No onions, and click on the Add button that's to the right of the field. Keep in mind that modifiers added this way will not charge extra.
- Under Preconfigured QSR Modifiers, select what the customer would like from the available options.
- Added modifiers will display on the right in the Added Modifier List. To remove a modifier, click on it in the Added Modifier List.
- Click or tap on Done Adding once you've finished adding all requested modifiers.
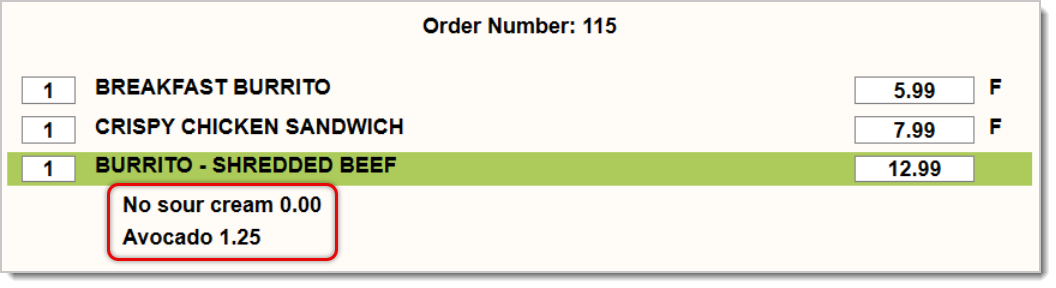
- In the transaction, you'll see the modifiers listed directly below the item, as well as their prices.
Related Articles
Cashier Training
POS Front End Tour
Entering a Non-Scan Item
Canceling a Transaction
How to Void Items
How to Apply a Discount in the POS
Product Modifiers
Frequently Asked Questions
Q: What do I do if I scan a barcode and nothing comes up?
A: When that happens, you have found an item that has not yet been saved in the system; a non-scan item. Follow the instructions in the article linked above titled Entering a Non-Scan Item.
Q: I have a question, but I can't find my answer here. How do I get more assistance?
A: If you need immediate assistance, the IT Retail team is available 24/7. Feel free to contact our support team at 877-752-0625. You can also email us at support@marktpos.com, and we will respond within 24 hours.








 November 20, 2025
Is this page helpful?
×Help us improve our articles