Vendor Price Import Products

January 06, 2026
Please Note: This tool and the Vendor Price Import tool currently integrate only with the vendor Associated Grocers of New England (AGNE). They will only be of use to you if you order from that vendor, which serves the northeastern region of the U.S. We plan to add more vendors in the future.
If you have configured the Vendor Price Import tool, this area will hold product price updates for you that come through the integration. This article will show you how to work with the updated price data. Take a look at what you can do!
Vendor Price Import Setup
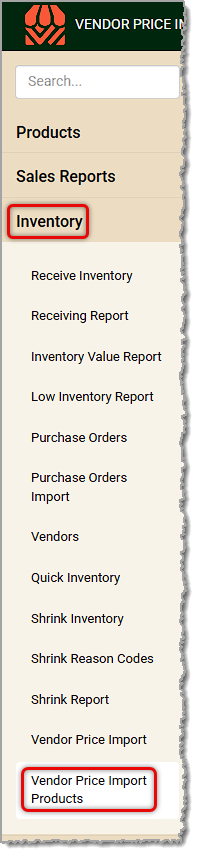
From the Back End open the Inventory menu and click on Vendor Price Import Products.
If you haven't yet worked with the support team to set up the integration, you will need to do so before you can use this area. Please call support at the number listed at the bottom of this article for assistance. For reference on the setup of the Vendor Price Import tool, please click on the link for that article below.
Working With Vendor Price Import Product Updates
When the integration receives updated price data from the vendor, the updated pricing and other product data will appear in the Vendor Price Import Products page as product staging data, meaning it is waiting to be deployed. You'll see the number of products with updates waiting to be integrated at the top. Here is how to work with this area:
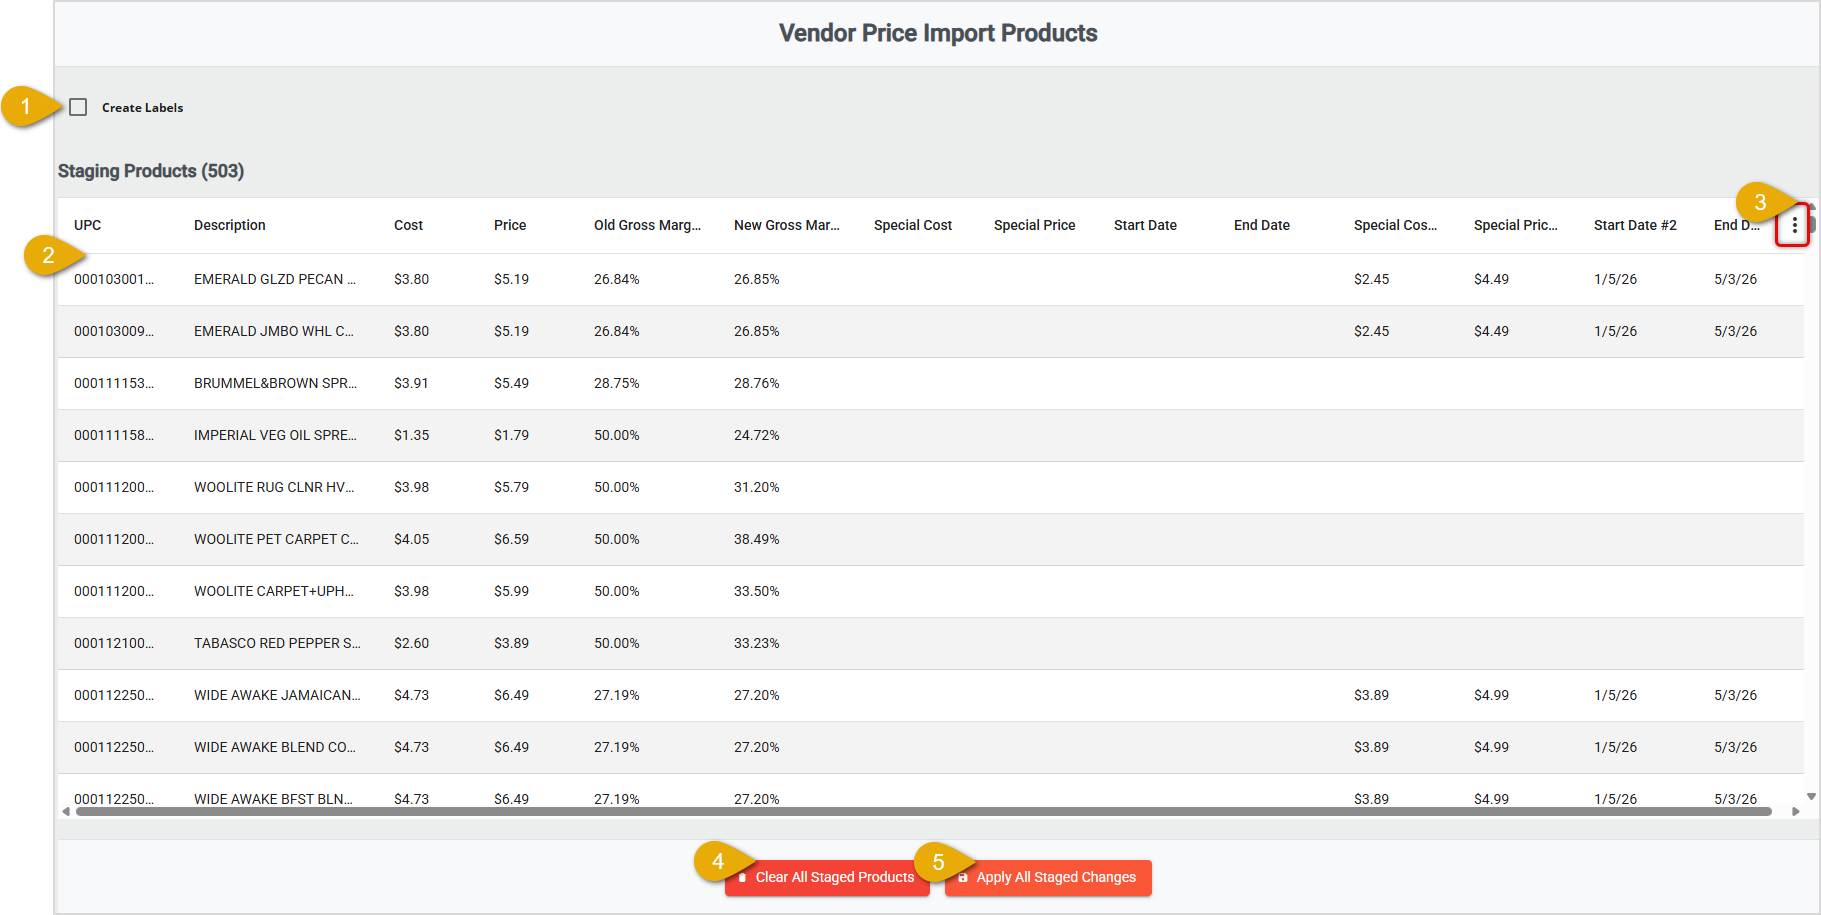
- Create Labels — Since all updates involve changes to prices for items, you may want to check this box to print updated labels for your products.
- Staging Products — Data for the products with updated information is listed in this table and can display the UPC, Description, Cost, Price, Old Gross Margin, New Gross Margin, Special Costs, Special Prices, and Start and End Dates for special pricing, if any.
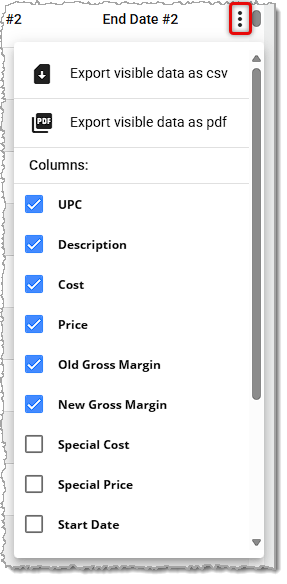
- Action Menu — Click the three-dot stack button to export a CSV or PDF file of the data, or to show or hide different columns, as needed.
- Clear All Staged Products — If you don't need to work with updated prices from the integration, you can clear all staged product data with this button.
- Apply All Staged Changes — Click this button if the proposed changes work for you and the system will apply all data changes to all staged products, will give you a success confirmation, and will then load a Review page showing you the results, as pictured below. You'll see the Old Price, New Price, Old Cost, and New Cost for each product in the update, and you can use the Action Menu on the right if you want to download the data.
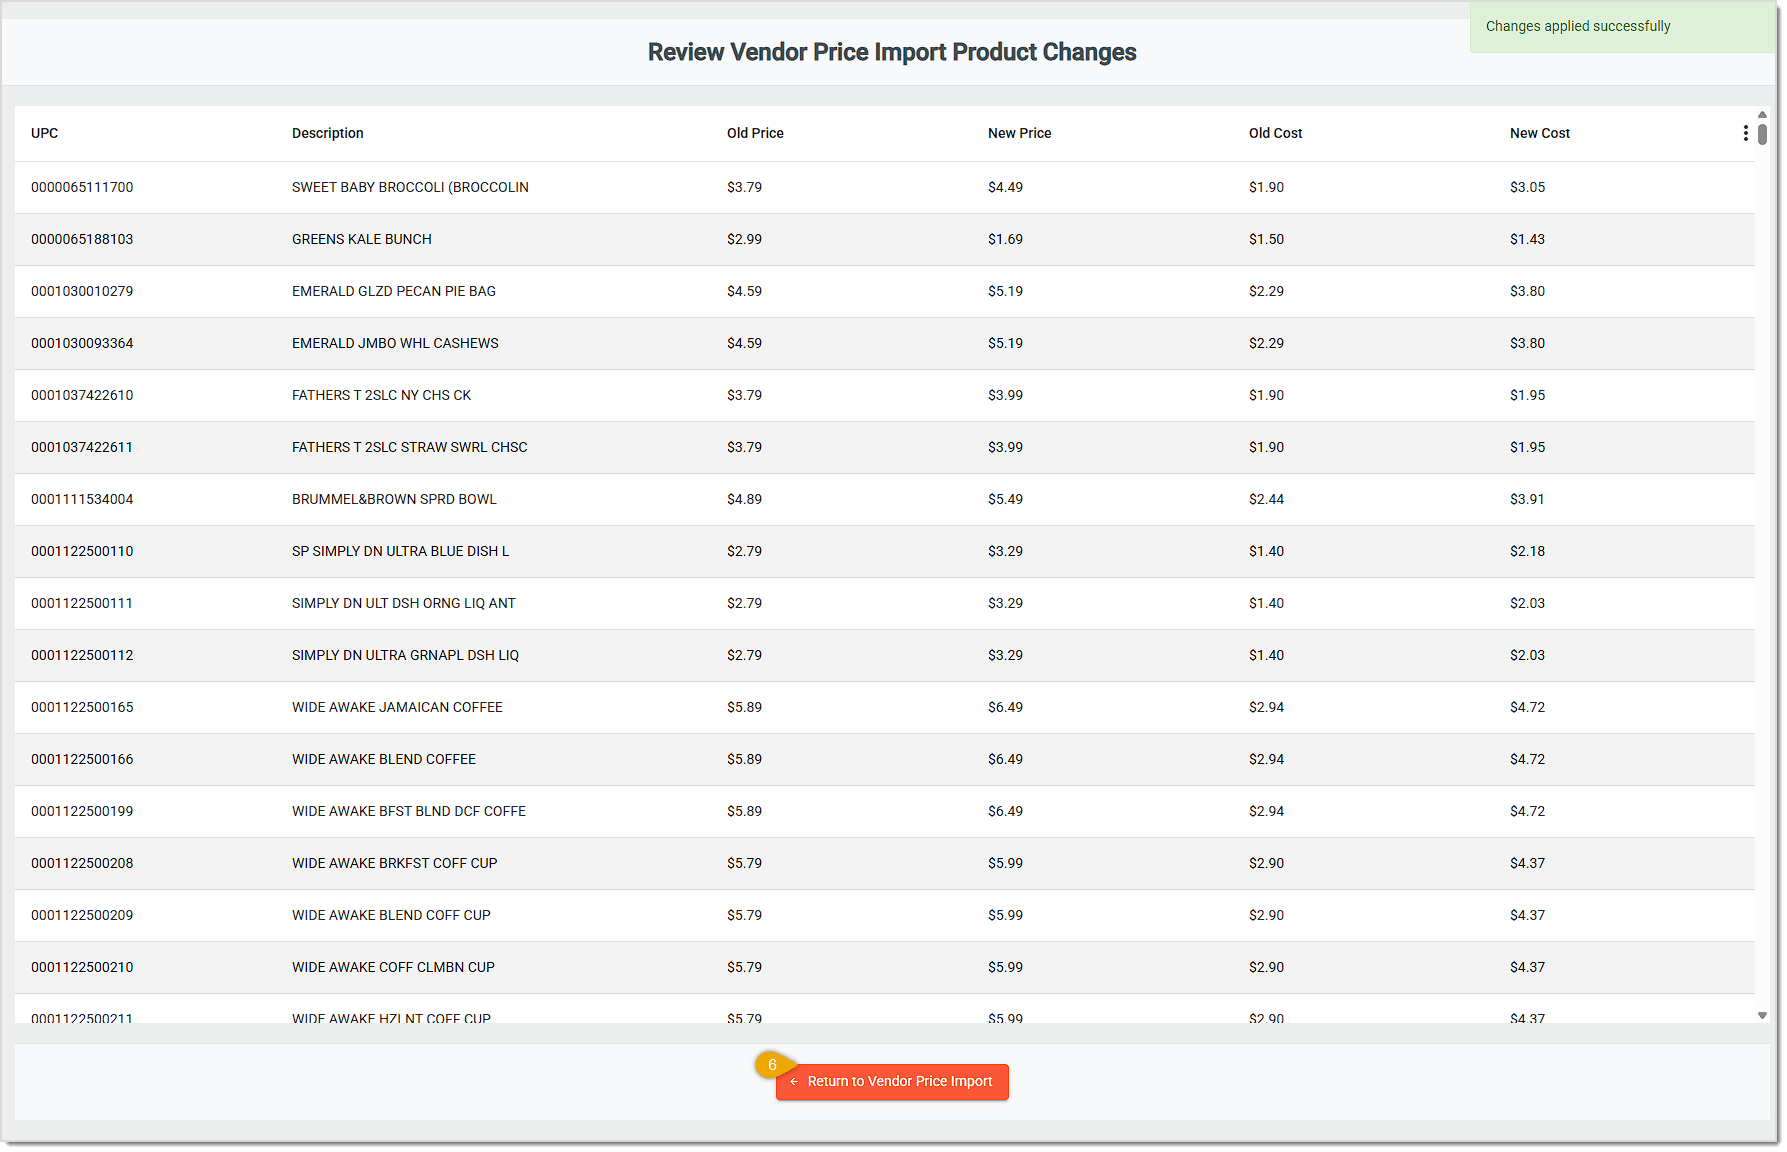
- Return to Vendor Price Import — Click this button when you're ready to return to the Vendor Price Import Products page. That page will no longer have staged products since you will have just updated them. The next time an update comes through the integration, products will appear in staging again.
Related Articles
Product Maintenance
Vendor Price Import
Frequently Asked Questions
Q: I have a question, but I can't find my answer here. How do I get more assistance?
A: If you need immediate assistance, the IT Retail team is available 24/7. Feel free to contact our support team at 877-752-0625. You can also email us at support@marktpos.com, and we will respond within 24 hours.
The Receive Inventory page allows you to easily receive product deliveries and to update quantities.
The IT Retail system makes it easy to add or update your products in the Back End. This article deta
The Inventory Value Report will show you the Quantity On Hand and dollar value of your products. Kee








Is this page helpful?
×Help us improve our articles