







Cashier Training
Welcome to IT Retail, we’re so glad you’ve chosen our POS for your store! This article will guide yo
 December 16, 2025
The possibilities for coupons are endless in the IT Retail system. When you create a coupon, you'll set a Trigger (what or how many the customer is required to purchase) and an Award (what benefit the customer gets after reaching the Trigger). For example, for a Buy 2 Get 1 Free coupon, the Trigger would be purchasing 2 of the same item, and the Award would be a free third item. These are called Electronic Coupons because they work entirely within the IT Retail Front End. They do not require the customer to have a physical, printed coupon.
Before you create a coupon, go to Administration > POS Manager > Security > Initial Setup, then make sure that Enable Electronic Coupons is set to Yes.

Read these articles to find out how to set up different types of coupons.
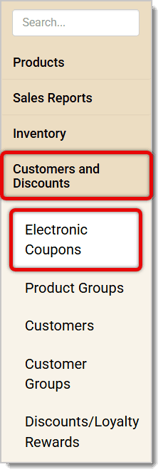
To make any of these coupons, first go to Customers and Discounts > Electronic Coupons.
For every coupon you create, you'll configure the basic details directly in the Electronic Coupons Editor, as described below.
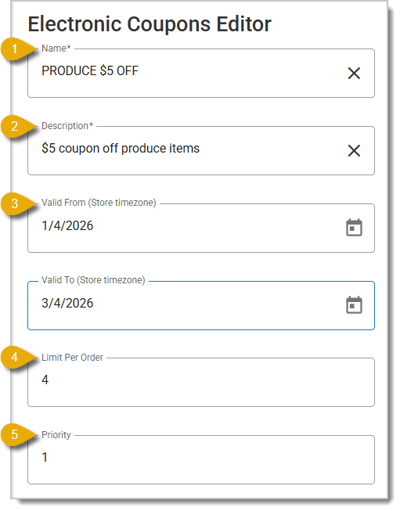
*Required Field
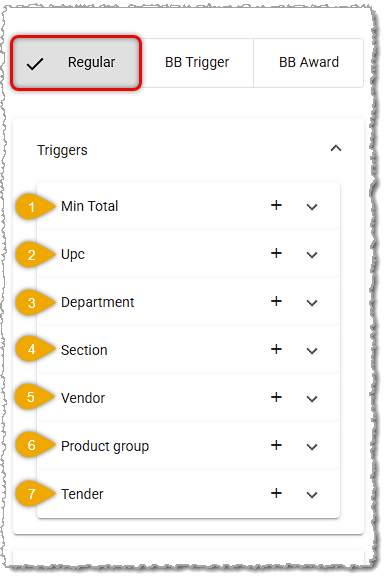
There are two major types of Electronic Coupons: Regular coupons you use the normal way in the system, which trigger and are applied whenever the necessary conditions are met. Bounce Back coupons work differently, their setup is described below, and will either print on receipts or you can send them through SMS to encourage customers to come back soon. Read on to learn about each Trigger for your Regular Electronic Coupons.
Awards give customers a certain benefit when their transaction meets a Trigger. Here’s what each Award does:
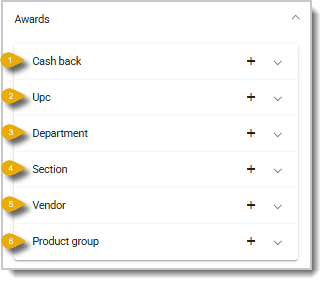
Cash Back — The Cash Back Award sets the coupon’s award as money “given back” to the customer by reducing the price. For example, setting up a “$10 off $40 Purchase” coupon would first require you to create a Cash Back Award and set it at $10.
UPC — Use the UPC Award if you want to reduce the price of an item as the coupon’s award. For example, let’s say you’re creating a coupon that gives customers half off for a plain muffin if they buy a cup of coffee. You’d create a Trigger with the coffee’s UPC; then you’d open a new UPC Award, enter the muffin’s product code, and set up the price reduction.
Department — The Department Award lets you set a coupon that awards customers a lower price for all items in a Department. Instead of just offering a discounted plain muffin like the example above, you can extend the award to all baked goods at your store. Just open a new Department Award, select a Department, and set up the price reduction.
Section — The Section Trigger is similar to the Department one, but instead applies to Sections of Departments. You can specify as many Sections as needed.
Vendor — You can award discounts for products from one or more Vendors with this Award. For example, a Vendor Award coupon could give the customer a free can of soda from a certain vendor as long as they meet the Trigger.
Product Group — If you have created Product Groups, you can specify one or more in the Product Group Award for coupons. This works similarly to the Department, Section, and Vendor Awards.
Bounce Back Coupons work differently than standard ones: The Triggers and final Awards are the same, but this type of coupon involves a two-step process: You'll create two coupons, one to Trigger a coupon code, and the other that will use the code as the trigger to get the Award at checkout in the Front End. The goal with these coupons is to give your customers incentive to come back soon after a purchase.
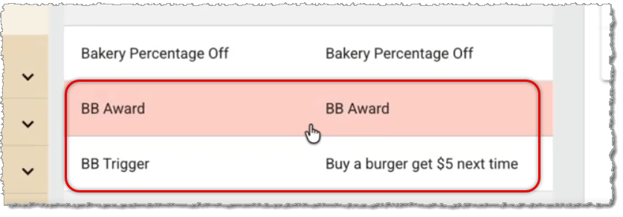
First, the customer will trigger the Trigger Coupon using identical triggers to those described above, but instead of applying an award right away, the initial step's award is a Bounce Back Code. This code will either be sent to the customer via SMS, will Print on the receipt of the transaction that resulted in the Bounce Back Code, or you can click the Send SMS button pictured below to manually send the code to a customer whenever you want (they won't need a triggering transaction, you're just giving them the code).
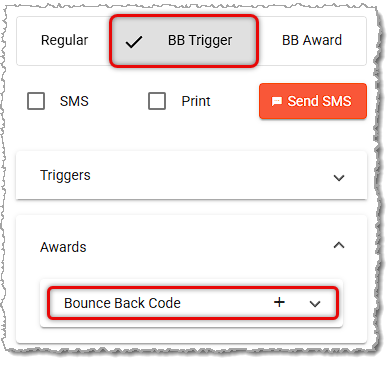
When creating your Trigger Coupon, the Triggers will be identical to the ones described above, but in the Awards area, you'll click to create a Bounce Back Code. The system will give you a unique code every time, and in the near future we will add tracking for codes into your reporting.
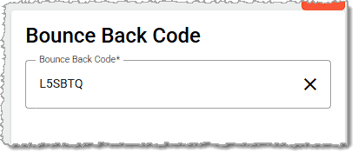
Once you have the code, if you want to just send it to the customer immediately, you can click the Send SMS button and the system will send it to your customers, as in the example below from the SMS Report.
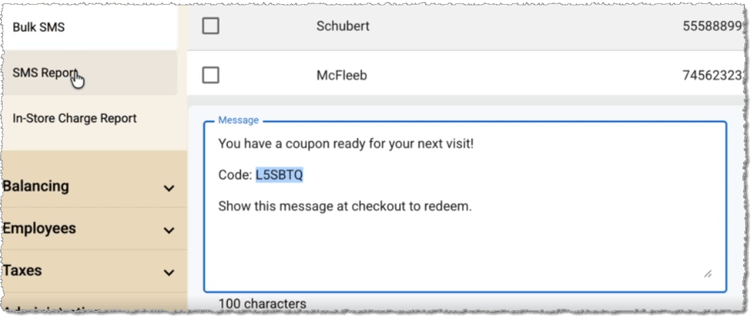
If you are not sending it out immediately, you will need to continue to the next step and create the Award Coupon.
When you create the Award Coupon , the trigger will be the Bounce Back Code you created for the Trigger Coupon (there are no other Trigger options, as pictured below). The Award can be any of the standard Awards described above.
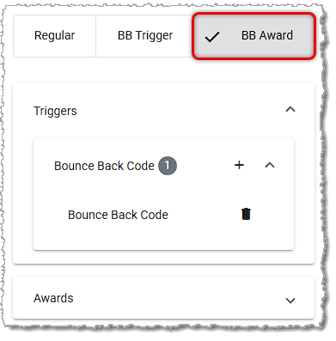
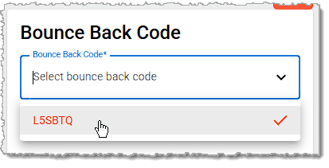
When you click to create the Bounce Back Code trigger, clicking in the empty field will give you a drop-list of previously created codes, and you can click on the one you need.
When the customer comes in with their Bounce Back Code, in the Front End you will click on Manager Functions and in the lower right, click Bounce Back Coupons.
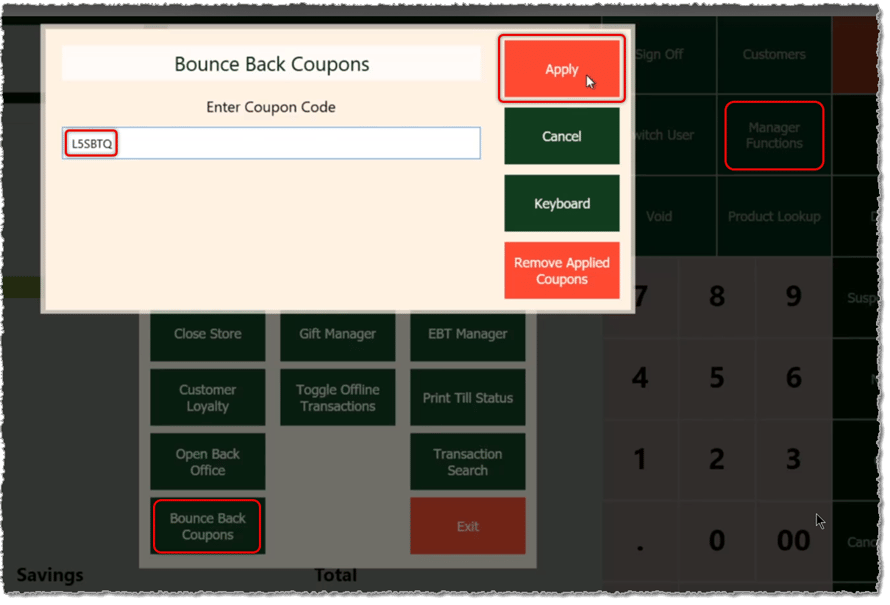
Enter the Bounce Back Coupon Code into the field and click the Apply button to apply it to the Register.
That's it, you're all set!
Coupons by Vendor or Department
Mix & Match Coupons with Product Groups
Q: I have a question, but I can't find my answer here. How do I get more assistance?
A: If you need immediate assistance, the IT Retail team is available 24/7. Feel free to contact our support team at 877-752-0625. You can also email us at support@marktpos.com, and we will respond within 24 hours.
Is this page helpful?
×Help us improve our articles