







How to Create Customers in the Front End
If a customer wants to sign up for your store’s membership program, you can add them in the Front En
 December 17, 2025
Some coupons can apply automatically if the customer meets certain conditions, like purchasing any produce item. In this article, we'll demonstrate how to set up a coupon that gives $5 off produce. This coupon will be applied automatically in the Front End to qualifying transactions.
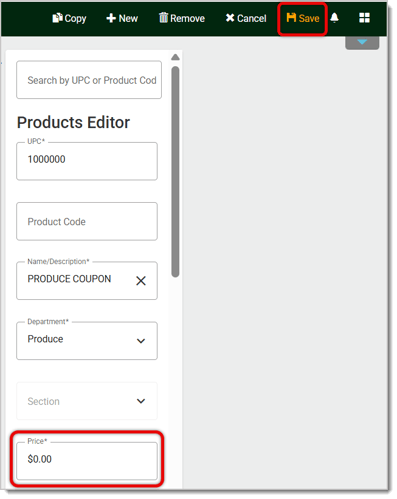
Before we can set up the coupon, we'll first make a "Product" for this coupon. This is not an actual product and is instead a placeholder for the coupon.
From the IT Retail Back End, navigate to Products > Product Maintenance. Under the Products Editor, enter the required details: UPC, Name / Description, Department, and Price. For the Price, we'll be entering it as $0.00, as it is not an actual product. Click on the Save button.
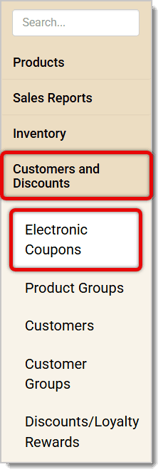
Go to Customers and Discounts > Electronic Coupons.
For every coupon you create, you'll begin by filling out basic details directly in the Electronic Coupons Editor.
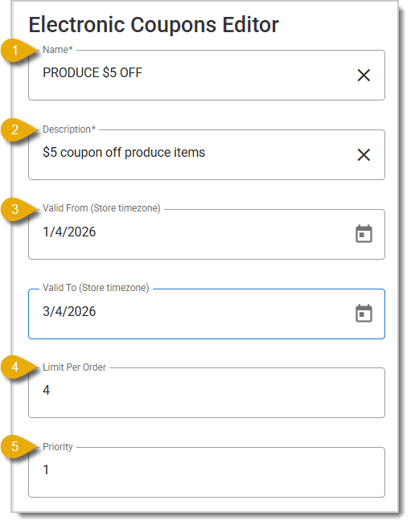
*Required Field
Next you can set up the Trigger and Award for this coupon.
In the Coupon Editor, scroll down to Triggers and click on the Downward Arrow.
Click on the Plus Sign that's next to UPC. 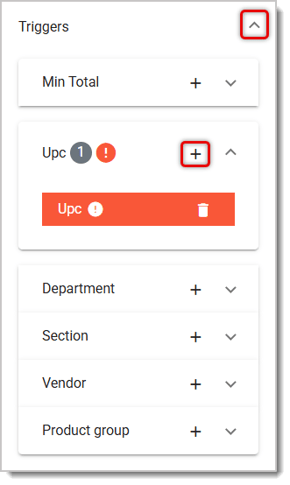
Under Product, enter the UPC or Description of the "product" you made earlier, and select it from the drop-list.
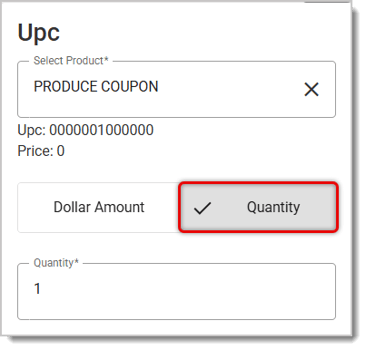
Select Quantity and enter 1.
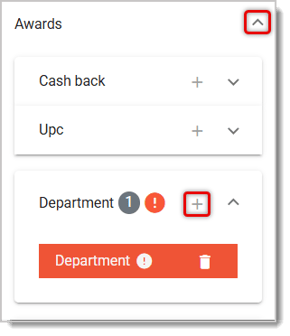
Below Triggers, click on the arrow next to Awards.
Click on the Plus Sign that's next to Department.
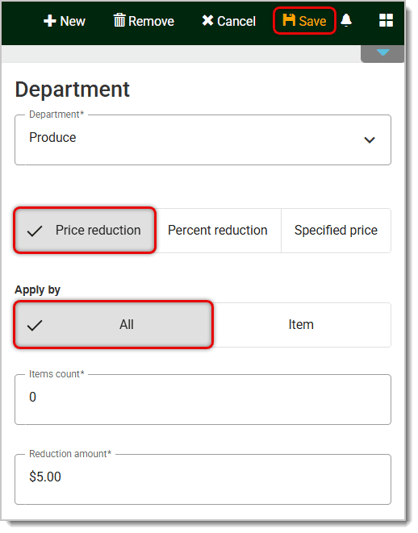
On the right, select the Department from the drop-list. In this case, we're selecting Produce.
Click on Price Reduction to indicate that this coupon will lower the price.
Under Apply By, select All, meaning this coupon will apply $5 off from the total price (Item would take $5 off of each produce item).
Enter 0 for the Items Count.
Enter $5.00 for the Reduction Amount.
Click on Save in the upper right to save this coupon.
Related Articles
Coupons by Vendor or Department
Mix & Match Coupons With Product Groups
Q: I have a question, but I can't find my answer here. How do I get more assistance?
A: If you need immediate assistance, the IT Retail team is available 24/7. Feel free to contact our support team at 877-752-0625. You can also email us at support@marktpos.com, and we will respond within 24 hours.
Is this page helpful?
×Help us improve our articles