Sections

January 07, 2026
Sections in IT Retail act as subsets of Departments. For example, if your store has a Dairy Department, you can make Yogurt its own Section. These are primarily helpful for sales reports, as products can't be rung up in the Front End by Section. Keep reading to see how you can create and manage Sections so your sales reports are more robust!
Sections
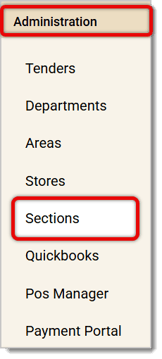
In the Back End main menu, go to Administration > Sections.
Here's everything you can do from this page:
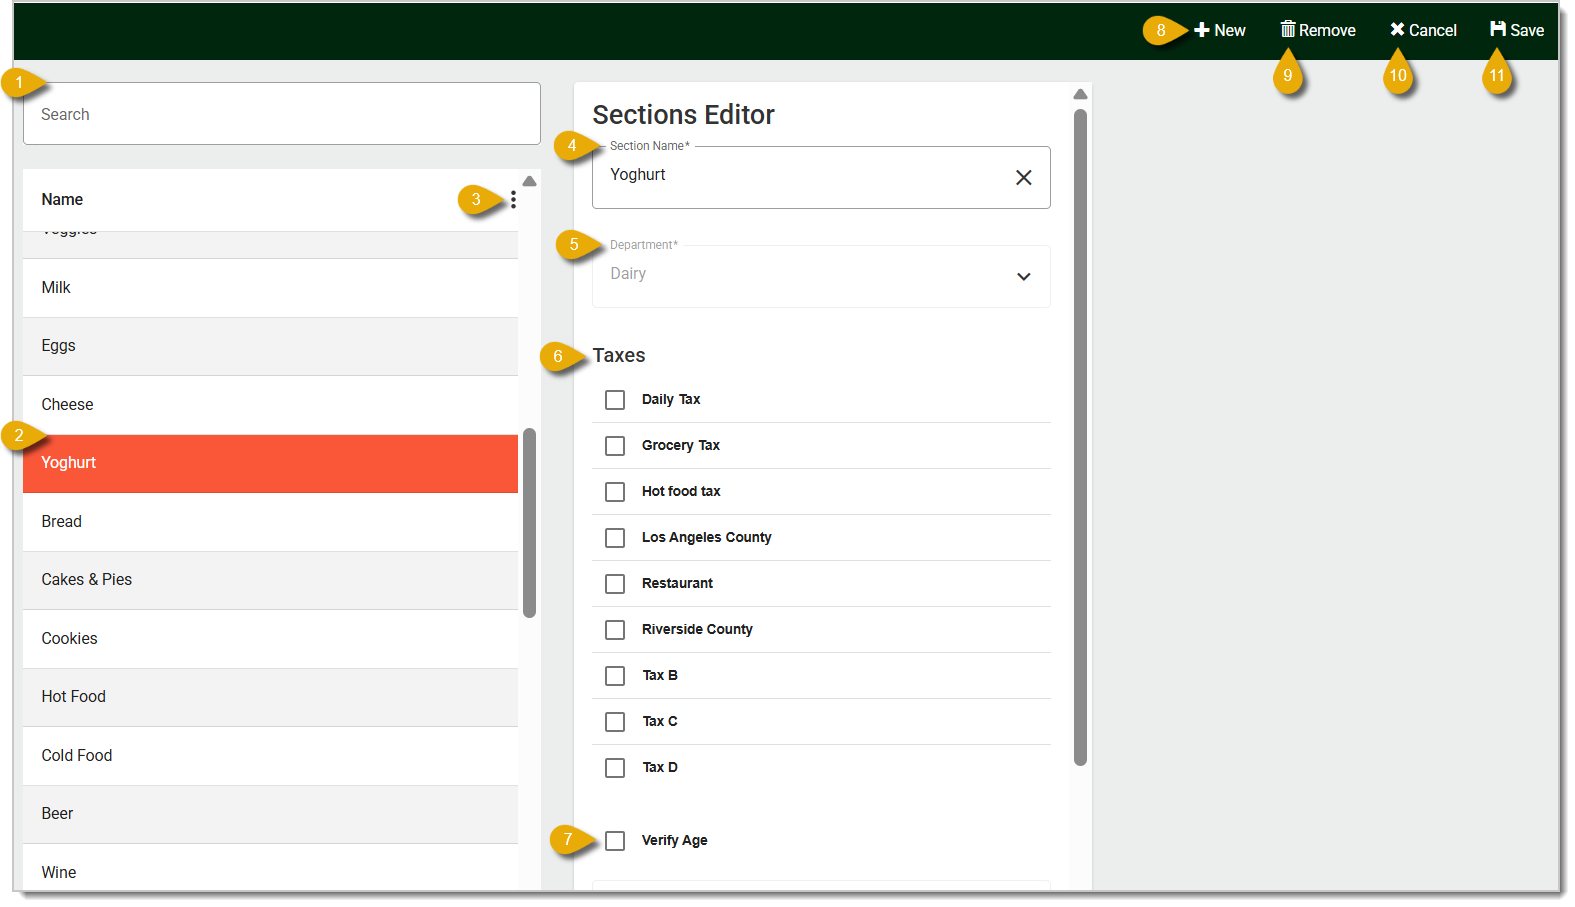
- Search — If needed, use the Search bar by typing in the Section Name. Matching results will display below.
- Select — Click on a Section to highlight it, as pictured above. Its details will load in the Sections Editor to the right.
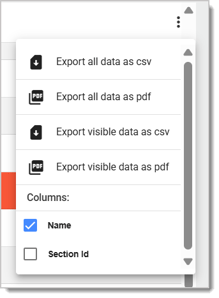
- Action Menu — Click on the Three-Dot Stack icon to open the Action Menu. In this menu, you can export the list as a CSV or PDF file, and you can select columns to hide or show.
- Section Name — Enter or edit the Section Name.
- Department — Select from the drop-list the Department for this Section. Please Note: Once you’ve selected a Department and saved your changes, you cannot change the associated Department. If the Section needs a different Department, you will have to remove the Section and create a new one from scratch.
- Select Taxes — Check boxes for each of the taxes that will apply to this Section's products.
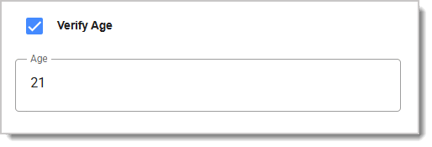
- Verify Age — Check this box if you want age verification before customers can buy products from this Section. For example, you can create a Section for Alcohol and check this box. When you enable this, make sure to also enter the minimum age required in the Age field.
- New — Click on New to create a new Section. If you already have a Section selected, clicking on New will clear fields in the Sections Editor for you.
- Remove — Select a Section, then click on Remove to delete it. You'll see a window pop up asking you to confirm.
- Cancel — To cancel any changes, click on Cancel.
- Save — Remember to Save any changes you want to keep with the Save button in the upper right. Otherwise, you'll lose any new Sections or any edits you've made.
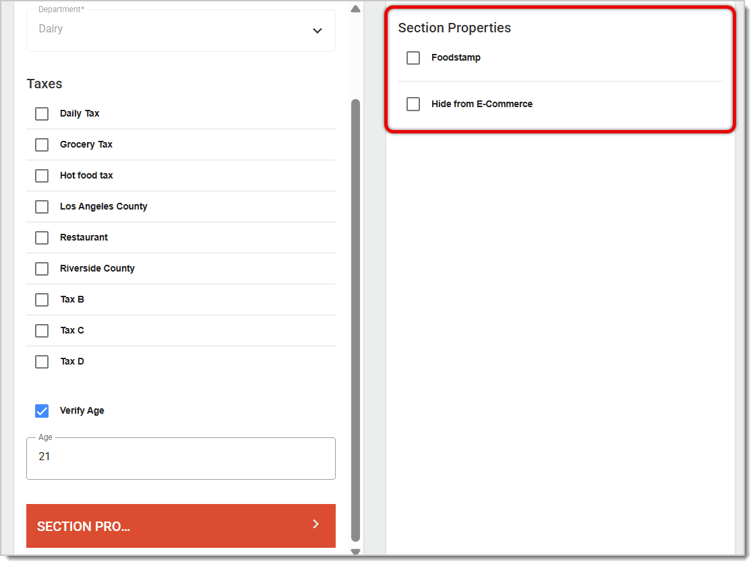
Scroll down the Sections Editor to the Section Properties tab. Click on it if you need to set the Section as eligible for Food Stamps / EBT, and/or if you want to hide the Section's products from your online store.
Related Articles
Departments
Tenders
Areas
Stores
Frequently Asked Questions
Q: I have a question, but I can't find my answer here. How do I get more assistance?
A: If you need immediate assistance, the IT Retail team is available 24/7. Feel free to contact our support team at 877-752-0625. You can also email us at support@marktpos.com, and we will respond within 24 hours.
There is a wealth of administrative functionality for you in the Manager Functions area of the Front
If you're just getting started in the IT Retail system you will want to set up your Departments befo
The IT Retail Tenders page allows you to create and edit Tender Types like cash, debit cards, and EB








Is this page helpful?
×Help us improve our articles