Employees

December 29, 2025
Use the Employees page to add new employees, edit existing employee details, and remove employees. In this article, you'll learn how to work with your Employees in the IT Retail system. Read on to see how easy it is!
Employees Page
In the Back End main menu, go to Employees > Employees.
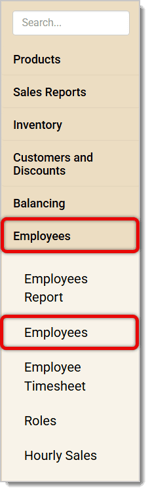
On the Employees page you'll see a list of your employees and the Employees Editor. Here is how to work with your Employees page: 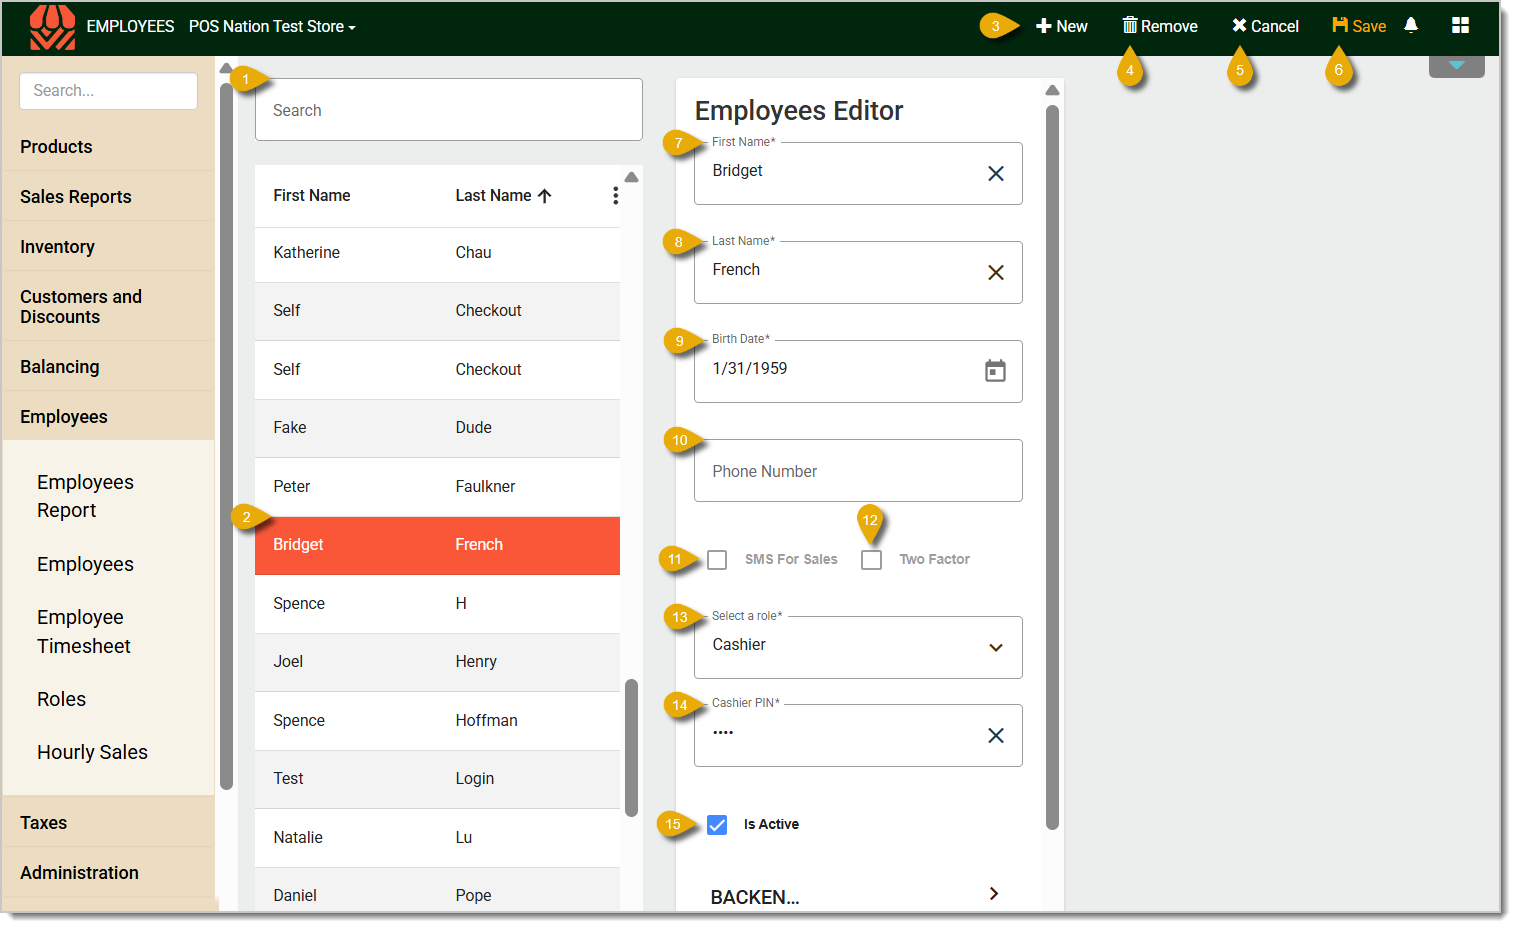
- Search — To look for an employee, enter their name in the Search field above the employees list. You'll see matching results in the list.
- Select Employee — To select an employee, click on their name in the employees list. The selected employee will be highlighted, and their details will prepopulate the fields in the Employees Editor.
- New — Click on the + New Button to add a new employee. If any information is already in the Employees Editor, clicking on this will clear it.
- Remove — To delete an employee, select them from the list on the left, and click on the Remove Button. Deleting an employee will revoke their active employee status.
- Cancel — Click on the Cancel Button if you want to cancel changes.
- Save — Click on the Save Button to save changes. If you don't click on this after you've made edits and click to go to another area, a confirmation window will pop up and ask if you'd like to save your changes.
- First Name* — Enter the employee's first name.
- Last Name* — Enter the employee's last name.
- Birth Date — Enter the employee's birth date. This might be necessary for selling products that have age limitations, such as alcohol.
- Phone Number — Enter the employee's phone number.
- SMS For Sales — Check this box for security purposes the employee should receive text updates about promotional store sales.
- Two Factor — Check this box for security purposes if you want the employee to have two-factor authentication when they log in.
- Role — Select the role of this employee from the drop-list. To learn how to create Roles, read the article linked in the Related Articles section.
- Cashier PIN — Enter the PIN code the employee has to enter to log into the Front End.
- Is Active — Keep this box checked if the employee is still an active employee.
* Required Field
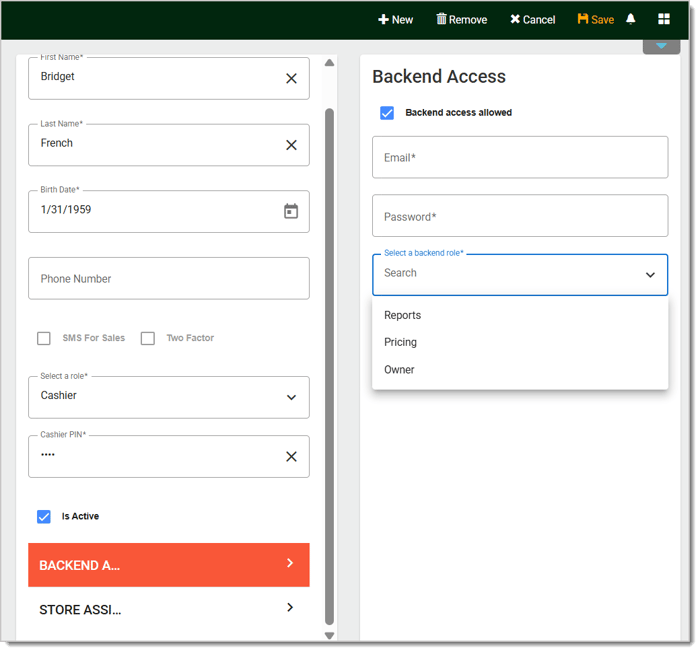
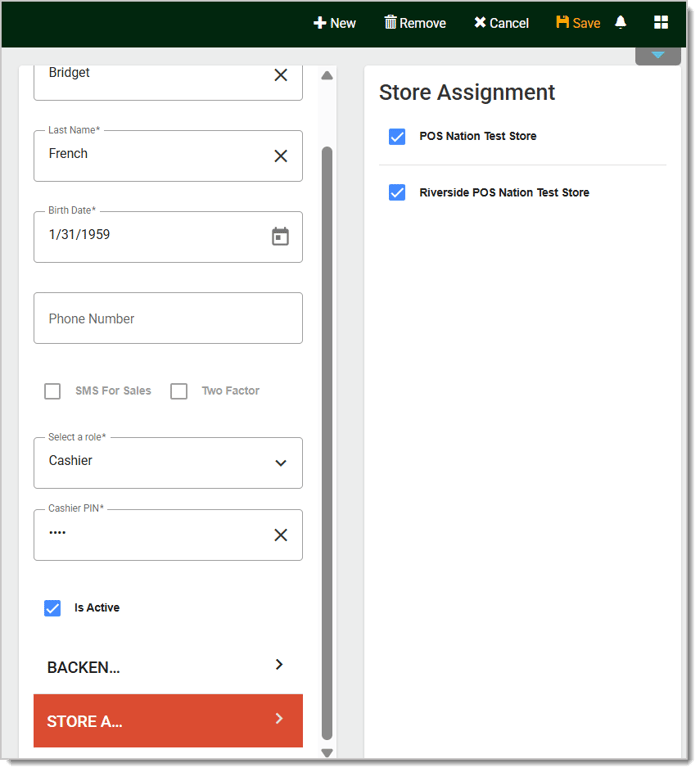
Scroll down the Employees Editor to grant an employee Back End access and their Store Assignment.
Please Note: Every time you edit details in either of these tabs, remember to click on Save in the upper right when you're finished, or you'll lose your changes.
Click on the Back End Access tab to give an employee Back End permissions. Check the box for Backend Access Allowed, then enter the employee's email address, password, and their Back End role. The email address and password will be their Back End login credentials.
You can use the Store Assignment tab to give employees access to the stores they need if you have more than one store. Check boxes for each store you want to assign to the employee.
Related Articles
Roles
Employees Report
Employee Removal
Employee Timesheet
Frequently Asked Questions
Q: I have a question, but I can't find my answer here. How do I get more assistance?
A: If you need immediate assistance, the IT Retail team is available 24/7. Feel free to contact our support team at 877-752-0625. You can also email us at support@marktpos.com, and we will respond within 24 hours.
Welcome to IT Retail, we’re so glad you’ve chosen our POS for your store! This article will guide yo
We have worked hard to make our Front End as user-friendly as possible, but there are a lot of movin
There is a wealth of administrative functionality for you in the Manager Functions area of the Front








Is this page helpful?
×Help us improve our articles