Grant certain employees specific permissions by assigning them Roles, which you can create and edit in the IT Retail Back End. You'll be able to set permissions both in the Front End and the Back End. Read on to see everything the Roles page can do for you!
Here is everything covered in this article:
Roles
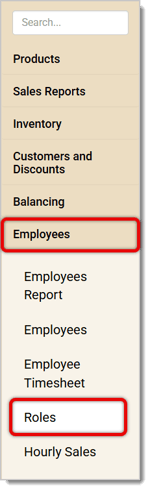
To open the Roles page, go to the Back End and click on Employees > Roles.
Here is how you can use this page:
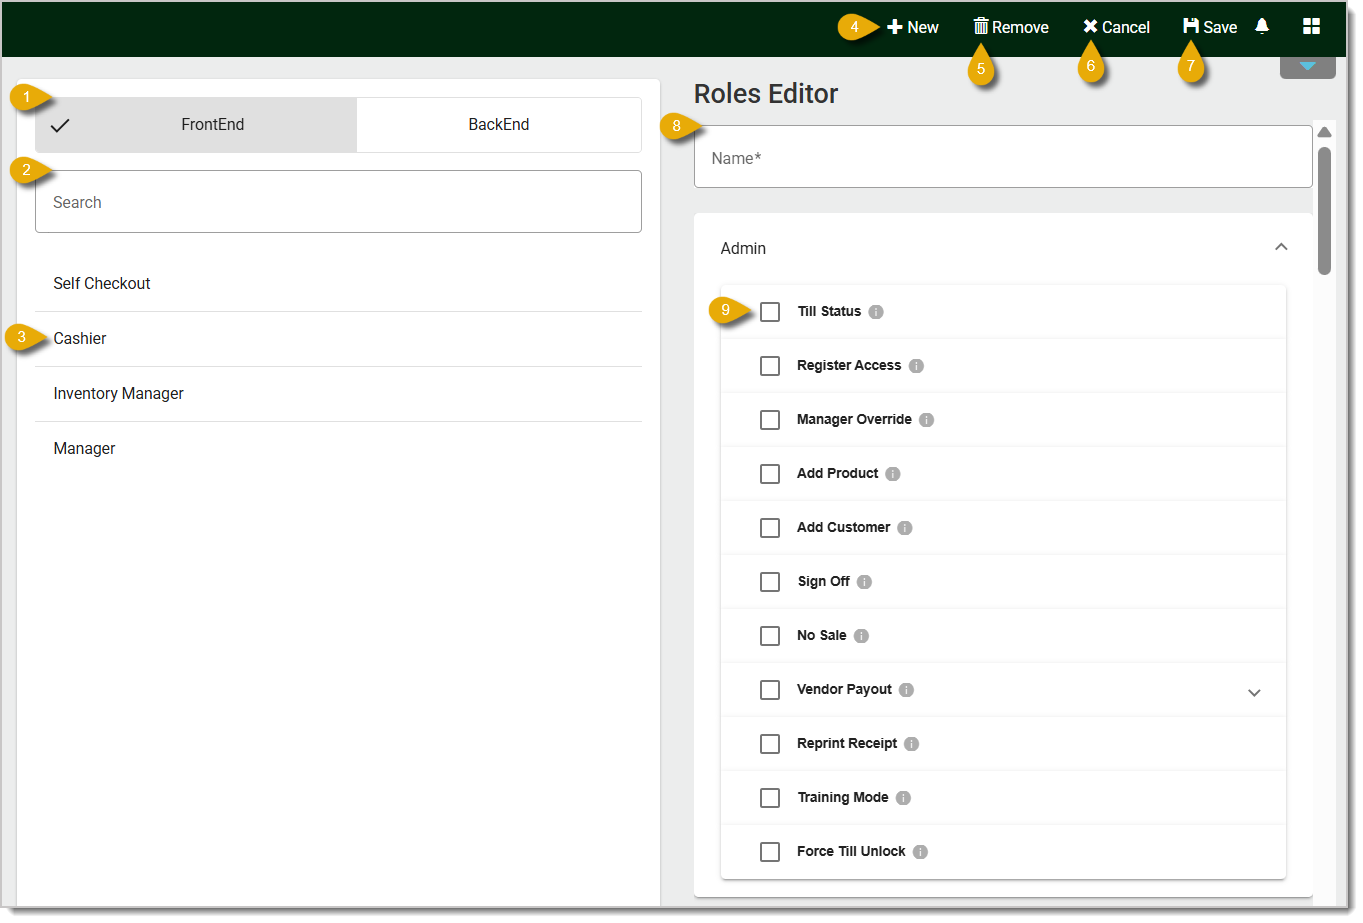
- Front End / Back End — Click on either tab to switch between roles for the Front End or the Back End.
- Search — Search for a specific role by entering its name. Matching results will display in the list below the search bar.
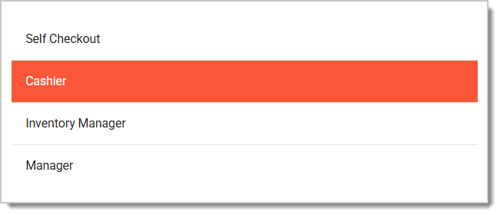
- Select Role — Click on a Role to select it so you can edit its permissions. You'll know a role is selected if it's highlighted as pictured below.
- New — Click on the Plus Sign to add a new Role.
- Remove — To delete a Role, select one from the list on the left, then click on the Trash Can. A window will pop up asking you to confirm this action.
- Cancel — Cancel changes by clicking on the X next to Cancel.
- Save — Click on this to Save changes. Any edits you've made will not be saved if you do not click on this button.
- Name* — When you're creating a new Role, enter the Name of it in the text field above permissions. You can also change the name of a Role by selecting it from the list on the left, then entering the new Name.
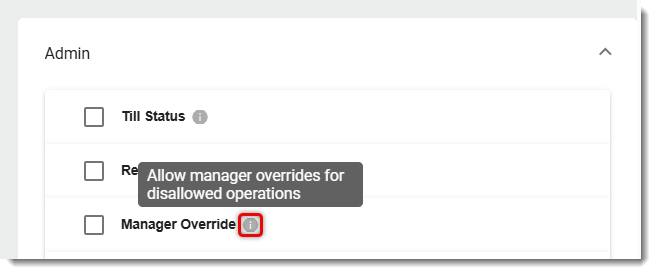
- Permissions — Select the check boxes for each action you want to allow for the selected Role. If you're not sure what a certain permission does, like Manager Override, hover your cursor over the i next to the permission. You'll see a short description. You can also see the section below on Role Permissions for information on each permission.
* Required Field
Role Permissions
Front End
Admin
These permissions are primarily for cashier actions. Here is everything under Admin permissions:
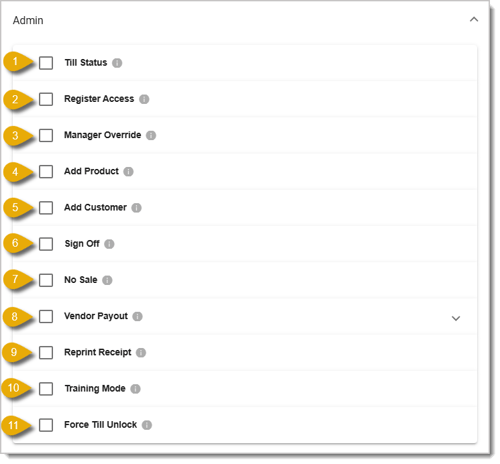
- Till Status — Employees with this Role can print out the Till Status Report with this permission, which will show all Front End activities, at the end of their shift.
- Register Access — This permission allows the Role to sign into registers.
- Manager Override — For actions that the Role normally can’t do, such as Pay Outs and Vendor Pay Outs, this permission will allow managers to override restrictions and proceed with the transaction.
- Add Product — This permission allows the Role to create new products from the Front End.
- Add Customer — This permission allows the Role to create new customers from the Front End.
- Sign Off — This permission allows the Role to sign off from registers.
- No Sale — This permission allows the Role to open the cash drawer using the No Sale button when there is no incomplete transaction in the Front End.
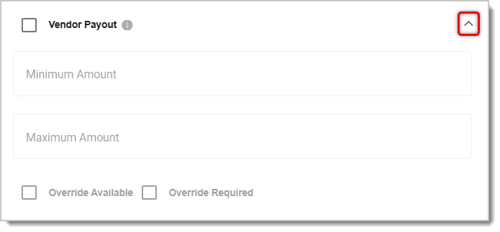
- Vendor Payout — This permission allows the Role to do Vendor Payouts from the register. You can click on the Chevron to the right of this permission to set the Minimum and Maximum Amounts the Role is allowed to pay out. You can also check boxes for Override Available and Override Required if you want Vendor Payouts to work in those ways.
- Override Available — If a Vendor Payout goes under the Minimum Amount or over the Maximum, a Role with the Manager Override permission can override the limit by entering their password. If this is not checked, any Vendor Payout amount that isn't in the range between the Minimum and Maximum will not be allowed.
- Override Required — Even if the Vendor Payout amount is within the allowed range, any payout will be restricted and will require a Role with the Manager Override permission to override the restriction by entering a password.
- Reprint Receipt — This permission allows the Role to reprint receipts.
- Training Mode — This permission gives the Role access to a training mode in the register.
- Force Till Unlock — When the register times out due to inactivity, the device will show a Lock Screen and the user will need to log in again to access the Front End. You can configure timeout settings in the Back End through Administration > POS Manager > Checkstand Screen.
Please Note: This permission is currently not functional. Even if this permission’s box is not checked, the register will still time out and require a cashier to log in again.
Transactions
These permissions give the selected Role access to actions involving items or payments in transactions. Here is how to configure Transaction permissions:
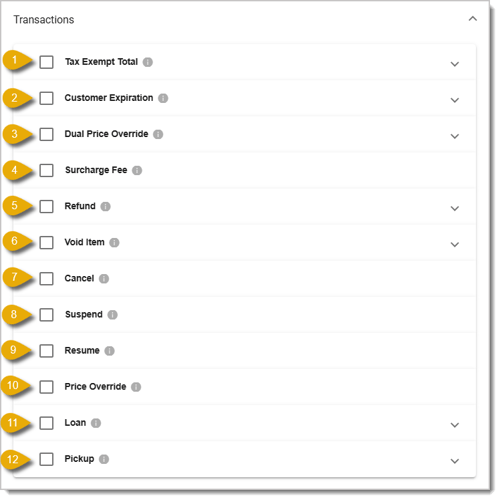
- Tax Exempt Total — This permission allows employees with the selected Role to set tax exemptions on transactions. You can click on the Chevron on the right to open the Override Available and Override Required options.
- Override Available — If a Vendor Payout goes under the Minimum Amount or over the Maximum, a Role with the Manager Override permission can override the limit by entering their password. If this is not checked, any Vendor Payout amount that isn't in the range between the Minimum and Maximum will not be allowed.
- Override Required — Even if the Vendor Payout amount is within the allowed range, any payout will be restricted and will require a Role with the Manager Override permission to override the restriction by entering a password.

- Customer Expiration — This permission allows the Role to add customers with expired customer memberships to transactions. You can click on the Chevron on the right to open the Override Available and Override Required options.

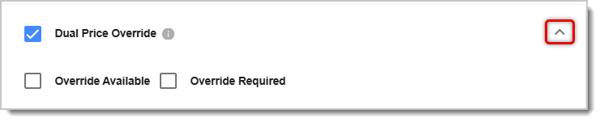
- Dual Price Override — This permission applies if you've enabled Dual Pricing, which gives customers a discount for paying with cash. The Dual Price Override permission allows the Role to override dual pricing and just set all of a transaction's items at cash price. You can click on the Chevron located to the right to open the Override Available and Override Required options.
- Surcharge Fee — This permission allows the Role to charge additional transaction fees in transactions.
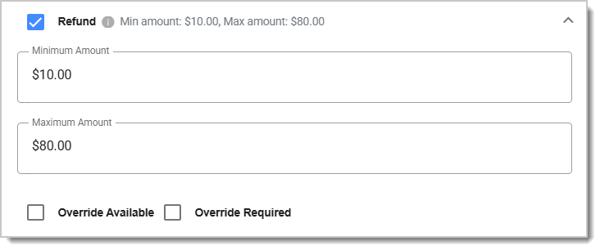
- Refund — This permission allows the Role to perform refunds. You can click on the Chevron located to the right to set the Minimum and Maximum Amount the Role can refund. You can also check the Override Available and Override Required options, if needed.
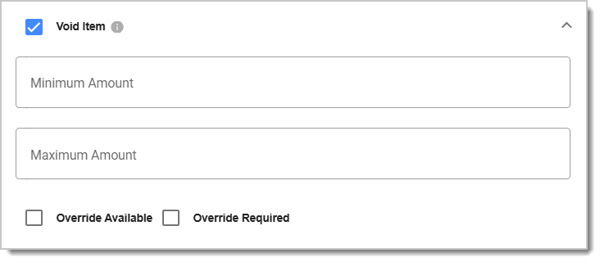
- Void Item — This permission allows the Role to void items in transactions if customers no longer want them. You can click on the Chevron on the right to set the Minimum and Maximum Amount (of an item's price) that Role can void. You can also check the Override Available and Override Required options, if needed.
- Cancel — This permission allows the Role to cancel transactions.
- Suspend — This permission allows the Role to suspend transactions.
- Resume — This permission allows the Role to resume suspended transactions.
- Price Override — This permission allows the Role to override product prices and change them.
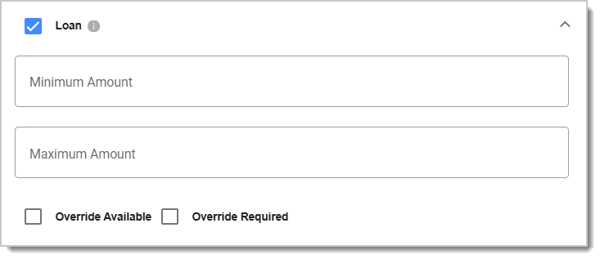
- Loan — This permission allows the Role to receive loans (cash they place in the cash register at the beginning of their shift or cash they need to add during their shift) for the Front End. You can click on the Chevron on the right to set the Minimum and Maximum Amount of the loan that cashiers can receive. You can also check the Override Available and Override Required options, if needed.
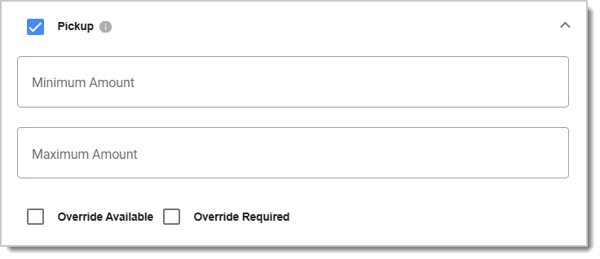
- Pickup — This permission allows the Role to perform pickups ("picking up" extra cash from the register and dropping it off into the safe when the register has too much). You can click on the Chevron on to the right to set the Minimum and Maximum Amount that the employee with the Role can pick up. You can also check the Override Available and Override Required options, if needed.
Paid Ins
Assign employees with the selected Role permission to charge Paid Ins you've already configured. Check boxes for each Paid In you want to allow cashiers to add to transactions. To create a Paid In, navigate in the Back End to Balancing > Paid In and Out > Paid In. Check the boxes for Paid Ins you want to allow the Role to be able to add to transactions.
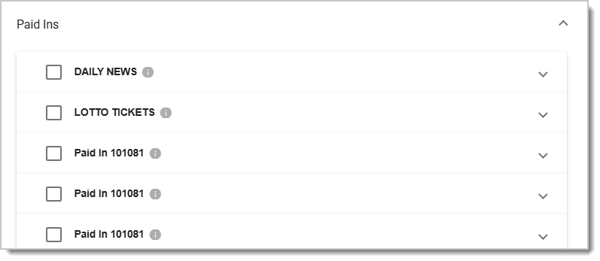
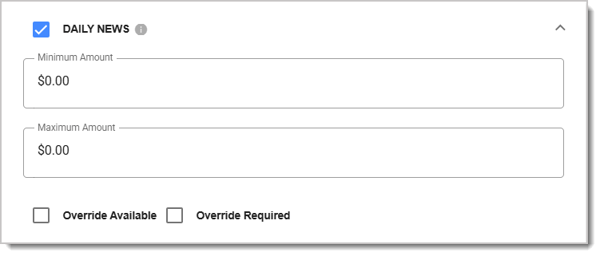
For each Paid In, you can click on the Chevron on the right to set the Paid In fee's Minimum and Maximum Amount that the Role can charge. You can also check the Override Available and Override Required options, if needed.
- Override Available — If a Vendor Payout goes under the Minimum Amount or over the Maximum, a Role with the Manager Override permission can override the limit by entering their password. If this is not checked, any Vendor Payout amount that isn't in the range between the Minimum and Maximum will not be allowed.
- Override Required — Even if the Vendor Payout amount is within the allowed range, any payout will be restricted and will require a Role with the Manager Override permission to override the restriction by entering a password.
Paid Outs
Assign employees with the selected Role permission to pay customers Paid Outs you've already configured. Check the boxes for each Paid Out you want to allow the Role to be able to add to transactions. To create a Paid Out, go in the Back End to Balancing > Paid In and Out > Paid Out.
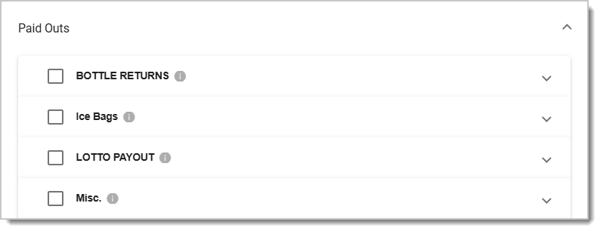
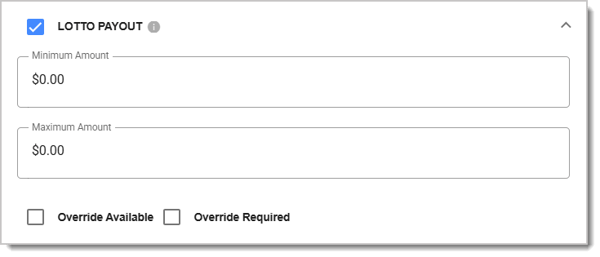
For each Paid Out, you can click on the Chevron on the right to set the Minimum and Maximum Amount that cashiers can pay out. You can also check the Override Available and Override Required options, if needed.
- Override Available — If a Vendor Payout goes under the Minimum Amount or over the Maximum, a Role with the Manager Override permission can override the limit by entering their password. If this is not checked, any Vendor Payout amount that isn't in the range between the Minimum and Maximum will not be allowed.
- Override Required — Even if the Vendor Payout amount is within the allowed range, any payout will be restricted and will require a Role with the Manager Override permission to override the restriction by entering a password.
Discounts
In the Discounts subsection, you can assign permissions to employees with the selected Role so they can apply discounts. Check the box for each discount you want the Role to be able to apply them to transactions.
The first two, Remove Discount and Manufacturer Coupons, are already in the IT Retail system. Remove Discount allows the Role to remove discounts from transactions; Manufacturer Coupons allows the Role to add coupons provided by manufacturers to transactions. The rest of the discounts in this area are ones you've configured and saved. You can create discounts in the Back End by going to Customers & Discounts > Discounts / Loyalty Rewards > Discounts.
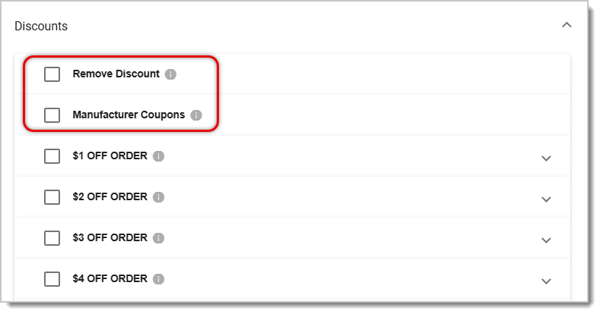
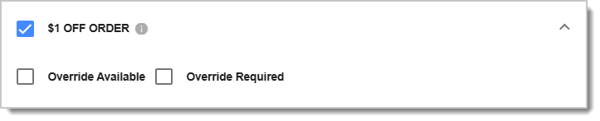
For each discount you've made, you can click on the Chevron on the right for the Override Available and Override Required options.
- Override Available — If a Vendor Payout goes under the Minimum Amount or over the Maximum, a Role with the Manager Override permission can override the limit by entering their password. If this is not checked, any Vendor Payout amount that isn't in the range between the Minimum and Maximum will not be allowed.
- Override Required — Even if the Vendor Payout amount is within the allowed range, any payout will be restricted and will require a Role with the Manager Override permission to override the restriction by entering a password.
Back End
These permissions give employees with the selected Role access to areas and actions in the Back End. For example, checking the box for End of Day Report will give the Role access to printing an End of Day Report. Here is what all Back End permissions will do:
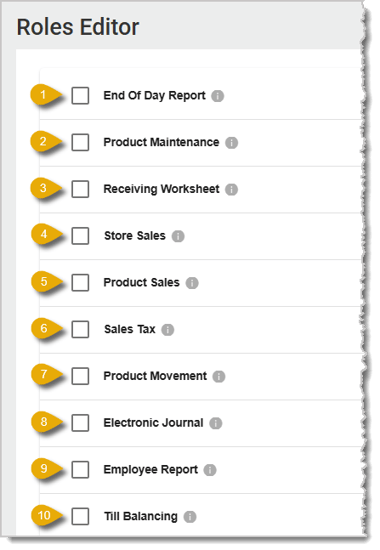
- End of Day Report — This permission allows the Role to print a report containing store sales, taxes, and payment tenders.
- Product Maintenance — This permission allows the Role to maintain your products in the Products > Product Maintenance area.
- Receiving Worksheet — This permission allows the Role to receive inventory with a purchase order or make a new invoice for receiving.
- Store Sales — This permission allows the Role to view the Store Sales report, showing store sales by department or section.
- Product Sales — This permission allows the Role to view the Product Sales report from the Sales Reports menu, showing products sold and total combined sales.
- Sales Tax — This permission allows the Role to view the Sales Tax report from the Taxes menu, showing the dollar amount of taxable sales, the amount of tax-exempt sales, and the Tax Amount actually paid.
- Product Movement — This permission allows the Role to view the Product Movement report from the Sales Reports menu, showing a product’s “movement” according to quantity sold, revenue, profit, etc.
- Electronic Journal — This permission allows the Role to view the Electronic Journal from the Balancing menu, showing transaction records. Someone with this permission can also email and download receipts.
- Employee Report — This permission allows the Role to view the Employees Report from the Employees menu, showing cashier summaries and statistics.
- Till Balancing — This permission allows the Role to use the Balance Till area from the Balancing menu to enter dollar amounts that are in the register cash drawer (balance the till) and view till statistics.
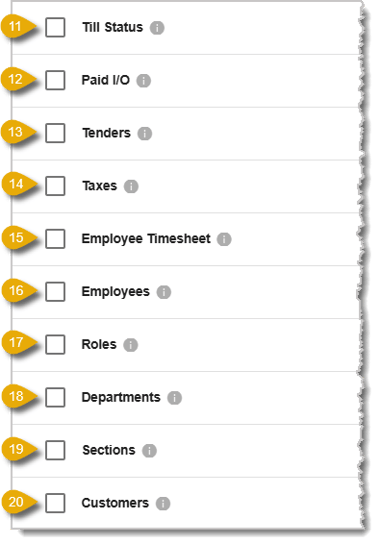
- Till Status — This permission allows the Role to view a report showing summarized values for each tender type in the Payment Methods area of the Balancing menu.
- Paid I/O — This permission allows the Role to create and maintain your store’s Paid In and Out area in the Balancing menu.
- Tenders — This permission allows the Role to add and maintain tender types in the Payment Methods area of the Balancing menu.
- Taxes — This permission allows the Role to add and maintain the taxes your store charges customers in the Taxes area of the Taxes menu.
- Employee Timesheet — This permission allows the Role to add or edit employee cashier timesheet entries or export a timesheet report from the Employee Timesheet area of the Employees menu.
- Employees — This permission allows the Role to add and edit employee details in the Employees area of the Employees menu.
- Roles — This permission allows the Role to manage Roles, so they can edit Front End and Back End permissions for roles (what you’re doing in this area) in the Roles area of the Employees menu.
- Departments — This permission allows the Role to add and edit your store’s departments in the Departments area of the Administration menu.
- Sections — This permission allows the Role to add and edit your store’s Sections in the Sections area of the Administration menu.
- Customers — This permission allows the Role to add and edit your store’s customer records in the Customers area of the Customers and Discounts menu.
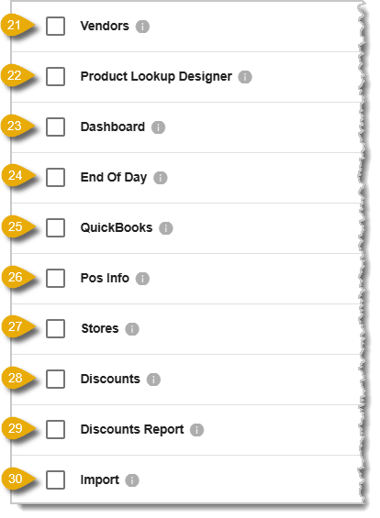
- Vendors — This permission allows the Role to add and edit vendor information in the Vendors area of the Inventory menu.
- Product Lookup Designer — This permission allows the Role to access the Product Lookup Designer, where they can edit the layout of the Front End’s Product Lookup menu.
- Dashboard — This permission allows the Role to view a summary of the day’s store sales on the Back End Dashboard.
- End of Day — This permission allows the Role to view a report of store sales, taxes, and tender types in the End of Day Report of the Sales Reports menu.
- Quickbooks — This permission allows the Role to set up the integration between IT Retail and your store’s Quickbooks Online account in the Quickbooks area of the Administration menu.
- POS Info — This permission allows the Role to manage POS Security, Checkstand Screen, Checkstand Receipt, API Setup, and Printer Setup in the POS Manager area of the Administration menu.
- Stores — If you have more than one store, a Role with this permission can manage information for any stores that have been selected in the Store Assignments tab of their Employee page record under the Employees menu. They will be able to switch between stores at the top of the Back End.
- Discounts — This permission allows the Role to add and edit discounts and customer loyalty rewards in the Discounts / Loyalty Rewards area of the Customers and Discounts menu.
- Discounts Report — This permission allows the Role to view the Discount Sales report showing Discount totals in the Discount Sales area of the Customers and Discounts menu.
- Import — This permission allows the Role to upload mass product changes with the Mass Import tool in the Mass Import area of the Products menu.
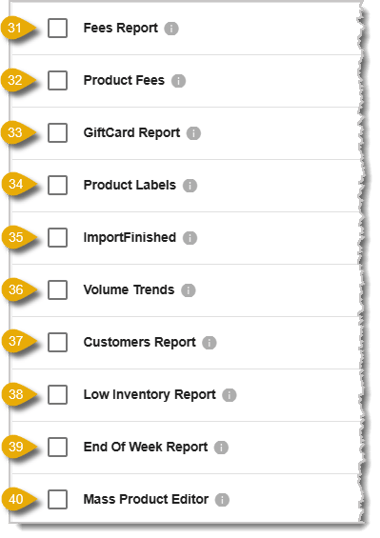
- Fees Report — This permission allows the Role to view the Fees Report in the Taxes area, summarizing Product Fee revenue data.
- Product Fees — This permission allows the Role to add and edit your store's Product Fees in the Fees area of the Taxes menu.
- Giftcard Report — This permission allows the Role to view the Giftcard Sales area of the Gift Cards menu, which summarizes total values for gift cards loaded and amounts redeemed.
- Product Labels — This permission allows the Role to manage and export a list of products that need their labels printed in the Product Labels area of the Products menu.
- Import Finished — This permission allows the Role to review products after they’ve been mass imported with the Mass Import tool.
- Volume Trends — This permission allows the Role to see sales trends through a graph showing your store’s hourly sales in the Hourly Sales area of the Employees menu.
- Customers Report — This permission allows the Role to view the Customers Report area of the Customers and Discounts menu, showing customer contact information, visits, and total dollar amount spent
- Low Inventory Report — This permission allows the Role to view the Low Inventory Report area of the Inventory menu, showing all products that are lower in stock than their low inventory alert quantity.
- End of Week Report — This permission allows the Role to view and print the End of Week Report, which will show a week’s department sales, tender type totals, and tax collected. This is in the Sales Reports menu.
- Mass Product Editor — This permission allows the Role to use the Mass Product Editor tool in the Products menu to quickly edit multiple products.
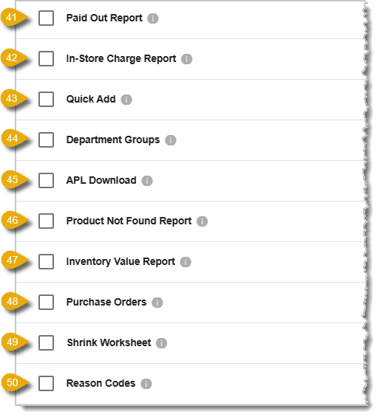
- Paid Out Report — This permission allows the Role to view the Paid Out Report in the Sales Reports menu so they can see all paid outs within a specified time period.
- In-Store Charge Report — This permission applies if your store allows customers to open in-store charge accounts. If you check this permission, an employee with the Role can export in-store account invoices and view the In-Store Charge Report (in the Customers and Discounts menu) to see in-store account balances.
- Quick Add — This permission allows the Role to use the Quick Add tool (in the Products menu), which will let them quickly add products to the IT Retail system. They can also use the tool to quickly edit a product’s Description, Department, Price, and Quantity on Hand.
- Department Groups — This permission allows the Role to group departments together into Reporting Groups and create Reporting Groups. They can do so by going to Administration > Departments > Reporting Group tab.
- APL Download — This permission allows the Role to configure FTP information and download an Authorized Product List (APL).
- Product Not Found Report — Some products in your store might be on the floor but not registered in your system. If this permission is checked, the Role can access the Product Not Found Report from the Products menu to see items that need to be recorded in your store’s Back End.
- Inventory Value Report — This permission allows the Role to view the Inventory Value Report in the Inventory menu, which shows total inventory value based on product quantity on hand and value.
- Purchase Orders — This permission allows the Role to create a Purchase Order for receiving in the Purchase Orders area of the Inventory menu.
- Shrink Worksheet — This permission allows the Role to access the Shrink Inventory area of the Inventory menu to track inventory shrink with reason codes.
- Reason Codes — This permission allows the Role to add and edit Shrink Reason Codes from the Inventory menu.
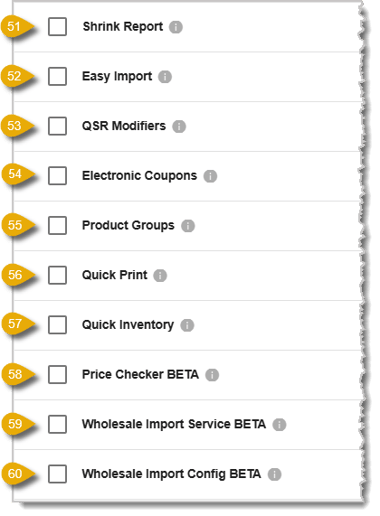
- Shrink Report — The Shrink Report shows two different grids of data that tracks inventory loss from the Shrink Inventory page in the Inventory area. If you check this permission, an employee with the Role can view the report in Shrink Inventory Report from the Inventory menu.
- Easy Import — This permission allows the Role to use the Easy Import tool from the Products menu. This tool provides a step-by-step guide on creating an import product file.
- QSR Modifiers — This permission allows the Role to add and edit product modifier information in the Product Modifiers area of the Products menu.
- Electronic Coupons — This permission allows the Role to create and edit electronic coupons that will discount a transaction once the transaction meets a configured trigger. This is accessible in the Electronic Coupons area of the Customers and Discounts menu.
- Product Groups — This permission allows the Role to add and edit your store’s Product Groups, accessible from the Customers and Discounts menu.
- Quick Print — This permission allows the Role to edit a product’s information and quickly print out its shelf label in the Quick Print area of the Products menu.
- Quick Inventory — This permission allows the Role to quickly add or edit a product’s Quantity on Hand using the Quick Inventory tool from the Inventory menu.
- Price Checker (Beta) — This permission allows the Role to access the Price Checker area of the Administration menu. Note that this is in Beta phase and is only accessible to Beta tester stores.
- Wholesale Import Service (Beta) — This permission allows the Role to use services for wholesale product imports. Note that this is in Beta phase and is only accessible to Beta tester stores.
- Wholesale Import Configuration (Beta) — This permission allows the Role to use services to configure FTP wholesale product imports. Note that this is in Beta phase and is only accessible to Beta tester stores.
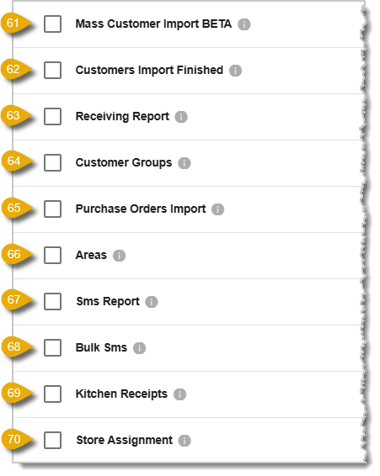
- Mass Customer Import (Beta) — This permission allows the Role to use a tool to mass import customers into your store’s records. Note that this is in Beta phase and is only accessible for Beta tester stores.
- Customers Import Finished — This is used in conjunction with the Mass Customer Import tool. With this permission, the Role can check customer details after a mass import.
- Receiving Report — This permission allows the Role to view the Receiving Report from the Inventory menu to see products received, their quantity, the weight, and the value in a specified time period.
- Customer Groups — This permission allows the Role to add and edit Customer Groups from the Customers and Discounts menu.
- Purchase Orders Import — This permission allows the Role to create a purchase order import file for inventory receiving in the Purchase Orders Import area of the Inventory menu.
- Areas — This permission allows the Role to manage the Areas from the Administration menu of your store.
- SMS Report — This permission allows the Role to view your store's SMS message history.
- Bulk SMS — This permission allows the Role to send SMS messages to customers.
- Kitchen Receipts — This permission allows the Role to view a report showing past kitchen receipts that were queued for printing.
- Store Assignment — This permission allows the Role to assign other employees to different stores if they’re in multi-store mode. An employee with this Role can do assignments by going to Employees > Employees > Store Assignment tab. Please Note: If you’ve already checked this permission and want to disable it, anyone currently in the Role will lose this permission.
Sync Roles with the Front End
Once you've created or edited Roles, you should make sure that changes have synced to the Front End.
- Open and enter login credentials for the Front End.
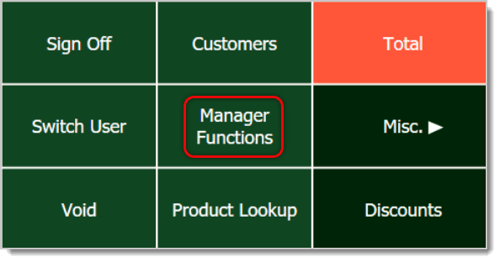
- Click or tap on Manager Functions.
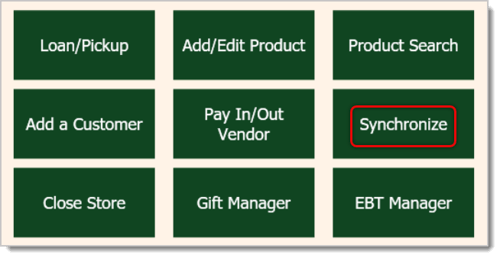
- A window will pop up, from which you can click or tap on Synchronize.
- Click or tap on Get Updates from Server.
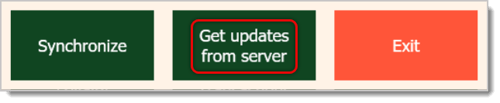
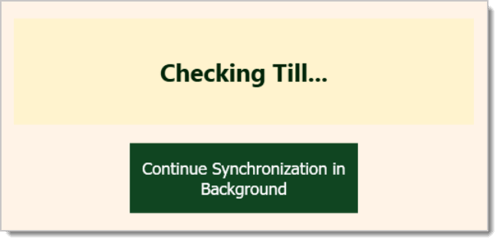
- A window will pop up telling you the system is checking the till. You can click or tap on the button underneath to Continue Synchronization in Background.
Related Articles
Paid In and Out
Employees
Employee Timesheet
Employees Report
Hourly Sales
Frequently Asked Questions
Q: I have a question, but I can't find my answer here. How do I get more assistance?
A: If you need immediate assistance, the IT Retail team is available 24/7. Feel free to contact our support team at 877-752-0625. You can also email us at support@marktpos.com, and we will respond within 24 hours.








 December 31, 2025
Is this page helpful?
×Help us improve our articles