







End of Shift Procedures
Whenever you come to the end of a shift, there are several things you need to do, even if you don't
 January 09, 2026
In the Front End you and your team will need to do Pay Ins and Pay Outs, and this area is where you can make sure what you need is available. This article will show you how to create your Pay In and Pay Out items. Take a look at how simple this is!
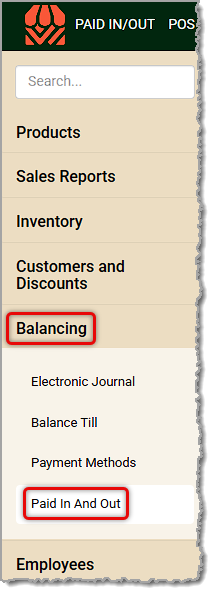
You can get to this part of the system by logging into the Back End and opening the Balancing menu. Click on Paid In and Out to get started.
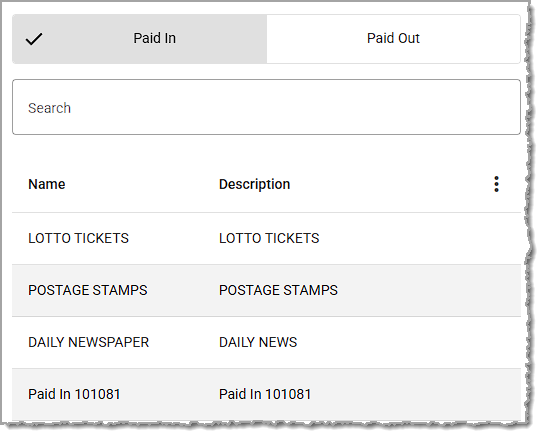
The Paid In tab will open for you by default, listing all of your saved Paid In items.
You are able to Search by keyword for whatever you need.
You can also use the Three-Dot Stack button to open the Action Menu on the far right to Export the data as a CSV or PDF or you can choose which columns display.
You'll see the Name of each Paid In item and its Description.
You can click on an item to edit either of those areas.
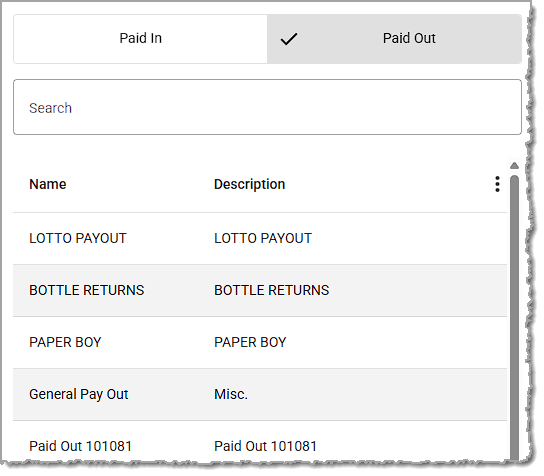
The Paid Out tab will list all of your saved Paid Out items.
You are able to Search by keyword for whatever you need.
You can also use the Three-Dot Stack button to open the Action Menu on the far right to Export the data as a CSV or PDF or you can choose which columns display.
You'll see the Name of each Paid Out item and its Description.
You can click on an item to edit either of those areas.
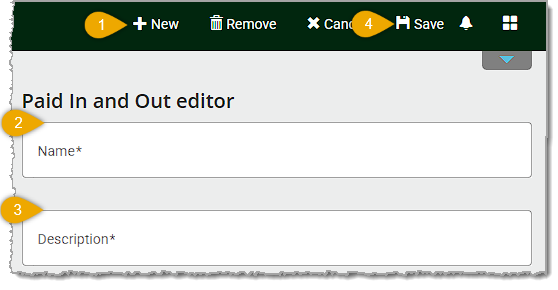
You can use the following steps to create a new item of either type. Make sure the tab is highlighted for the type of item you will create. For example, click on Paid Out and then follow the steps below to create a new Paid Out item.
Items saved this way will not be immediately available in the Front End. You will need to either log out then log back in to update the data, or open the Manager Functions menu where you can click to Synchronize and that will update the changes for you.
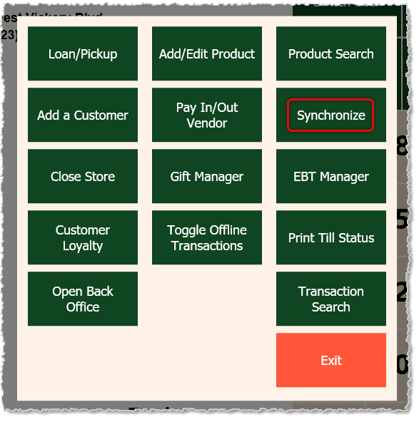
Manager Functions in the Front End
Q: I have a question, but I can't find my answer here. How do I get more assistance?
A: If you need immediate assistance, the IT Retail team is available 24/7. Feel free to contact our support team at 877-752-0625. You can also email us at support@marktpos.com, and we will respond within 24 hours.
Is this page helpful?
×Help us improve our articles