







Working With Products in Transactions
Adding products to a customer’s transaction is straightforward. Below is a step-by-step guide on how
 September 16, 2026
You can update product data for multiple all at once without having to change stores each time. See how easy it is!
Please Note: This feature is only necessary if you have more than one store in the system.
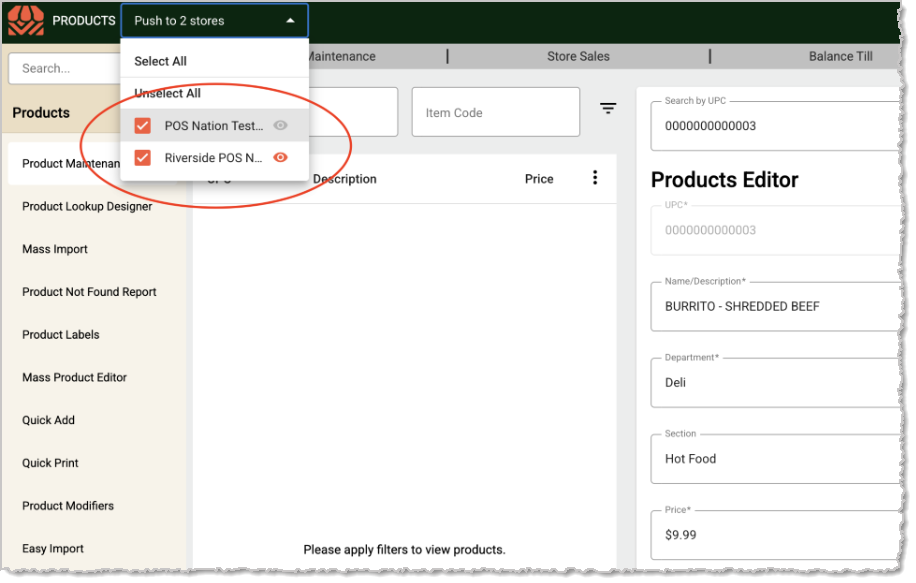
If you have products that need updates that are in more than one store, you can update all of them at once using the steps below. Start by clicking on the Store list at the top of the IT Retail page and selecting the stores you want, as pictured here.
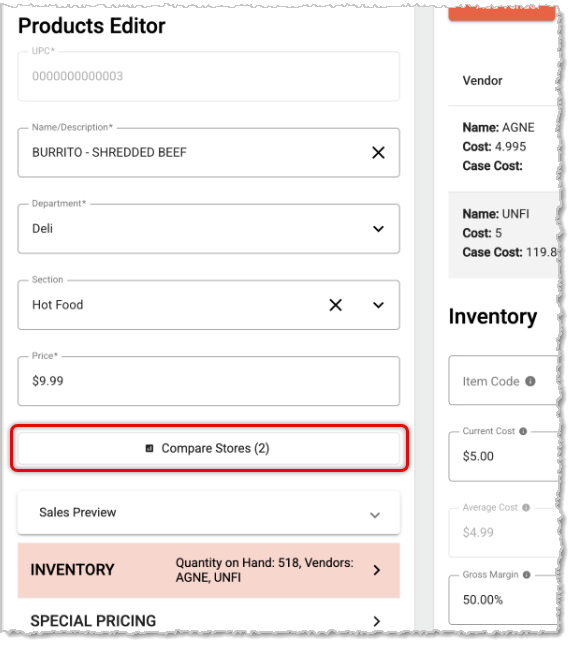
When you find the product you want to make changes to for the stores, at any time you can click to compare data points between the stores to see where they might be different for the product. In the center panel below the basic product information, click on the Compare Stores button. The button will show you how many stores you have selected, as pictured here.
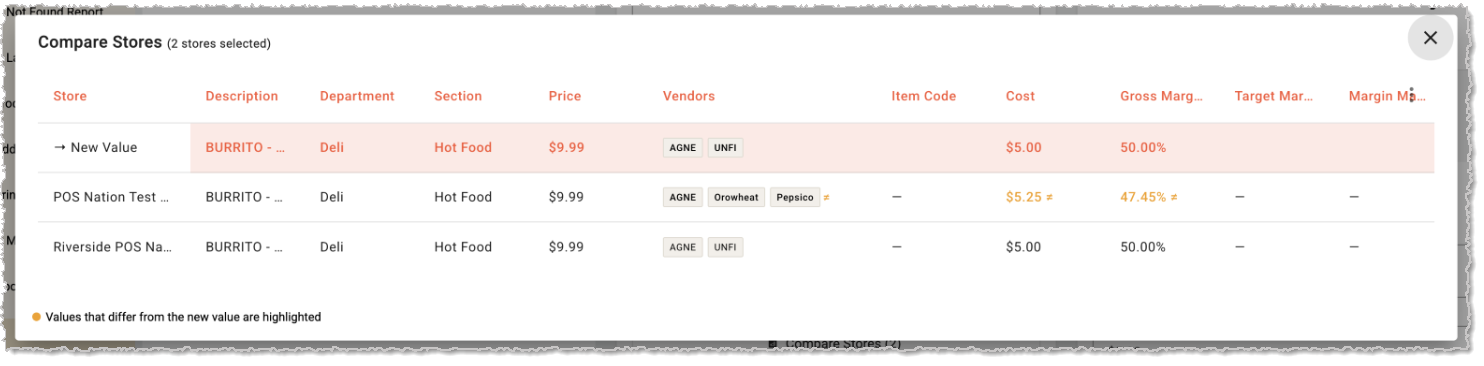
In the Compare Stores window, for each selected store you are able to see all of the product data points. These include the Description, Department, Section, Price, Vendors, Item Code, Cost, Gross Margin, Target Margin, Margin Management, Case Count, Case Cost, Reorder Quantity, Unit of Measure (UoM), Package Size, Low Inventory Alert, Quantity on Hand, Linked Products, Bundle, UPC Mapping, Special Pricing #1 and #2, Scale, Enforce Quantity, Foodstampable, WIC, WIC CVV, WIC Category, Discount, QSR Item, Prompt for Price, Expiration Date, Second Description, Scale by Count, Scale Label Format, Scale Department, Verify Age, Age, Taxes, Fees, CAS PLU Type, Ingredients, and Nutrition Facts. For any data points that are different from a 'New Value' they are highlighted for you in the store's row in a different color. The values in this window are for reference only.
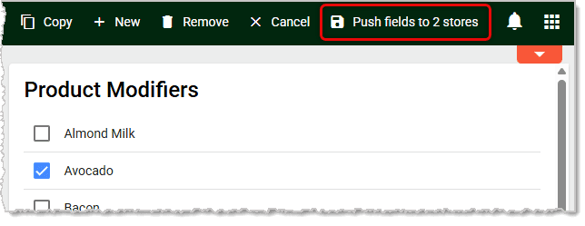
As you make changes to the product don't worry about keeping track. When you go to Save in the upper right, the system will pop up a confirmation that the changes have been saved for the main store you're logged into. The Save button will then change to a Push Fields to X Stores button, where X is the number of stores you've selected, as pictured here.
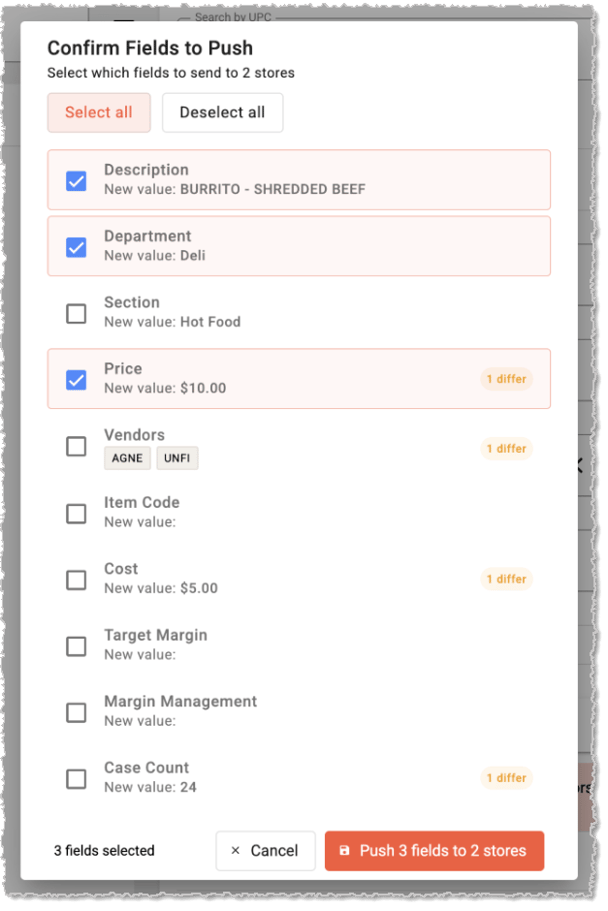
When you click the Push Fields to X Stores button, a window will open allowing you to Confirm Fields to Push to the selected stores for the item, as pictured below. Check the boxes for the fields you want to adjust with the pictured New Value for each. The window will highlight which fields currently have different values. Click the Push X Fields to X Stores button when you're done with your selections and the changes will be pushed to those stores. It may take the system a moment to push the changes, please be patient. A confirmation will pop up of the successful save after the system is done.
Create a Product in the Back End
Q: Do I have to push every field, or can I choose which ones update?
A: You can choose. In the Confirm Fields to Push window, check only the boxes for the fields you want to send to the other stores.
Q: Does clicking Save update the product for all my selected stores right away?
A: No. Save only applies to the store you're logged into. You still need to click Push Fields to X Stores to send the changes to the rest.
Q: I have a question, but I can't find my answer here. How do I get more assistance?
A: If you need immediate assistance, the IT Retail team is available 24/7. Feel free to contact our support team at 877-752-0625. You can also email us at support@marktpos.com, and we will respond within 24 hours.
Is this page helpful?
×Help us improve our articles