







Setting Up Receipt Texting
The IT Retail system lets you send customers copies of their receipts via text message, which saves
 January 22, 2026
If your company owns multiple stores, you can use Multi-Store to combine them in the Back End. This enables you to see Store Sales for all stores at once. You can also save time when you make changes to products in your stores. Learn how to set up Multi-Store usage so you can streamline your Back End experience!
You can use some functions and pages across all stores. This includes:
Customers. A customer can go to any store in your company to earn points and use In-Store Charge.
Customer Groups
Departments
Sections
Taxes. If stores have different tax rates between them, you may need to make departments with their own tax rates.
Fees
Employees. You can assign employees to more than one store. For example, a manager may have to travel from store to store, and they can sign into the Front End using the same password.
Roles
Tenders
Vendors
You can also view one or more stores when using the Store Sales report.
Other functions and menus, however, are specific to individual stores. That includes:
Products. These are unique to each store. If you carry the same products in different stores, you can import them from one store to another using the Export and Import functions.
Product Modifiers. These are also unique to each store.
Electronic Coupons. You'll have to create them for every store.
Inventory
End of Day Report
Balancing Forms
If you're looking to implement Multi-Store, contact the IT Retail Support Team. If you're a new customer, you can opt in for Multi-Store during the onboarding and initial setup phase.
After we've added Multi-Store to the Back End, you should first set up the receipts for your stores. Refer to the image below.
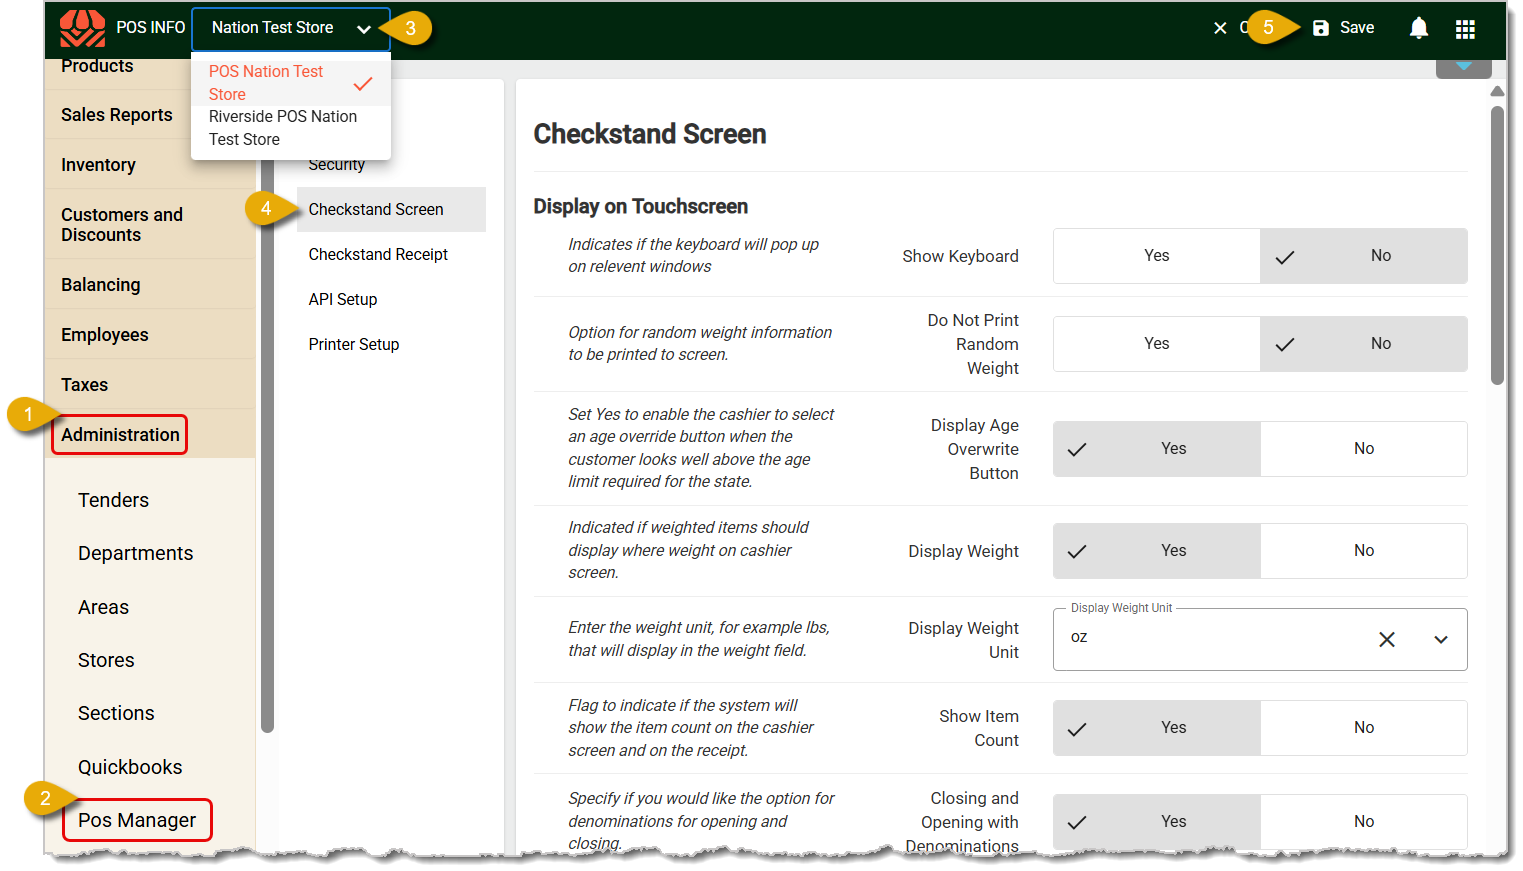
In the Back End, click on Administration.
From the Administration menu, click on POS Manager.
Next to the IT Retail logo, click on the Store Name and select the store you want to edit from the drop-list.
In the POS Manager menu, click on the Checkstand Receipt tab. On this page, you can edit settings and text for this store's receipt.
You can also assign Employees to multiple stores. Here is how to set employee access to your stores:
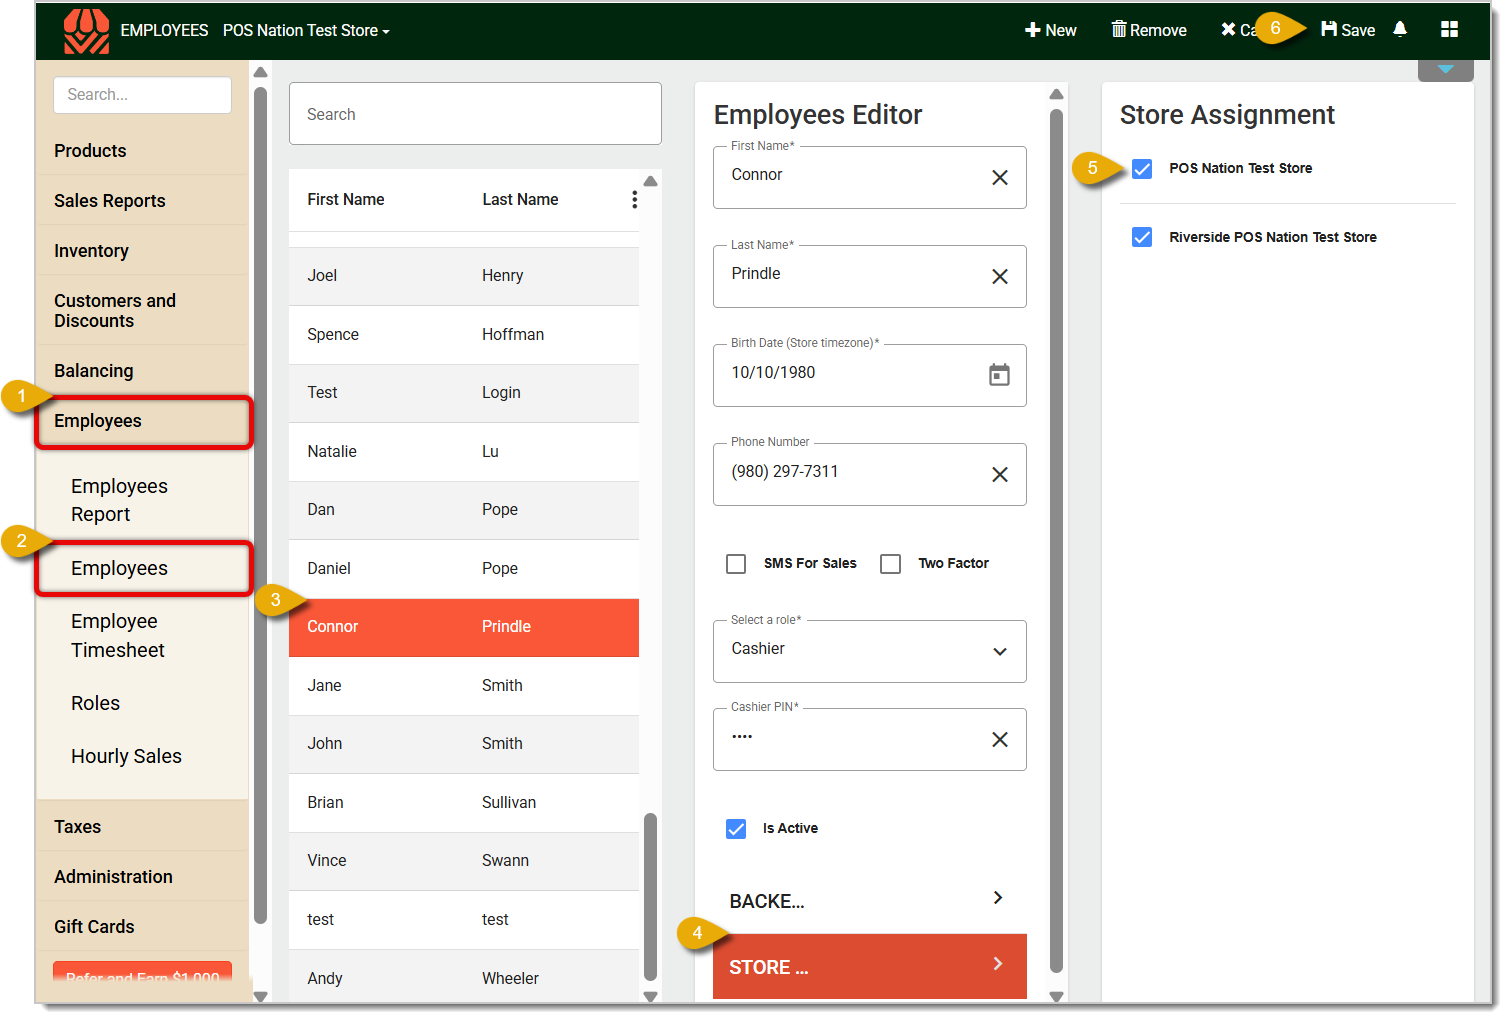
In the Back End, click on Employees in the main menu.
From the Employees menu, click on Employees.
Find and select the Employee you want by clicking on their name.
At the bottom of the Employees Editor, find Store Assignment and click on it.
Check boxes for each store you want to assign the employee.
When you log into the Back End, you'll first see the Dashboard, which is set to the first store you've created by default. At the top-left corner of the page, next to the IT Retail logo and Dashboard, you can click on the Store Name to change stores. In this drop-list, click on the store you want to work on. This will change the displayed Store Name.
When you're editing something, always check the Store Name, so you can make sure you're working on the correct one.
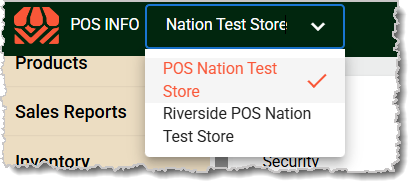
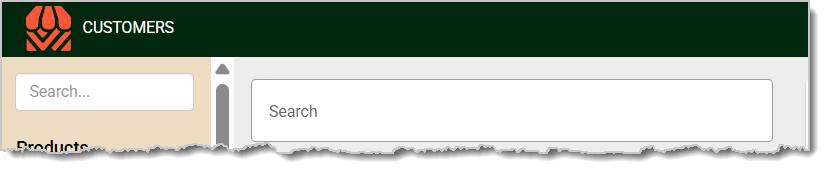
Pages or settings that apply to all stores, like Customers, won't have this drop-list, as pictured below.
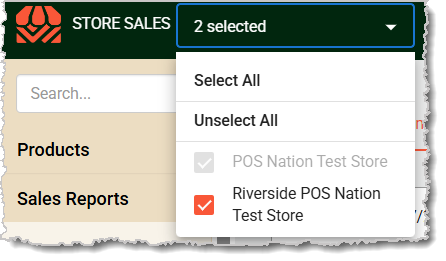
The Store Sales page can display data for one or more stores. The store selection drop-list on this page will let you select more than one. You can also click on Select All or Unselect All for shortcuts.
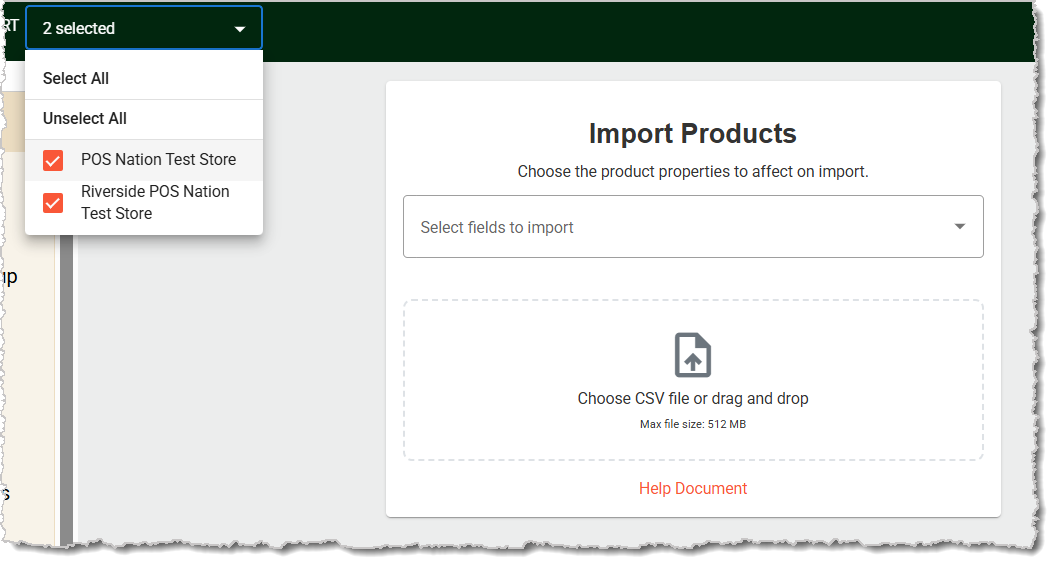
If you're using the Mass Import tool, you can similarly select one or more stores. You can also click on Select All or Unselect All for shortcuts. Use this if you need to import prices or products to one or all of your stores. Read the Mass Import article linked in Related Articles to learn more about using this tool.
Import Products 2: Easy Import
Import Products 3: Mass Import
Q: I have a question, but I can't find my answer here. How do I get more assistance?
A: If you need immediate assistance, the IT Retail team is available 24/7. Feel free to contact our support team at 877-752-0625. You can also email us at support@marktpos.com, and we will respond within 24 hours.
Is this page helpful?
×Help us improve our articles