To add new customers and edit existing ones in the IT RetailBack End, use the Customers page. You can add comprehensive details about your customers such as their Frequent Shopper status or their Customer Group. This article will show you all of the functions of the Customer page so you can organize customers with ease!
The Customers Page
To start, in the Back End, go to Customers and Discounts > Customers.
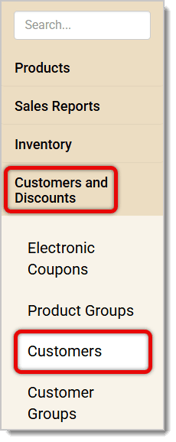
You'll see the Customers page that has a list of all existing customers and the Customers Editor. The Customers Editor is where you can add or edit details for your customers. Here is how to work with the Customers page:
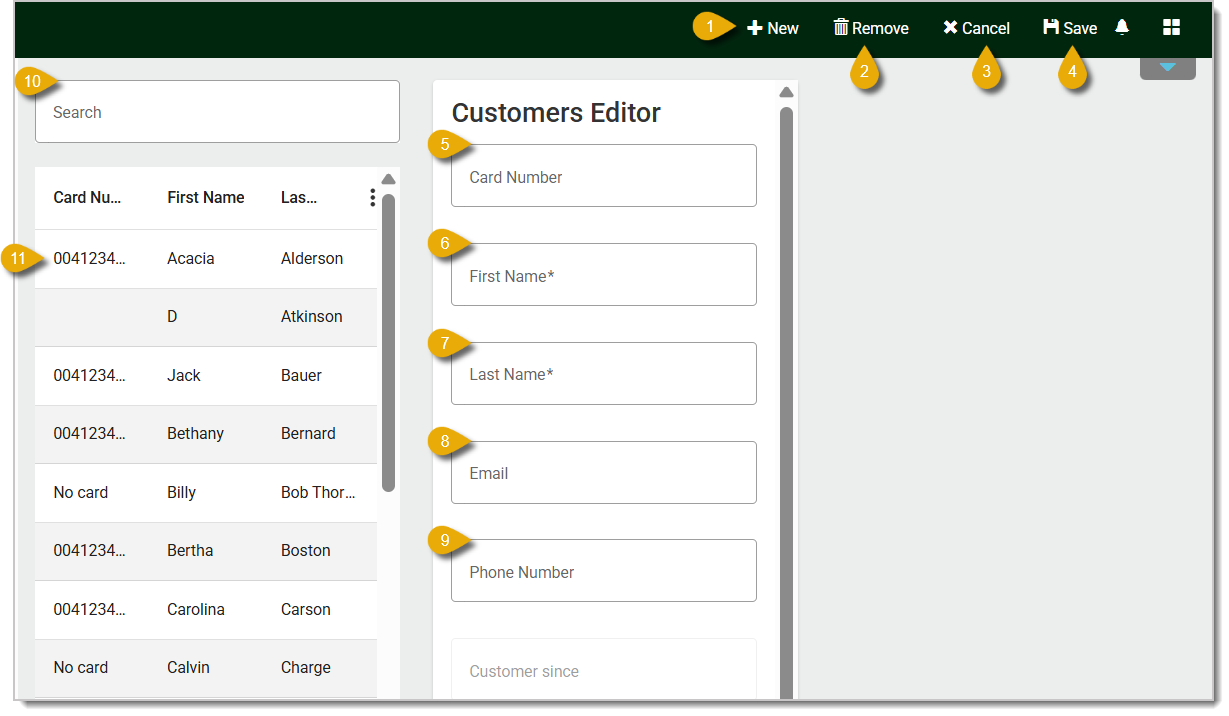
- New — Click on this to create a new customer. Doing so will clear out all fields in the Customers Editor.
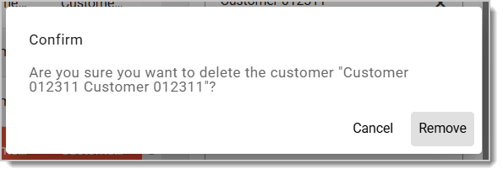
- Remove — If you have selected a customer who wants to be removed from your list, click on the Remove button at the top of the page to delete them from your system. It will first ask you if you are sure you want to delete this customer. Click on Remove to confirm and finalize the deletion.
- Cancel — If you want to cancel your changes, click this button at the top of the page.
- Save — Click on Save in the upper right to save a new customer or details you edited.
- Card Number — If your store uses customer loyalty membership cards, enter the customer's Card Number here.
- First Name* — Enter the customer's first name.
- Last Name* — Enter the customer's last name.
- Email — Enter the customer's email address. While only the First Name and Last Name are required here, we recommend adding the email address for easier lookup later.
- Phone Number — Enter the customer's phone number. While only the First Name and Last Name are required here, we recommend adding the phone number as well for easier lookup later.
- Search — Use this text field to search for existing customers by name, email address, or phone number. Matching results will load for you.
- Select Customer — Click on a list item to select the customer and view or edit their details. Their information will automatically pre-populate the fields in the Customers Editor.
Scroll down in the Customers Editor panel to enter the customer's Address, Properties, and Frequent Shopper Status. For every edit you make, be sure to click on Save when you're done, or you'll lose your work.
Click on the Address tab to enter the customer's street or mailing address. 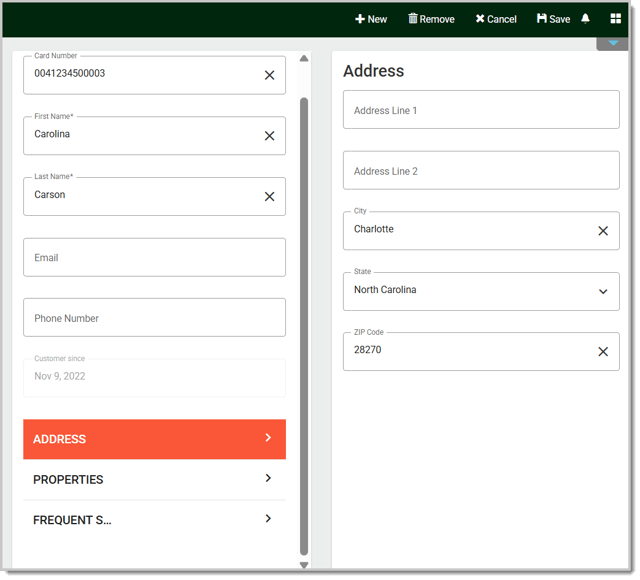
Click on the Properties tab to edit some of the customer's financial information. Here is what you can configure in this area:
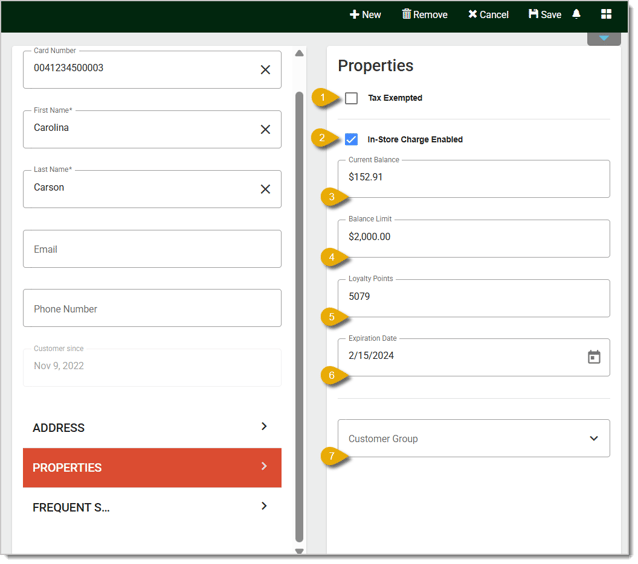
- Tax Exempted — Check this box to exclude taxes from the customer's transactions. You can learn how to add taxes through the Back End by reading our Taxes article linked in the Related Articles section below.
- In-Store Charge Enabled — Check this box to allow customers to have a charge account with the store.
- Current Balance — If the customer has a charge account, this will display the account's current outstanding balance, if any.
- Balance Limit — Set the maximum amount for the customer's charge account.
- Loyalty Points — This field will show the customer's total number of Loyalty Points. In for whatever reason you need to adjust the points, you can edit this number.
- Expiration Date — If your store charges for yearly customer memberships, you can set the expiration date.
- Customer Group — Select the Customer Group for the customer from the drop-list if they need to be in one. Find out how you can set up Customer Groups by reading the article linked in Related Articles below.
Click on Frequent Shopper to view and edit the customer's Frequent Shopper details. This is an area you can use to reward customers who shop with you often. You can see their Total Purchases amount and the Top Purchases for the items they buy most. For your top customers, you can add a Discount Percentage to give them a discount for all store purchases. You can also use this area to give friends, family, and employees a global discount.
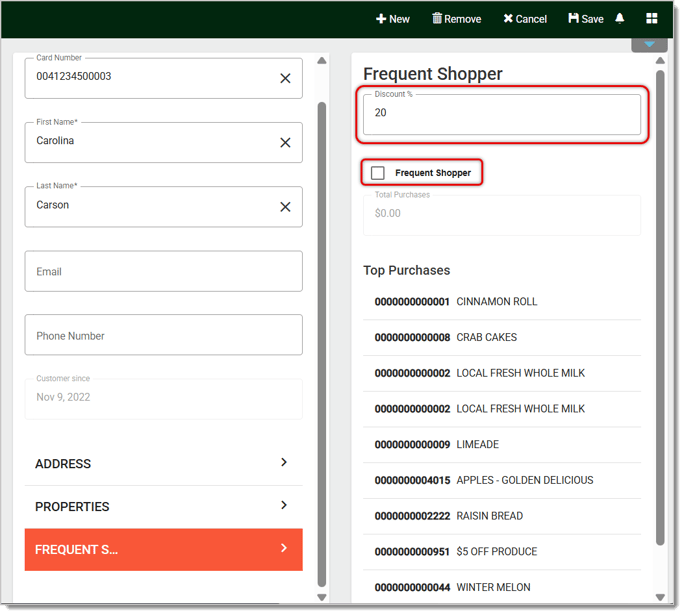
Under Discount, enter the percentage amount of discount the customer gets for being a Frequent Shopper. Also be sure to check the box for Frequent Shopper so the customer gets the discount. This discount applies only to items and departments that have been flagged for Allow Discount. Below these fields, you'll see the amount of their Total Purchases and a list of the customer's Top Purchases.
Also check if the customer’s membership has an expiration date in the Properties tab described earlier. Once that date passes, the Frequent Shopper box will become un-checked. If there is no expiration date, the customer will continue to have the Frequent Shopper discount as long as the Frequent Shopper box is checked.
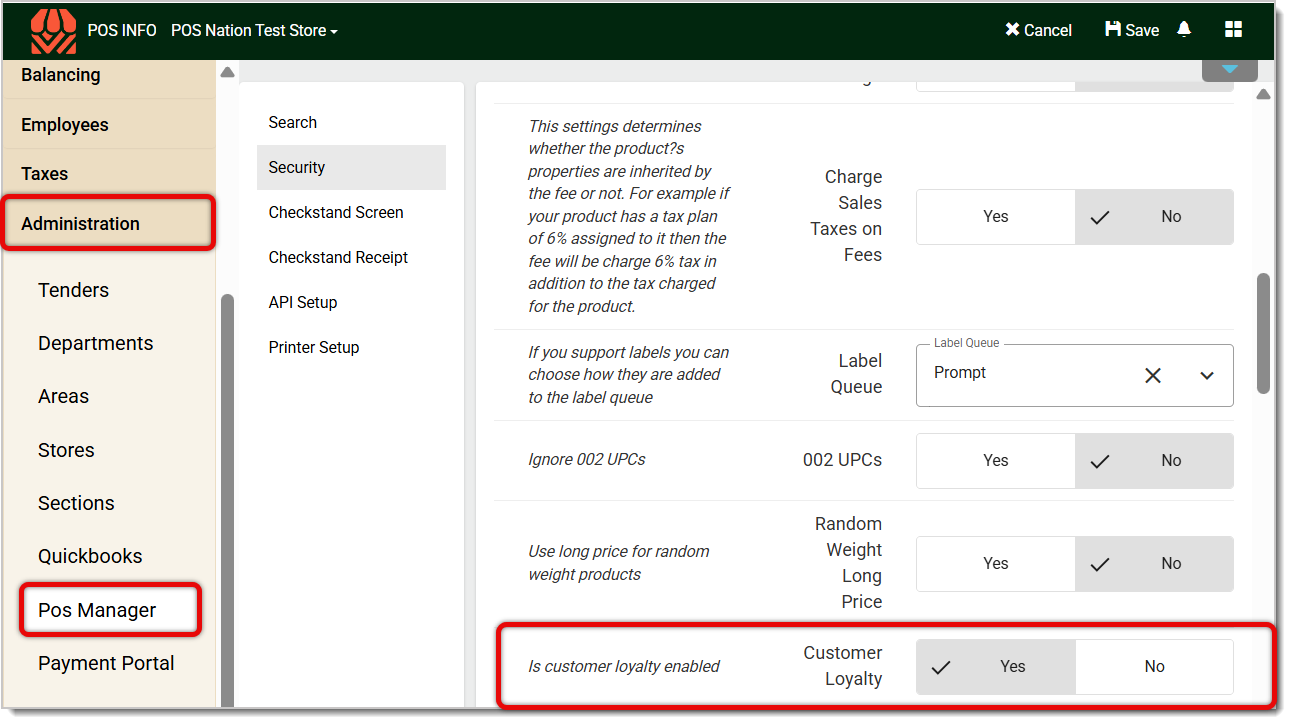
For your customers to receive Customer Loyalty points, make sure that you have Customer Loyalty enabled. To do so, go to Administration > POS Manager, then scroll down to find Is Customer Loyalty Enabled and check Yes.
Loading Customers in the Front End
After you’ve configured details for your customers, you can now load their information in the Front End. Here’s how to load a customer into a transaction and view their details in the register:
- In the Front End, click or tap on Customers.
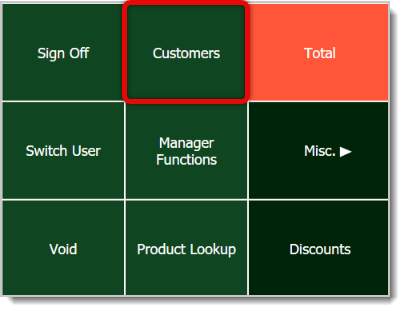
- A window will pop up for you to select the Customer. You can Search for the customer using the search bar at the top. Enter their name, email address, or phone number.
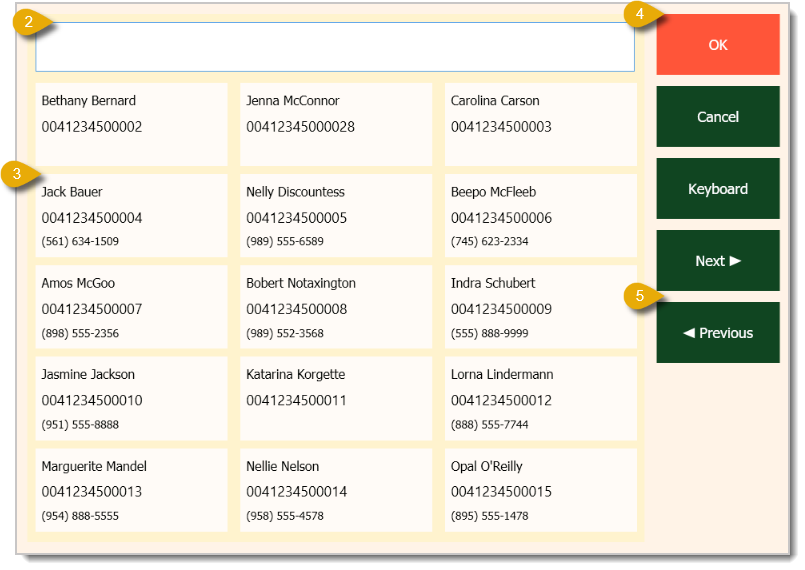
- Once you've found the Customer, click or tap on their name.
- Click or tap on OK to load the customer into the transaction.
- If you want to search for the customer by navigating through pages, you can click or tap on Next or Previous to browse.
- Once the customer is loaded in the transaction, you'll see their full name, Frequent Shopper discount (Customer Discount), if any, and current number of Customer Loyalty Points. If the customer has an In-Store Charge Account with your store, you can see their Customer Balance as well.

- Once the customer is ready to pay, click or tap on Total in the upper right.
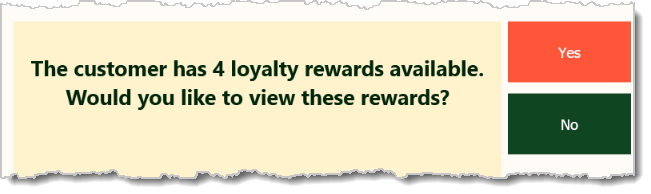
- If the customer is eligible for loyalty rewards, a window will pop up stating how many are available and asking if you'd like to view them. At this point, you can ask the customer if they want to use one. Click or tap on Yes to see the available rewards.
- Another window will pop up showing the available rewards. Ask the customer which one they'd like to use. The customer can use only one Loyalty Reward per transaction.
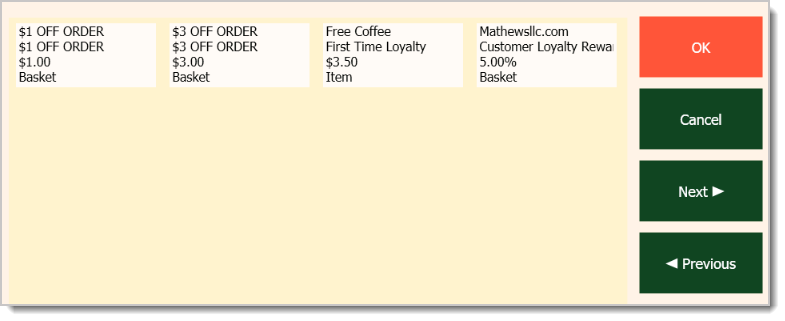
- Click or tap on the reward the customer wants.
- Click or tap on OK to finalize the selection.
- The loyalty reward discount will apply to the transaction. In this case, it applies to a specific item.
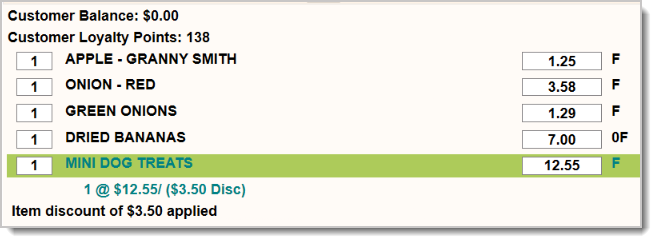
You can configure loyalty rewards in the Back End by going to Customers and Discounts > Discounts / Loyalty Rewards > Loyalty Reward.
Related Articles
Customer Groups
In-Store Charge Accounts
In-Store Charge Report
Discounts / Loyalty Rewards
Customer Loyalty
Customer Membership Expirations in the Back End
Customer Report
Taxes
Frequently Asked Questions
Q: I have a question, but I can't find my answer here. How do I get more assistance?
A: If you need immediate assistance, the IT Retail team is available 24/7. Feel free to contact our support team at 877-752-0625. You can also email us at support@marktpos.com, and we will respond within 24 hours.








 December 22, 2025
Is this page helpful?
×Help us improve our articles