IT Retail

Customer Groups

October 01, 2024October 01, 2024

You are able to set up groups to provide your customers discounts, which can be an excellent way to reward your best shoppers! This article will show you how to set up your customer groups and add customers to them. Take a look!


Working With Customer Groups

To get started with your Customer Groups, in the main system's Back End menu, click on Customers and Discounts, and then Customer Groups.
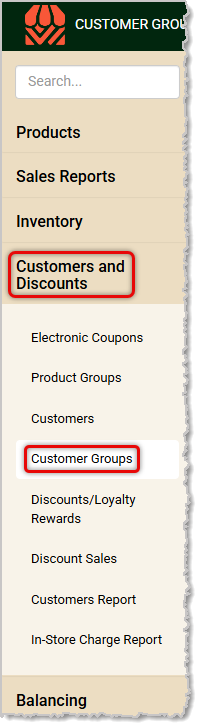
Image showing the Customer Groups link in the Customers and Discounts menu of the  system's back end.

You will see all Customer Groups you have created so far in the middle of the page. You can Search to find the one you want, then click on the name of the group if you need to edit any of the information.
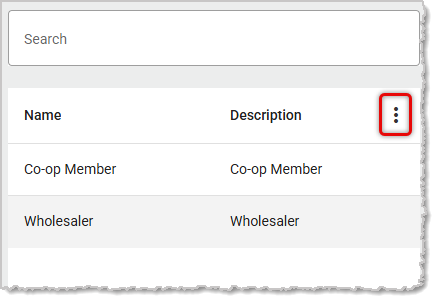
Image showing the list of customer groups in the back end of the  system.

On the far right is an action menu with options for exporting the data as CSV or PDF files. You can also adjust which columns display and any you might want to be hidden.
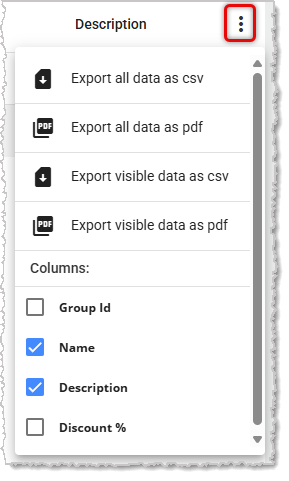
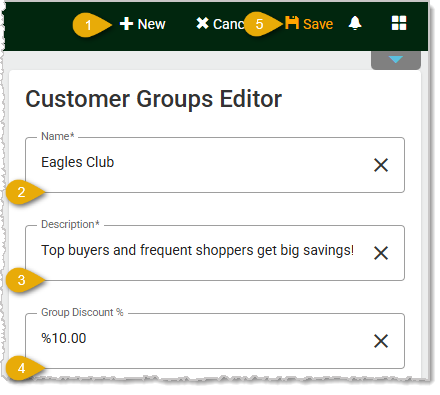
Image showing the action menu of the customer groups page in the back end of the  system.


Create a New Customer Group

Image showing the steps to create a new customer group in the back end of the  system.

  1. Create New — Click on the +New button to begin creating a new customer group.
  2. Name* — Enter the name you want for the group.
  3. Description* — Enter a brief description of what the group is about.
  4. Discount — Enter the percentage discount members of the group will receive for eligible items.
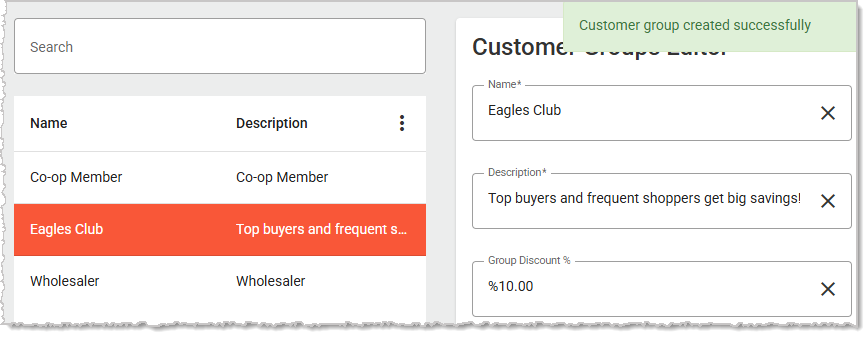
  5. Save — Click the Save button at the top to save your new group. You will see a confirmation that the new group was successfully created and you will see it appear in the list of your groups as pictured below.
    Image showing a successfully saved customer group in the  system's back end.

*This field is required in order to save the group.
 

Add a Customer to a Customer Group

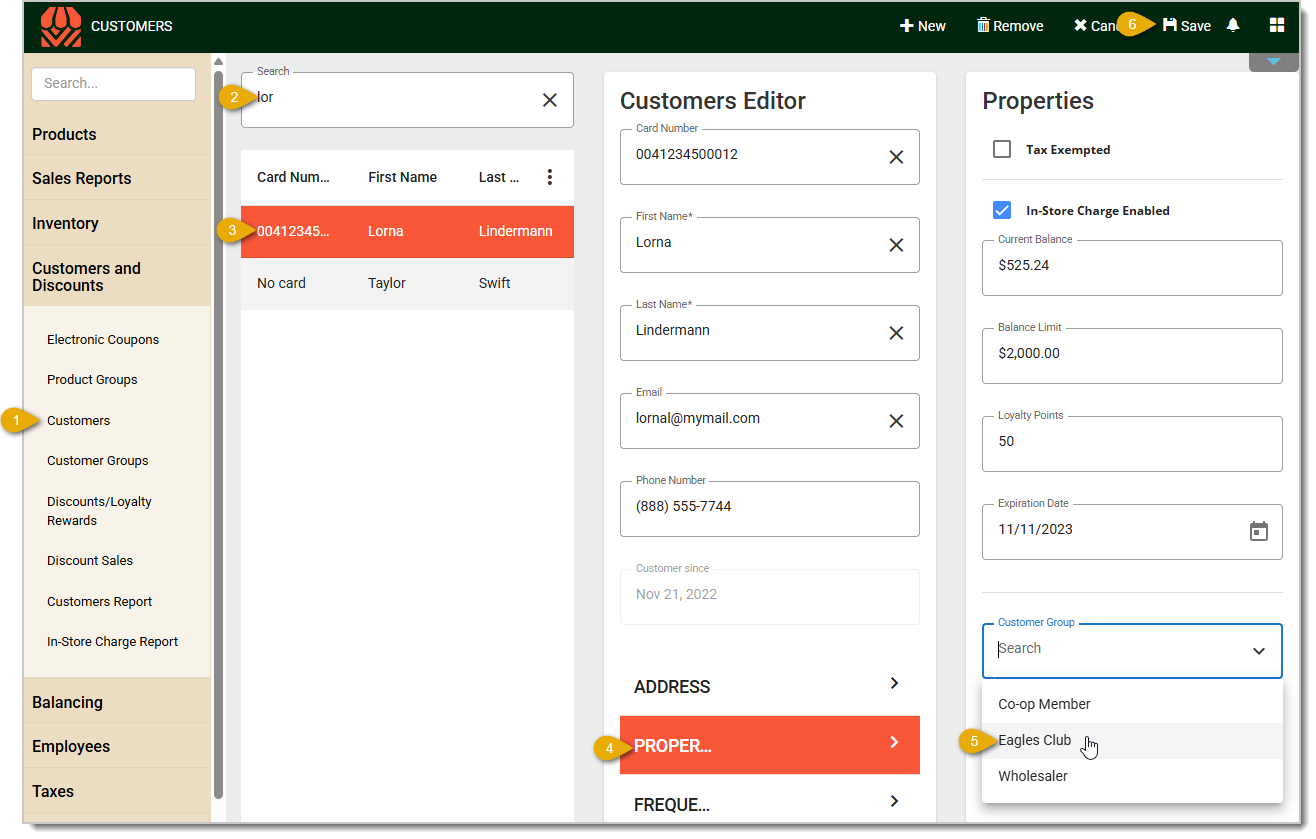
Image showing the steps to add a customer to a customer group in the  system's back end.

  1. Open the Customers and Discounts menu and click on Customers.
  2. Search for the customer you want by name, email address, or phone number.
  3. Click on the customer's name.
  4. Click on the Properties tab.
  5. Open the Customer Group drop-list and click on the group to which you want to add the customer.
  6. In the upper right, click the Save button to finish adding the customer to the group. You'll see a confirmation pop up in the upper right that the customer was successfully added to the group.

Moving forward, the customer will receive discounted pricing on items eligible for discounts at checkout! 


Related Articles

Customers

Discounts / Loyalty Rewards

Customer Loyalty

Customer Membership Expirations in the Back End

Customer Report

Cashier Training


Frequently Asked Questions

Q: Can I send a Bulk SMS message to my Customer Groups?

A: At this time you are not able to use Customer Groups with the Bulk SMS messaging tool, but in the future we hope to add this ability.


Q: I have a question, but I can't find my answer here. How do I get more assistance?

A: If you need immediate assistance, the team is available 24/7. Feel free to contact our support team at 877-752-0625. You can also email us at support@marktpos.com, and we will respond within 24 hours.

Need Help?

Can't quite find the answer you're looking for? Our support team is just a call away.