Import Products 3: Mass Import

December 12, 2025
If you are just starting up with the IT Retail system our Mass Import tool will help you get your products moved over from your old system. You can also use it to update existing product data if you like working with spreadsheets. This article will show you how to upload the data file and get your full data set into the system. Take a look!
Please Note: The data for this upload has to be very specifically formatted, so if you haven't already reviewed the article titled Import Products 1: Data File, please do so before going through these steps or the ones in Import Products 2: Easy Import. For full reference on all of the product data fields and how they are used, please refer to the article on Product Maintenance.
Mass Import Products
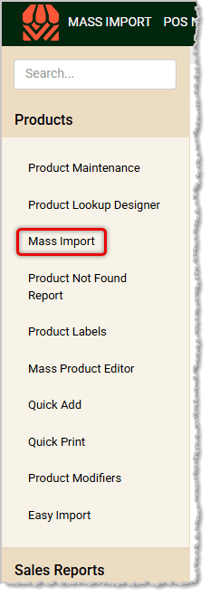
You will need to log into the Back End to set up this function. Click to open the Products menu, then click on Mass Import.
Here are the functions of the Mass Import tool:
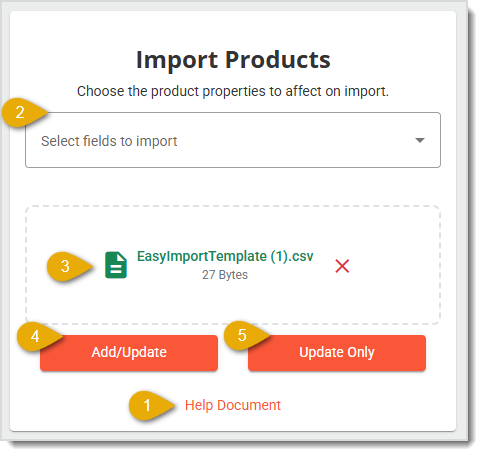
- Help Document — Click this link to download Standard and Advanced template files you can use as a starting point for building your product data file upload. The linked article has details on how that file needs to be formatted, required and recommended fields, and pro tips for working with the data in Excel. If you are just doing an update to saved products, or if you don't need all of the columns in a pre-made template, you should use the Product Properties below to build a custom template download.
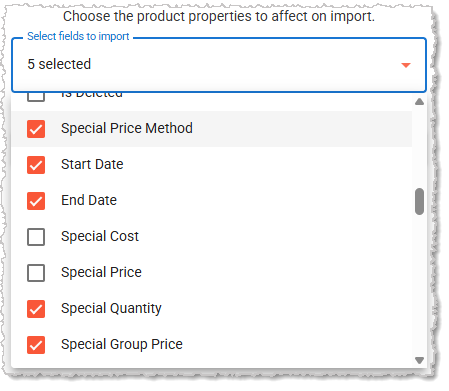
- Product Properties — Click to open the full list of all product properties from both the Standard and Advanced templates. If you are using one of those templates and if you're using all of the columns in that file, you do not need to do anything in this area. You should use this area if you aren't using all of the fields in a pre-made template. You can use this area to choose the properties you want for a custom upload template for only the data you are adjusting. You can Select All (or Unselect All), or if you're only editing a few fields for the products you're uploading, click on only those fields, as in the example below. In our example, we're updating Special Pricing for some products. The fields you select will be highlighted as pictured below. For full details on what each product property is and how to use it, refer to the article linked below about the Product Maintenance page. Information about how the data needs to be formatted will be provided in the Mapping step below.
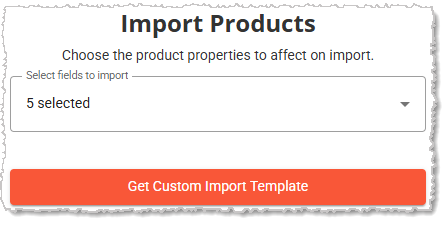
Once you have selected your properties, click outside of the drop-list to close it, and you will be able to click the button the Get Custom Import Template button to download your custom data file.
- Add Data File — Find the file you want to upload and drag and drop it into this area or you can just click anywhere in the area to open a window to browse your device for your file. We do not recommend importing or updating more than 2,000 products at a time, so to be safe, limit your CSV to 2,000 lines (not including the header row).
- Add / Update Products — Click this button if there are any new products in your data file. Your file can also have updates to properties of products that are already saved in the database.
- Update Only — Click this button if you are only updating existing products.
- Proceed to Mapping — Once you have clicked the appropriate Update button, the Map Import window will open, and that step of this process is detailed below.
Map Import Data and Completing the Upload
Once you have the Map Import window open, you can proceed with mapping your data fields so they will go into the IT Retail database correctly. The system will read your data file and show you the following:
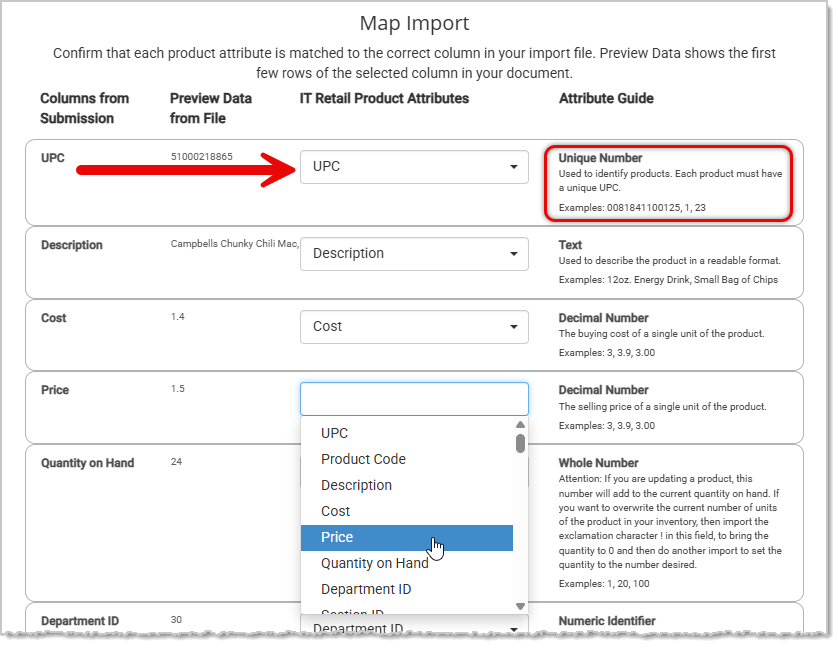
- Columns From Submission — You'll see all of the column headers you used for your data in this area. If you are working from a template, these will match exactly with the IT Retail Product Attributes column.
- Preview Data From File — In this area you'll see examples of data from your file for each of your columns.
- IT Retail Product Attributes — This area will show data points in the system that match each of your file's data points. If you are using a downloaded template from the system, they should match up perfectly, as in the example. If they don't match, you can click on the drop-list to select whatever product property matches the data item in your file. The relation between your data from your file and the chosen product property from the list is what we mean by 'mapping'.
- Attribute Guide — This area provides you useful information about the data in each column of your data file. First, in bold, it will give you the Type of Data, then a brief description of how it is used in the system, and finally an example of the data for that column. Use this information to better understand how to map your data to the product properties in the Product Attributes column of this window.
- Send Mapping Selections — Click the OK button at the bottom of the Map Import window to save your mapping for the data and proceed with the upload.
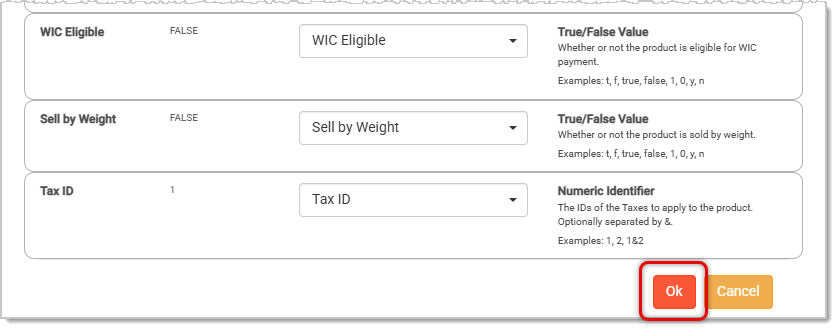
- Add Updates to Label Form — A window will pop up asking you if you want to add the updated products to the label form. Choose Yes if you will be printing shelf tags for the products, and No if you will not need to do print price labels. After making your selection, the system may need some time to process the upload, so please be patient!
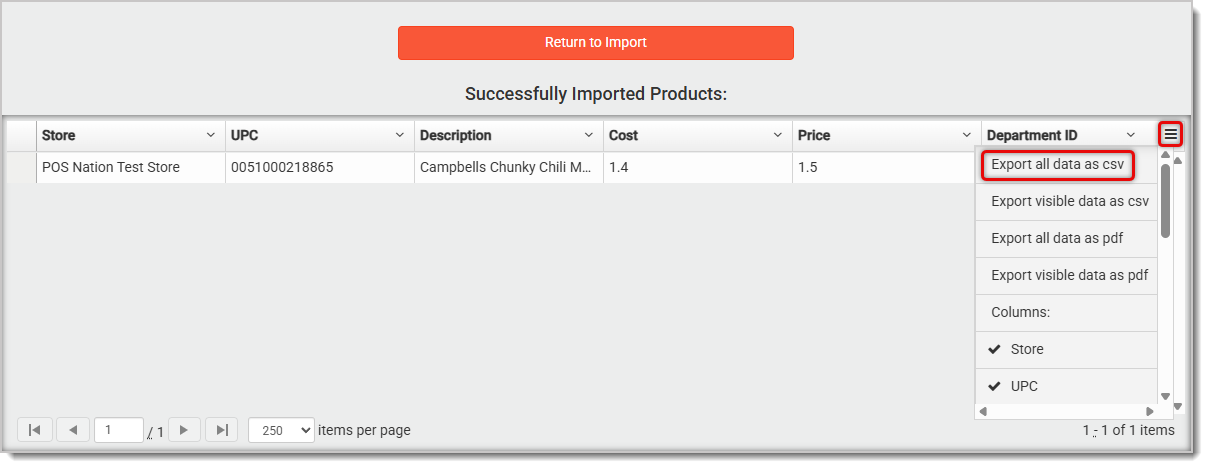
- Successfully Imported Products — Once the upload has finished updating in the database, you'll see the products that uploaded successfully in a new window. You'll some export and column visibility options using the Action menu in the upper right, as pictured below. If you want to run a comparison of the imported data versus your raw data, you can Export All Data as a CSV and work with it in that format.
Please Note: If there is a failed import you will be able to export a CSV listing the failed products and the reasons for the failures and you can repeat the steps above after fixing the data. If you need assistance with this, please contact our support team at the phone number at the bottom of this article.
That's it! You're all set!
Related Topics
Articles in this series:
Import Products 1: Data File
Import Products 2: Easy Import
Import Products 3: Mass Import (this article)
Product Maintenance
Mass Product Editor
Quick Add
Frequently Asked Questions
Q: I have a question, but I can't find my answer here How do I get more assistance?
A: If you need immediate assistance, the IT Retail team is available 24/7. Feel free to contact our support team at: 877-752-0625. You can also email us at support@marktpos.com and we will respond within 24-hours.
Adding products to a customer’s transaction is straightforward. Below is a step-by-step guide on how
Processing refunds and returns is a natural part of retail sales. We’ll walk you through the steps o
Going live with EBT (SNAP) is exciting and may not be as daunting as you’d think. We've done a few t








Is this page helpful?
×Help us improve our articles