







Cashier Training
Welcome to IT Retail, we’re so glad you’ve chosen our POS for your store! This article will guide yo
 January 16, 2026
When you want to connect your barcode scanners to IT Retail, you'll first have to set up the scanners to match your product file. To learn how to make your product file, read our first Import Products article. We'll explain the configurations you'll need for your scanners, both if your products do or don't have check digits. Read on to see everything you need to do for successful scanner setup.
The configurations below should already be your default settings. We generally recommend leaving check digits out of your Product File.
Product File
Every single product in your file must not have check digits, as consistency is important in making sure your scanner is successfully set up. Check digits are the last digits in barcode numbers. These help with error detection when someone manually inputs the barcode number to transactions. To check if your UPCs have left out check digits, count the number of digits in one UPC. For UPC-A barcodes, it should have 12 digits. If the rest line up with the code you've checked, you can confirm that you've left out check digits.
Back End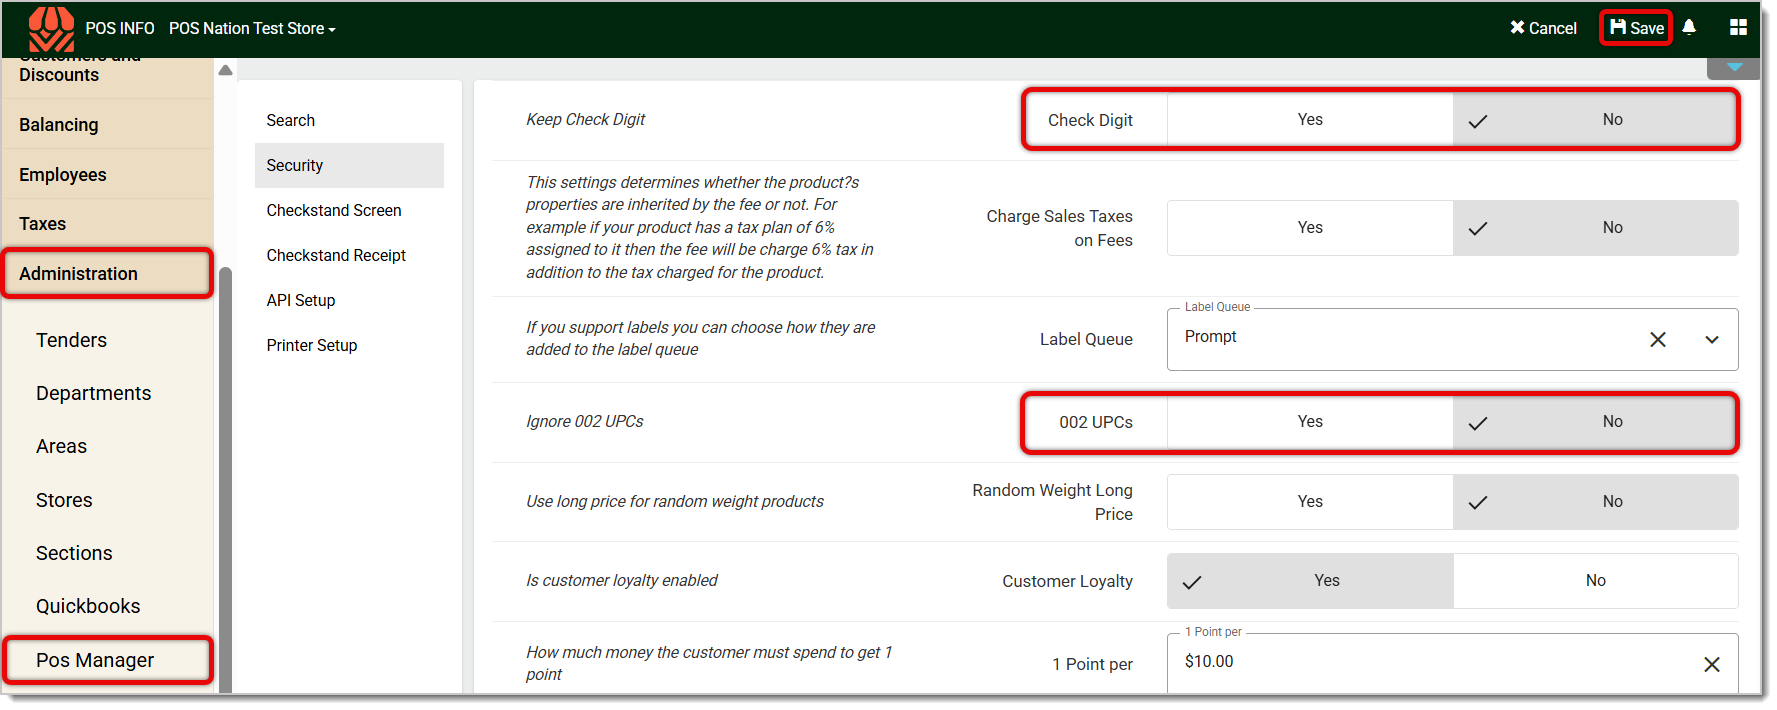
In the IT Retail Back End, go to Administration > POS Manager.
On the POS Manager page's Security tab (default), scroll down the Initial Setup section until you find Keep Check Digit/Check Digit. Click on No.
If you instead want to use check digits in your product file, here are the settings you should use.
Product File
Make sure that every item in your product file has check digits. This is a must, or the scanner will not successfully configure every product. Check digits are the last digits in barcode numbers. These help with error detection when someone manually inputs the barcode number to transactions. To check if your UPCs have check digits, count the number of digits in one UPC. For UPC-A barcodes, it should have 13 digits. If the rest line up with the code you've checked, you can confirm that your file includes check digits.
Hardware
The scanner will have to be configured to accommodate check digits. Since this is not the default configuration, the IT Retail support team will need to reformat your scanner.
Back End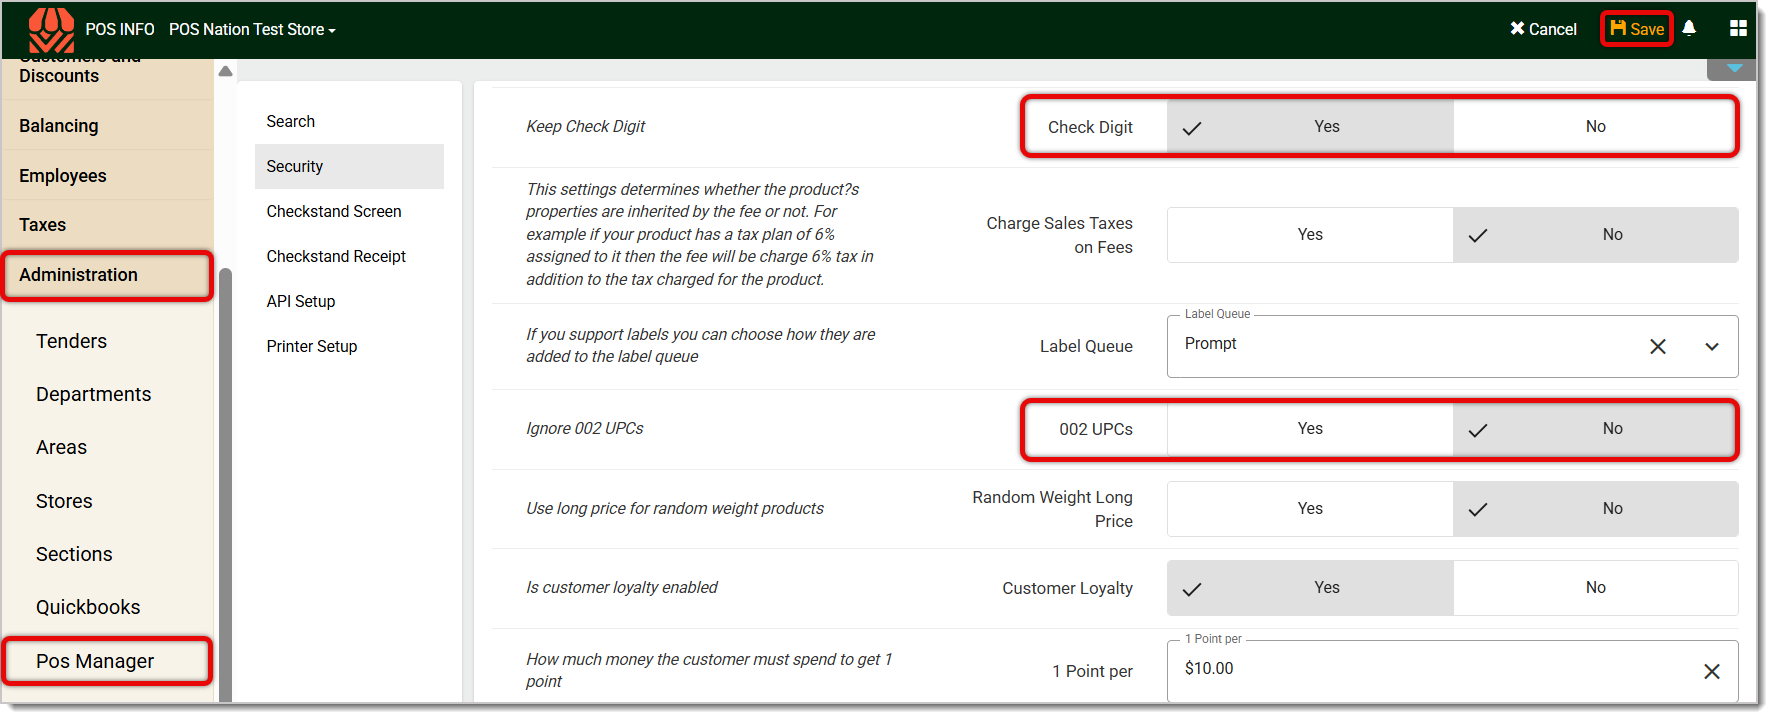
In the IT Retail Back End, go to Administration > POS Manager.
On the POS Manager page's Security tab (default), scroll down the Initial Setup section until you find Keep Check Digit/Check Digit. Click on Yes.
Q: I have a question, but I can't find my answer here. How do I get more assistance?
A: If you need immediate assistance, the IT Retail team is available 24/7. Feel free to contact our support team at 877-752-0625. You can also email us at support@marktpos.com, and we will respond within 24 hours.
Is this page helpful?
×Help us improve our articles