







Cashier Training
Welcome to IT Retail, we’re so glad you’ve chosen our POS for your store! This article will guide yo
 December 04, 2025
Using Product Lookup from the Front End is an easy way to ring up items that customers frequently purchase. Before a cashier can use the Product Lookup from the register, though, you’ll first have to set it up in the Back End using the Product Lookup Designer. In this article, we’ll show you where to access the designer and how to use it. Read on to see how easy it is!
In the Back End main menu, click on Products > Product Lookup Designer to open the designer.
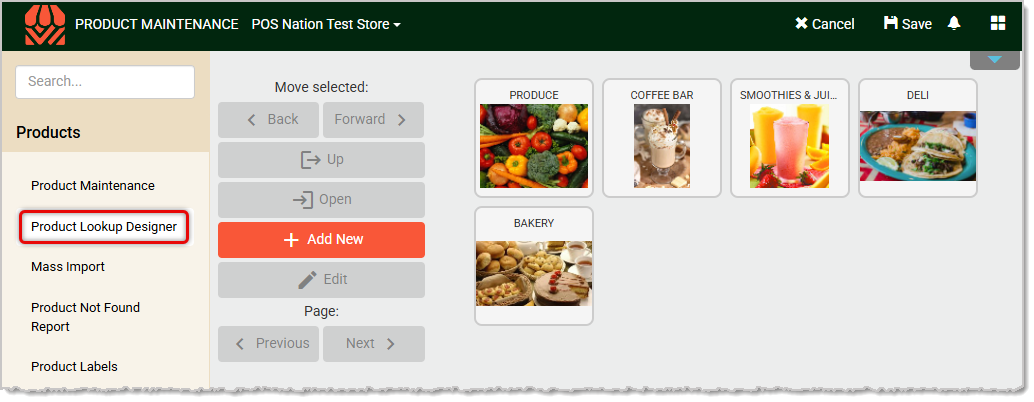
You should start by creating categories for the Product Lookup window. This makes navigating it on the Front End much easier. Since categories do not have to be associated with specific departments or sections, we recommend having one called Favorites or something similar for the most commonly purchased products.
In the Product Lookup Designer, click on Add New. This will open the Add Category window. 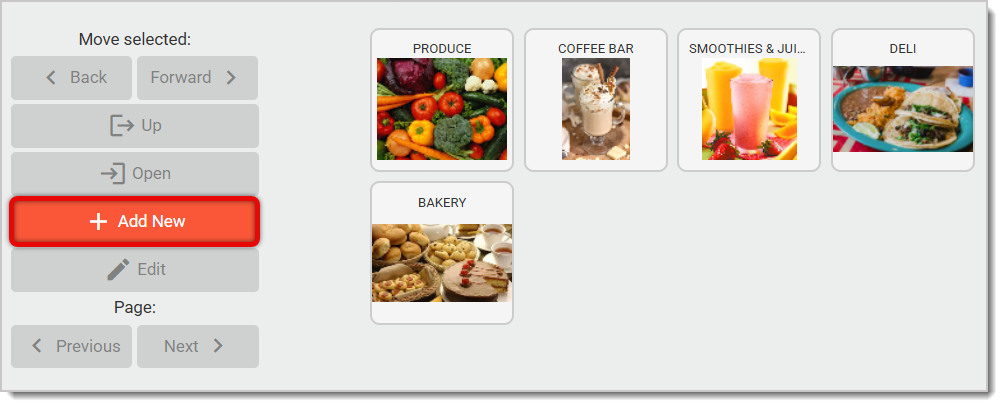
Enter the Category Name.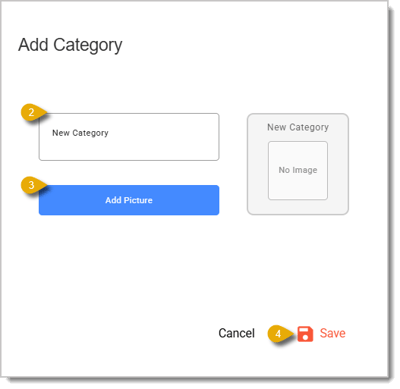
Click on Add Picture to upload an image.
Click on Save on the bottom right to save and create your Category.
Please Note: The Product Lookup Designer only supports images in the .png format at this moment. If your image is not in .png format, you can change the file extension or use a file converter.
Adding products to a Category in the Product Lookup Designer is similar to creating Categories:
Click on a Category to select it. You’ll see it outlined in red, as in the thumbnail for Deli selected in the image below.
Click on Open from the menu of options to the left of the Categories.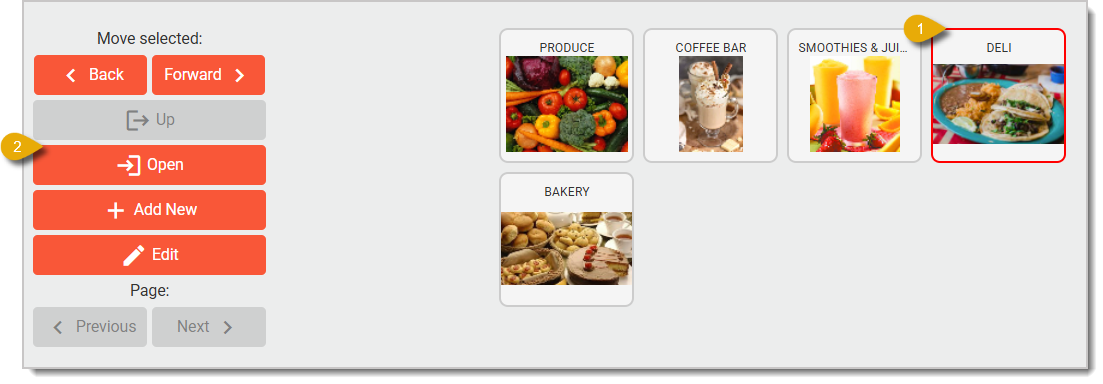
After you’ve opened the Category, click on Add New from the left-hand options.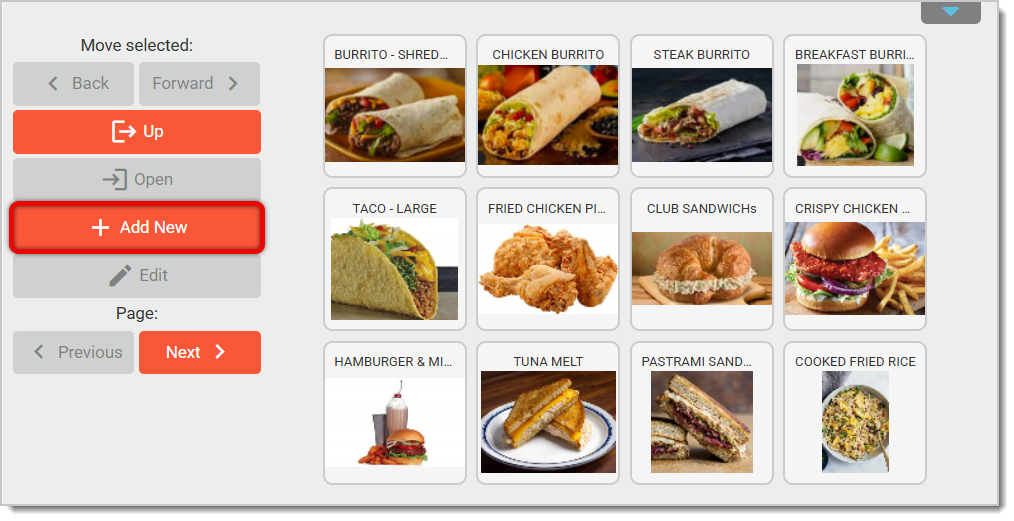
After you’ve opened the Add Button window, you can search for the item you want in the Select Product field. Enter the UPC or name of the product. 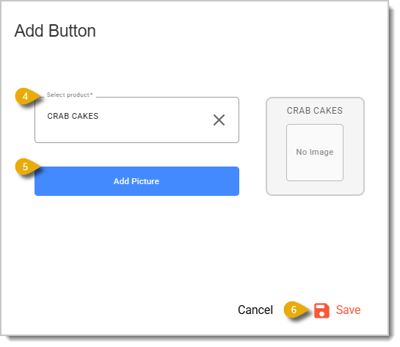
You can also click on Add Picture to upload a corresponding image.
Click on Save in the bottom right to add the product to the Category.
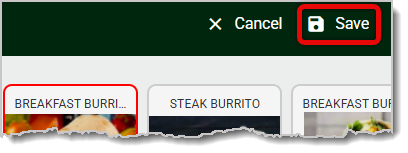
Now a cashier can use Product Lookup on the Front End to add that item to a transaction.
Working With Products in Transactions
Q: Should I add all my products to the Product Lookup window?
A: We recommend adding items that you will reorder and that are frequently purchased by your customers. For seasonal items or items you may not reorder, it is not recommended to add them to the Product Lookup window.
Q: I have a question, but I can't find my answer here. How do I get more assistance?
A: If you need immediate assistance, the IT Retail team is available 24/7. Feel free to contact our support team at 877-752-0625. You can also email us at support@marktpos.com, and we will respond within 24 hours.
Is this page helpful?
×Help us improve our articles