With the Purchase Orders Import tool you have two ways to import invoice data, either by spreadsheet or by image file upload. For the image upload, you take a picture of the invoice and upload the image and the system imports it as a purchase order. This article will instruct you on how to import your purchase orders using both of these methods. See how fast and easy we've made this process!
The Purchase Order Import Tool
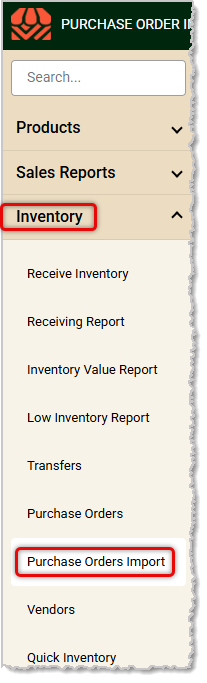
You can get to this part of the system by logging into the Back End and going to Inventory > Purchase Orders Import.
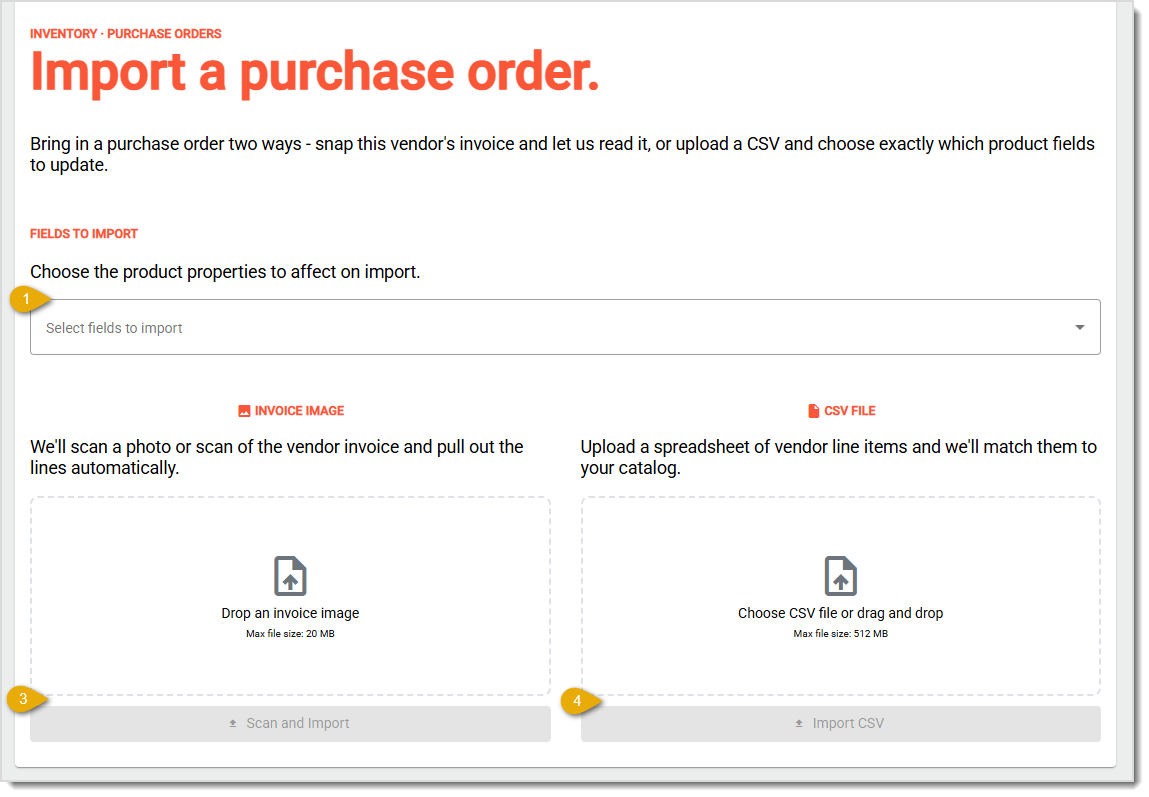
The Purchase Orders Import page gives you two ways to quickly import a Purchase Order. You can either take a photo of the invoice and let the system import it, or you can upload a CSV spreadsheet of the order data. Here is how to use this page:
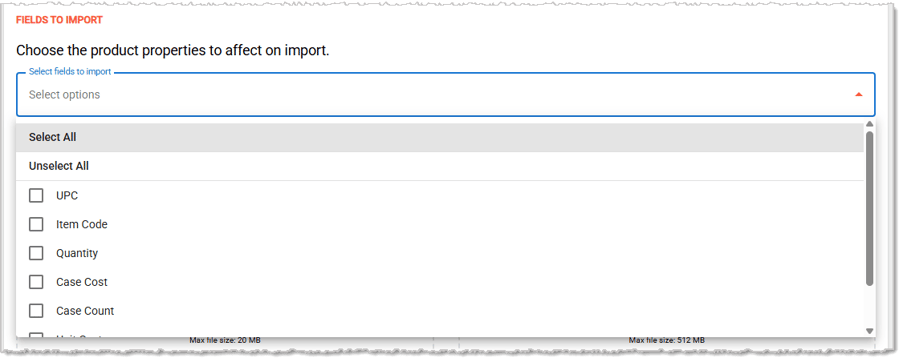
- Select Fields to Import — Click the Select button to see the list of product attributes you can have in your custom import template. Select the ones you want, then click the button again to collapse the drop-list.
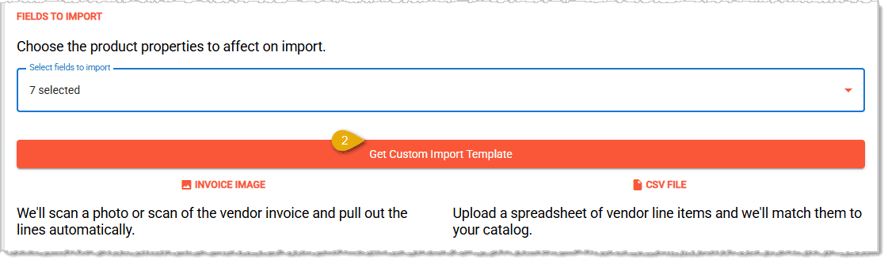
- With your attributes selected, you'll see a button to Get Custom Import Template. Click that button to download your CSV spreadsheet file.
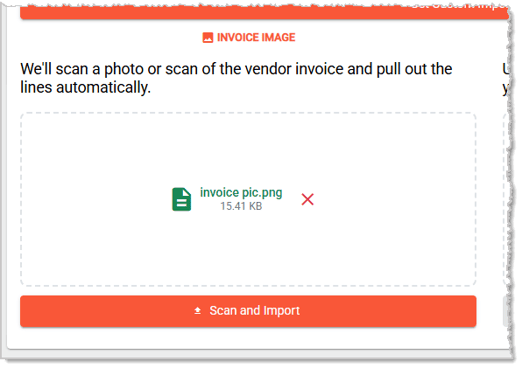
- Invoice Image — Drag and drop either a photo or a scanned image file of your invoice into this area. The Scan and Import button will become highlighted and you can click it to proceed. We recommend JPG or PNG images, and the maximum file size is 20MB. You can see the completion of this process in the section below called Auto-Create a Purchase Order From an Image.
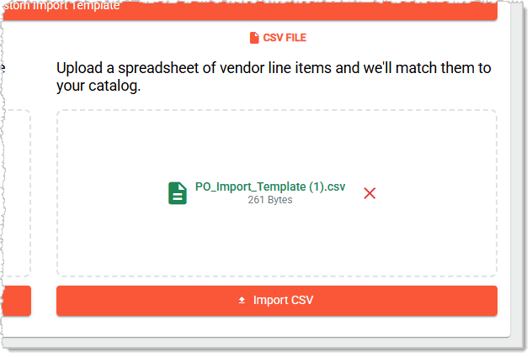
- CSV File — If you already have a CSV with the data you need, you can drag and drop it into this area or click in this area to browse your device for the file. If you have built a custom template, open the CSV file you downloaded and add your data for the products that will be in your purchase order, then drag and drop the file to this area as described. Once your file is added, you'll see the file name and size, as pictured below. The Import CSV button will become highlighted and you can click it to begin the process. You can see the completion of this process in the section below called Create a Purchase Order From a CSV Import.
Auto-Create a Purchase Order From an Image
Once you have clicked the Scan and Import button for your Purchase Order image, the system will open the Review PO window and you can do the following:
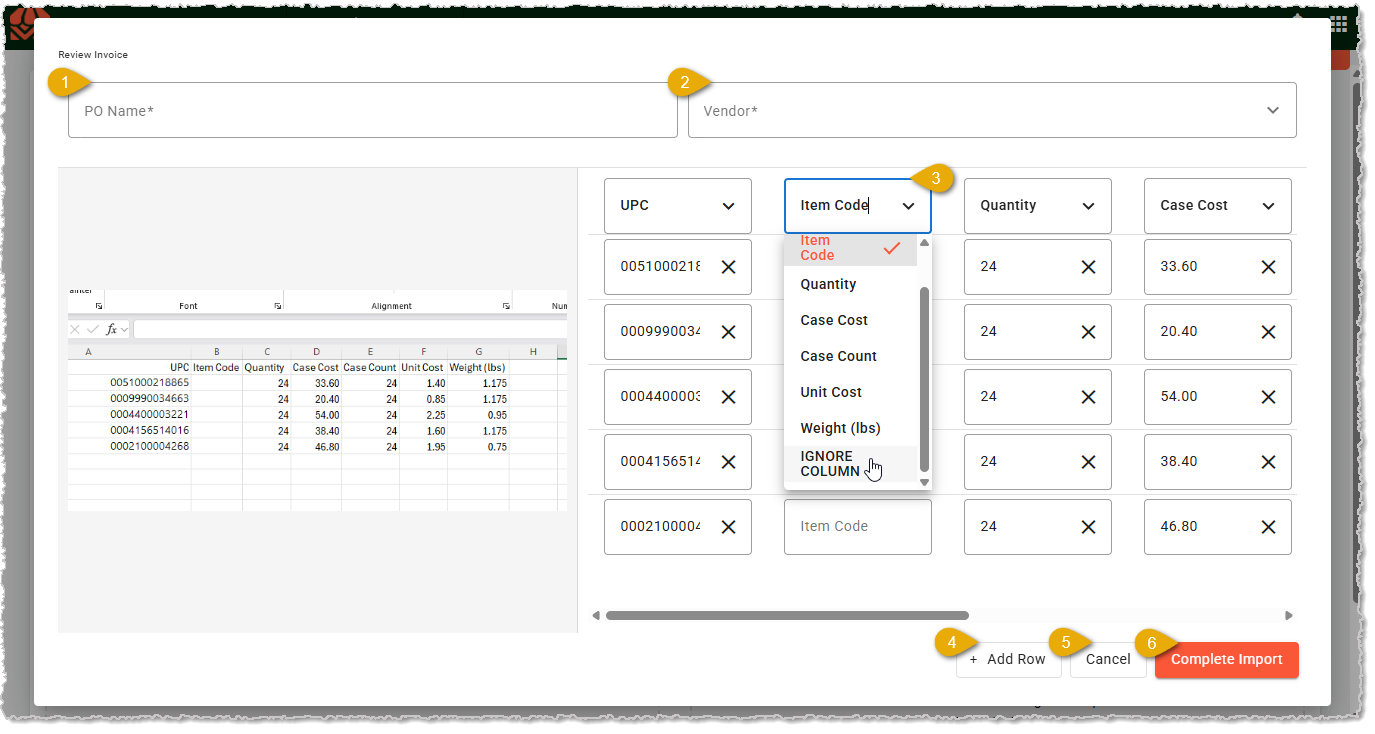
You'll see your image in the lower left. Unlike the way this area worked previously, you won't have to work with a CSV file; the system will create a Purchase Order for you directly from the image, after you review the data.
- Purchase Order Name — Enter the Name you want for the PO.
- Vendor — Click the Vendor drop-list and select the one you want for the PO.
- Item Data — The system will match data items as best it can, but in some cases, in the top row you may need to click the drop-list and either Ignore Column or specify which of the allowed columns the data should map to. For the data items themselves, you can click the X and enter corrected data, if you need.
- Add Row — If you need to add another product to the PO, click this button and fill out the data fields.
- Cancel — If you no longer need to import this data as a PO, click this button.
- Complete Import — Click this button when everything is ready, and the system will save the PO in your list of Purchase Orders.
Create a Purchase Order From a CSV Import
You'll see a preview of your data from the CSV on the left with just a few items as examples of each of the Columns from Submission. If you used the downloaded template, the data columns should map over perfectly. Here is how to use the Map Import window:
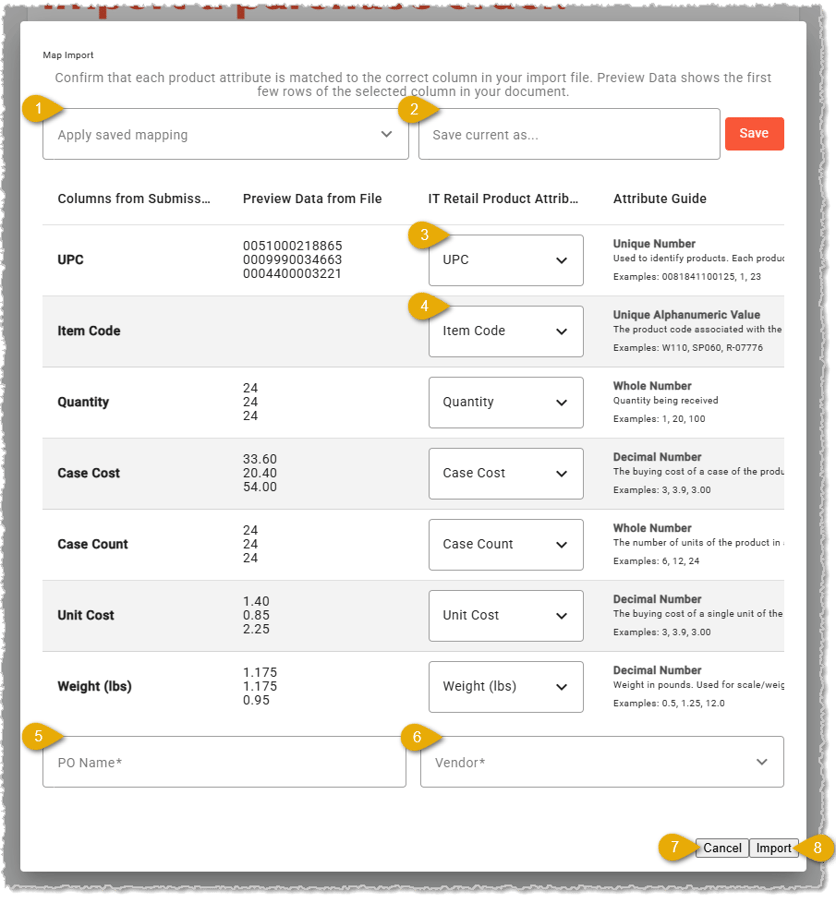
- Apply Saved Mapping — In the Map Import window, if the format for the Purchase Order Import is one you've saved already as a template, you can click this area to choose the one you want from the list and click on its name. The mappings in that template will automatically populate, saving you time in manually configuring them.
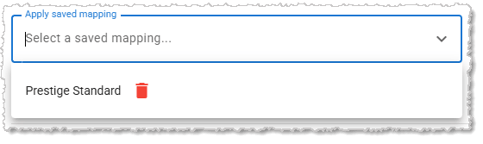
- Save Current As — If you will re-use the mapping configuration for future PO imports, you can enter a name for a reusable Template here. Click the Save button to save your template for future use.
- Map Data Columns — Make sure that the columns from your file (Columns From Submission) match up with product properties (IT Retail Product Attributes). For example, in the image above, UPC was automatically mapped to the UPC product attribute.
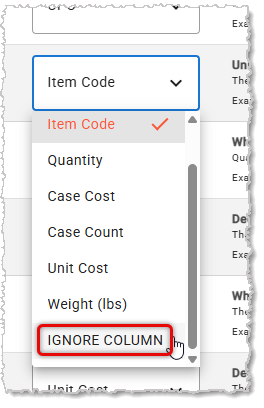
- Unused Data Columns — If you have any empty data columns, as in the example above, or if there are any that are different from those in the Template that cannot be imported (Only UPC, Item Code, Quantity, Case Cost, Unit Cost, and Weight (lbs) can be imported), you can click the attribute name and select Ignore Column, as pictured below.
- Purchase Order Name — At the bottom of the window, you will want to enter the PO Name you want if it's not already populated.
- Vendor — If it's not already populated, select the Vendor(s) for the order.
- Cancel — If you no longer need to import this data as a PO, click this button.
- Complete the Import — Click the Import button to save the mapping and complete the upload. If there are any errors in the data, you'll be informed and can download a list of the items that failed to upload. If any one item fails, the system will not import the others and you will need to fix the data before you can upload it again. If you need help with this process, please call our support team using the information at the bottom of this article and we'll be delighted to assist you!
Related Articles
Purchase Orders
Create Purchase Orders for Low Inventory
Receive Inventory
Receiving Report
Inventory Value Report
Low Inventory Report
Quick Inventory
Frequently Asked Questions
Q: What image formats and file size work for the invoice upload?
A: JPG or PNG work best, and the file needs to stay under 20MB.
Q: What happens if one item in my CSV fails to import?
A: The whole import stops. None of the items import until you fix the failing data and upload again.
Q: Can I reuse the same column mapping for future CSV imports?
A: Yes. Save your mapping as a template with Save Current As, then pull it up again later with Apply Saved Mapping.
Q: Which product attributes can actually be imported through a CSV?
A: Only UPC, Item Code, Quantity, Case Cost, Unit Cost, and Weight (lbs). Any other column needs to be set to Ignore Column.
Q: Do I need a CSV file to use the image upload option?
A: No. The system builds the Purchase Order directly from the image after you review the matched data — no spreadsheet needed.
Q: I have a question, but I can't find my answer here. How do I get more assistance?
A: If you need immediate assistance, the IT Retail team is available 24/7. Feel free to contact our support team at 877-752-0625. You can also email us at support@marktpos.com, and we will respond within 24 hours.








 January 06, 2026
Is this page helpful?
×Help us improve our articles