







Cashier Training
Welcome to IT Retail, we’re so glad you’ve chosen our POS for your store! This article will guide yo
 January 07, 2026
The IT Retail system allows you to create discounts and and loyalty rewards to give your customers. This article will guide you through how to create and use your discounts and rewards. Explore what's here for you!
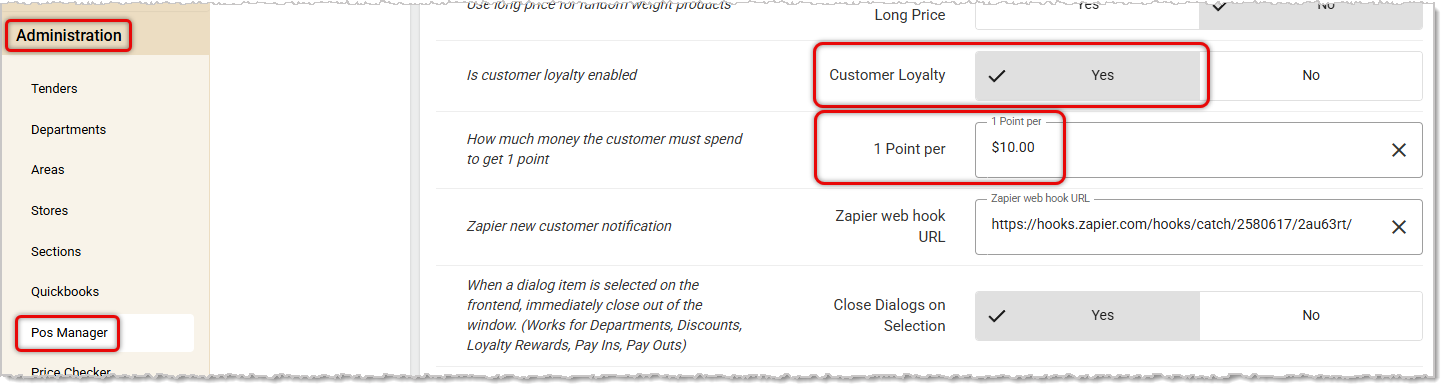
If Customer Loyalty is not already enabled for your store, in the Back End, here is how you can enable it:
Click to open the Administration menu and go to POS Manager, click to open the Security tab, and scroll down until you see the Customer Loyalty setting. Click to enable it. Configure how many Customer Loyalty points your customers will earn per dollar they spend in the store in the 1 Point Per setting shown below. Once you are finished, in the upper right, click Save.
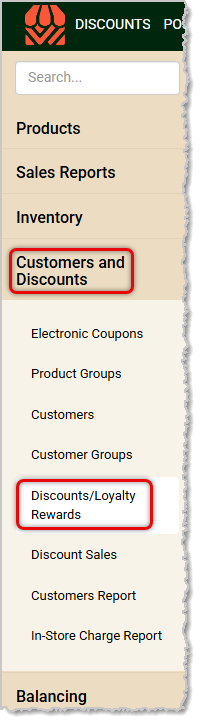
You can get to this part of the system by logging into the Back End and opening the Customers and Discounts menu. Click on Discounts / Loyalty Rewards to get started.
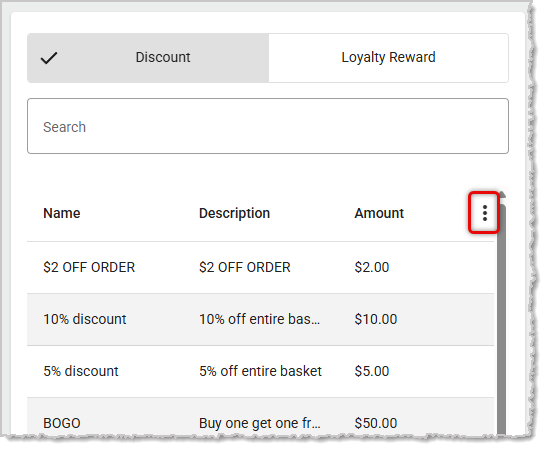
You will see all discounts and loyalty rewards you have created so far listed in the middle of the page. There is no difference in the data and structure between Discounts in the system and Loyalty Rewards, they are really just different names for the same thing and they are applied in different situations.
Discounts can be applied by your cashiers in the Front End if the conditions for a discount have been met. For example, if it's the correct day of the week or if there are any discount-eligible items in the transaction. You can apply discounts to individual items or to the entire transaction. Please see the article linked below for How to Apply a Discount in the Front End for full details.
For Loyalty Rewards, when a customer has earned enough reward points, they are able to redeem a set number of points for a reward in a future transaction. Please see the article linked below for Giving Customer Reward Coupons in the Front End for full details.
You can use the tabs to view Discounts or Loyalty Rewards. Search to find the one you want, then click on the name of the discount or reward if you need to edit any of the information or if you need to delete it using the Remove button in the upper right (not pictured).
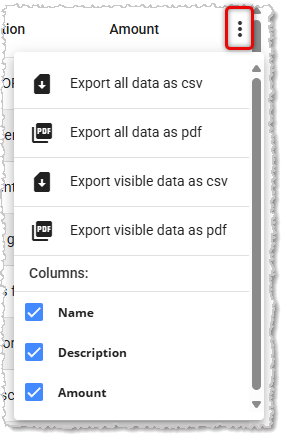
On the far right is an action menu with options for exporting the data as CSV or PDF files, and you can also adjust which columns display.
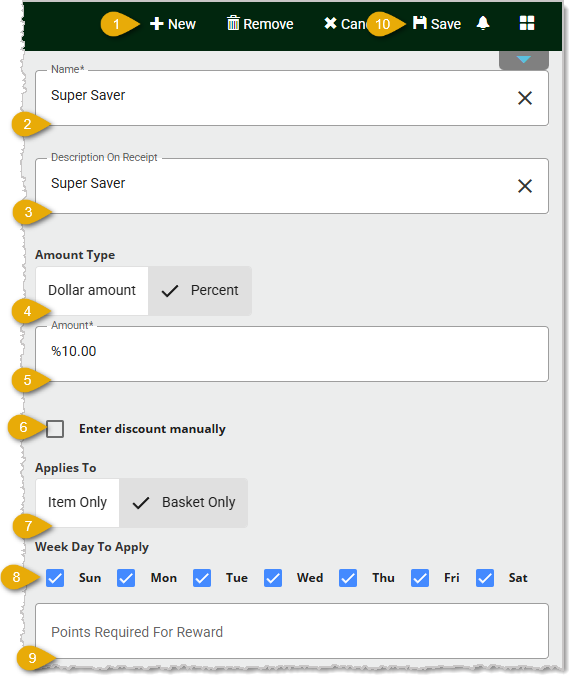
To create a new Discount or Loyalty Reward, make sure the tab for correct one is selected in the middle of the page. The data for both types of discount is identical except that Loyalty Rewards also have an area to enter how many reward points a customer must earn in order to get the reward. After setting the correct tab (either Discount or Loyalty Reward), follow the steps below to create your discount:
Customer Membership Expirations in the Back End
How to Apply a Discount in the Front End
Giving Customer Reward Coupons in the Front End
Q: I have a question, but I can't find my answer here. How do I get more assistance?
A: If you need immediate assistance, the IT Retail team is available 24/7. Feel free to contact our support team at 877-752-0625. You can also email us at support@marktpos.com, and we will respond within 24 hours.
Is this page helpful?
×Help us improve our articles