When you're creating coupons, it's a good idea to also create Product Groups, especially if you're planning to make Mix & Match Coupons. For instance, you can make a Product Group for candy, and then make an Electronic Coupon specifically for that group. Any of the items in the group can act as a Trigger or Award. Read on to see how you can set up a Product Group for yourself!
Setting Up Product Groups
Start setup by navigating to Customers and Discounts > Product Groups.
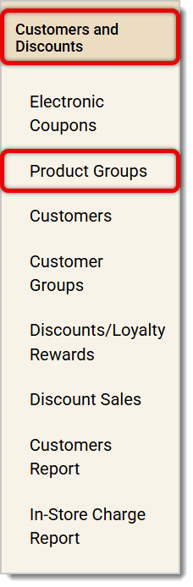
In the middle panel of the resulting page, you'll see the Product Group Editor and any Product Groups you’ve already saved. To make a new Product Group, follow these steps:
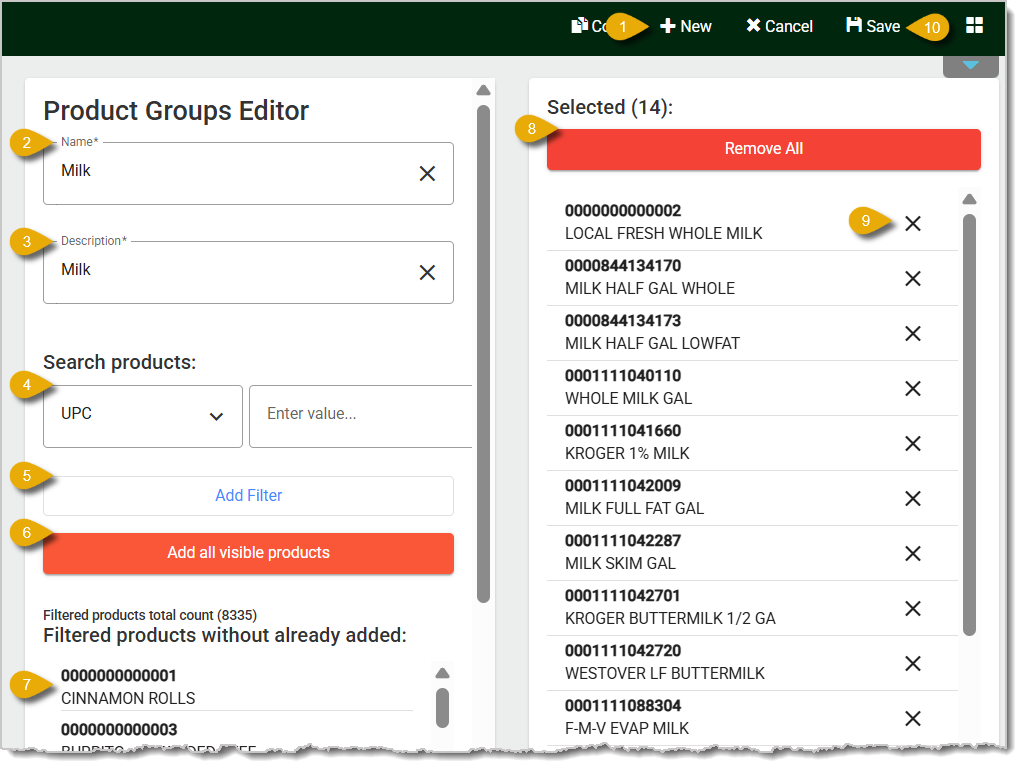
- The Product Group Editor will show blank fields by default so you can make a new group, but if necessary, click on New at the top of the page.
- Enter the Name* for your Product Group.
- Enter the Description* for your Product Group.
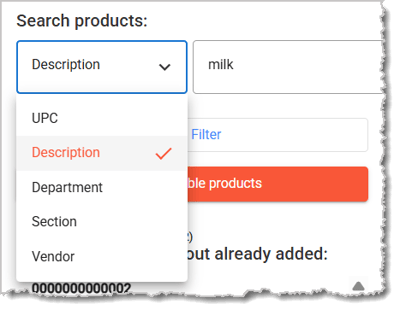
- Search for products you want in the group by Description, UPC, Department, Section, or Vendor. Once you've selected a search method from the drop-list, scan in or enter what you’re searching for in the field to the right.
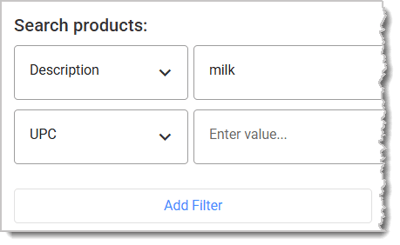
- Click on Add Filter if you want to narrow down your search even more. This will add another Search type and entry field, as pictured below:
- Your search will pull a list of matching results below the filters. You can click on the Add All button that's directly above the results list. This will place all matching results in the Selected panel on the right.
- If you don't want to place all of the results in the group, simply click on the individual products you want. They will move to the Selected panel.
- If you want to start over, click on the Remove All button.
- If you want to remove a product from the Selected list, click on the X to the right for the item.
- Click on Save to add the new Product Group or save your changes.
Using Product Groups for Coupons
Product Groups are flexible, so you can use them for multiple types of coupons, like discounting canned drinks or seasonal items by a fixed percentage. Product Groups are also helpful for Mix and Match coupons. This type of coupon gives customers awards for items in a product group you’ve configured. As an example, we’ll use a group called “Ade Drinks,” which covers drinks like lemonade, limeade, watermelon-ade, and more to make a coupon that gives customers 3 beverages for $10 total.
Please Note: For Mix & Match Coupons, all product group items in the transaction have to be the same price.
In the Back End, go to Customers & Discounts > Electronic Coupons. Configure basic details for your coupon in the Electronic Coupons Editor. Then scroll down to find Triggers and Awards.
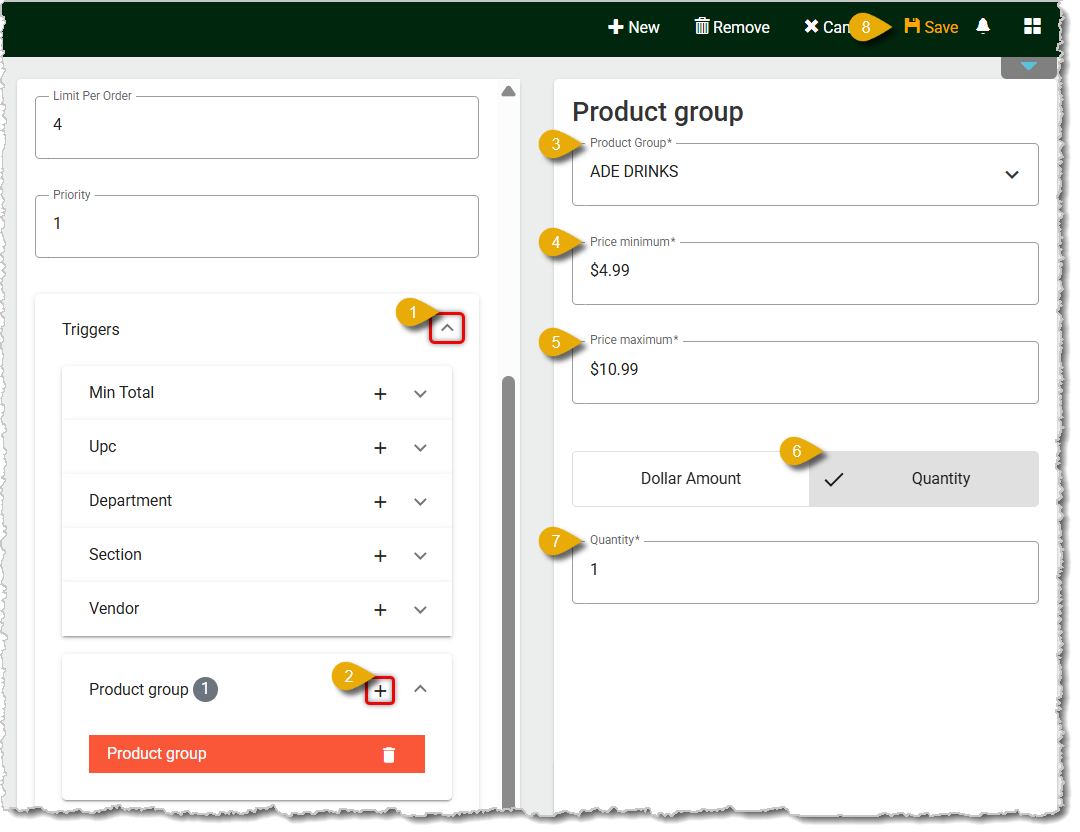
- Open the Triggers menu by clicking on the Chevron to the right of Triggers.
- Click on the Plus Button next to Product Group. This will open the Product Group Panel on the right. All fields in this panel are required in order to save this trigger.
- Select the existing Product Group you want from the drop-list.
- Under Price Minimum, enter the lowest price in the group. For example, if lemonade is the cheapest in the group, type in lemonade's price.
- Under Price Maximum, enter in the highest price in the group.
- Make sure to select Quantity instead of Dollar Amount for the Mix and Match coupon we're creating.
- Enter the minimum Quantity of items from this product group. That means a customer has to buy at least that number to get the award.
- Save your work. This is optional since you still need to configure the Award, but we recommend saving at this point just in case.
- Scroll down to Awards, and click on the Chevron on the right to open the Awards menu.
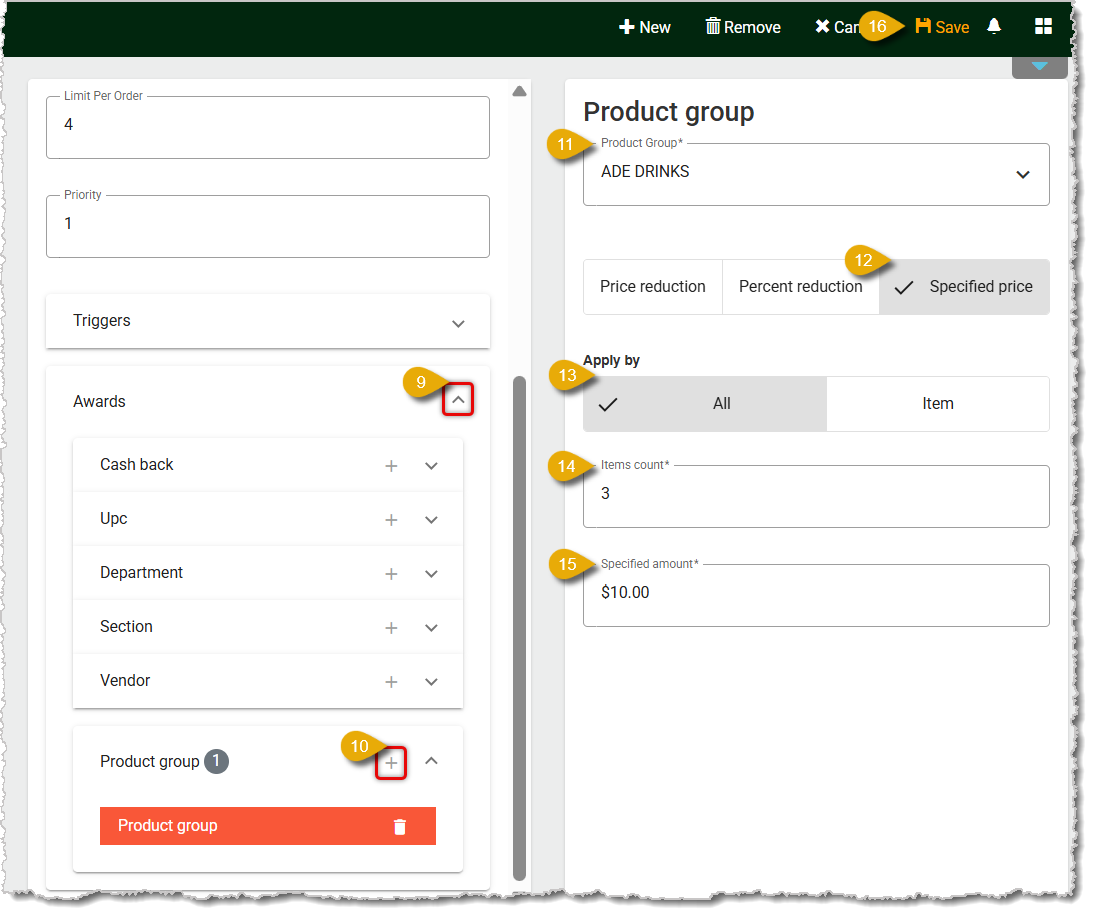
- Click on the Plus Button next to Product Group. The Product Group panel will open on the right.
- Select the Product Group you want from the drop-list.
- For this "3 for $10" example, we'll click on Specified Price.
- Under Apply By, click on All so the coupon applies to all of the eligible items in the transaction. Item would be for coupons that apply to individual items.
- In the Item Count, enter 3.
- For the Specified Amount, enter $10.
- Save your work.
Use these steps and other functions of the Electronic Coupons Editor to create as many Product Group coupons as you like. You can also read the article linked below about Mix & Match Coupons With Product Groups for more information.
Related Articles
Electronic Coupons
Mix & Match Coupons With Product Groups
Product Group Coupons
Cash Back Coupons
BOGO Coupons
Automatic Coupons
Frequently Asked Questions
Q: I have a question, but I can't find my answer here. How do I get more assistance?
A: If you need immediate assistance, the IT Retail team is available 24/7. Feel free to contact our support team at 877-752-0625. You can also email us at support@marktpos.com, and we will respond within 24 hours.








 December 18, 2025
Is this page helpful?
×Help us improve our articles