Set Up Self Checkout

December 10, 2025
If you want to offer your customers the option of self-checkout you can do so in the IT Retail system. This option works with card payments only. This article details how you can set up your system to offer self-checkout. Take a look!
Important Back End Setup
You will need to log into the Back End to set up this function. There are three things you need to do in the Back End to get set up for self-checkout:
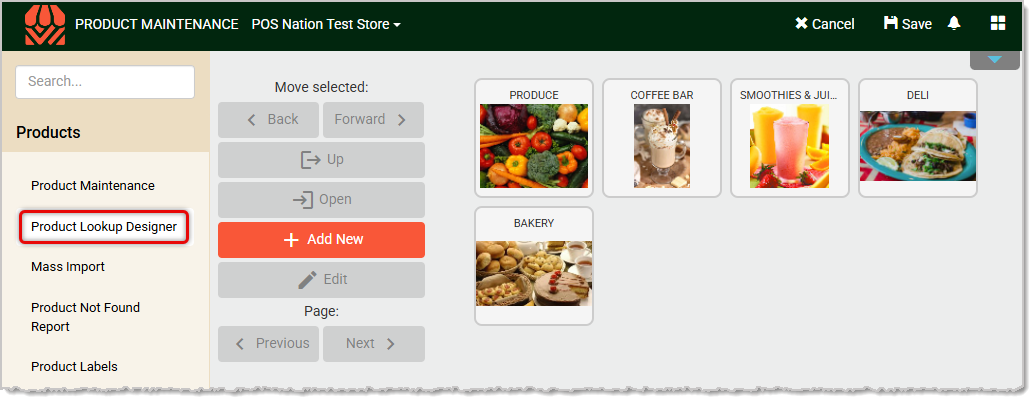
- Set Up Product Access — You should make sure your Product Lookup has all the items a customer might need to look up for themselves.
- You can do this under the Products area using the Product Lookup Designer, as pictured below.
- For full details on this process, please see the linked article near the bottom of this page about the Product Lookup Designer.
- Create a Self-Checkout Role — Here is how to create this new Role:
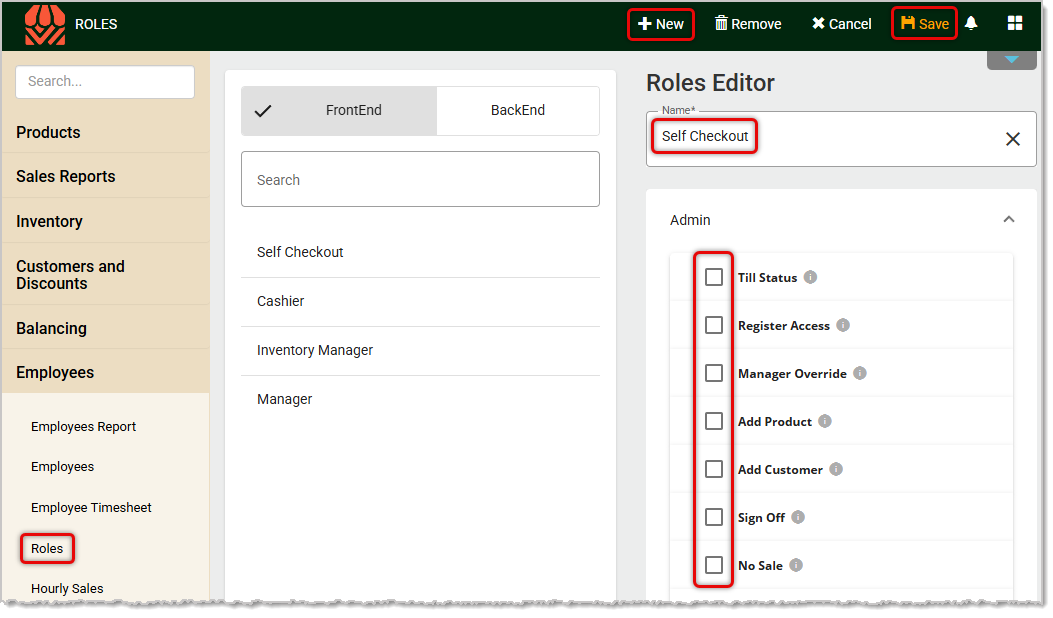
- In the Back End under the Employees menu, open Roles and create a Role for Self-Checkout.
- Do this by clicking the New button in the upper right.
- Then in the Roles Editor panel on the right, enter the Name of the role.
- For this role, make sure that NO permission items are active, so un-check any that might be checked for all areas (there are additional permissions besides the Admin ones in the image below).
- Click the Save button in the upper right when you're finished.
- Create a Self-Checkout Employee — Here is how to create this new employee:
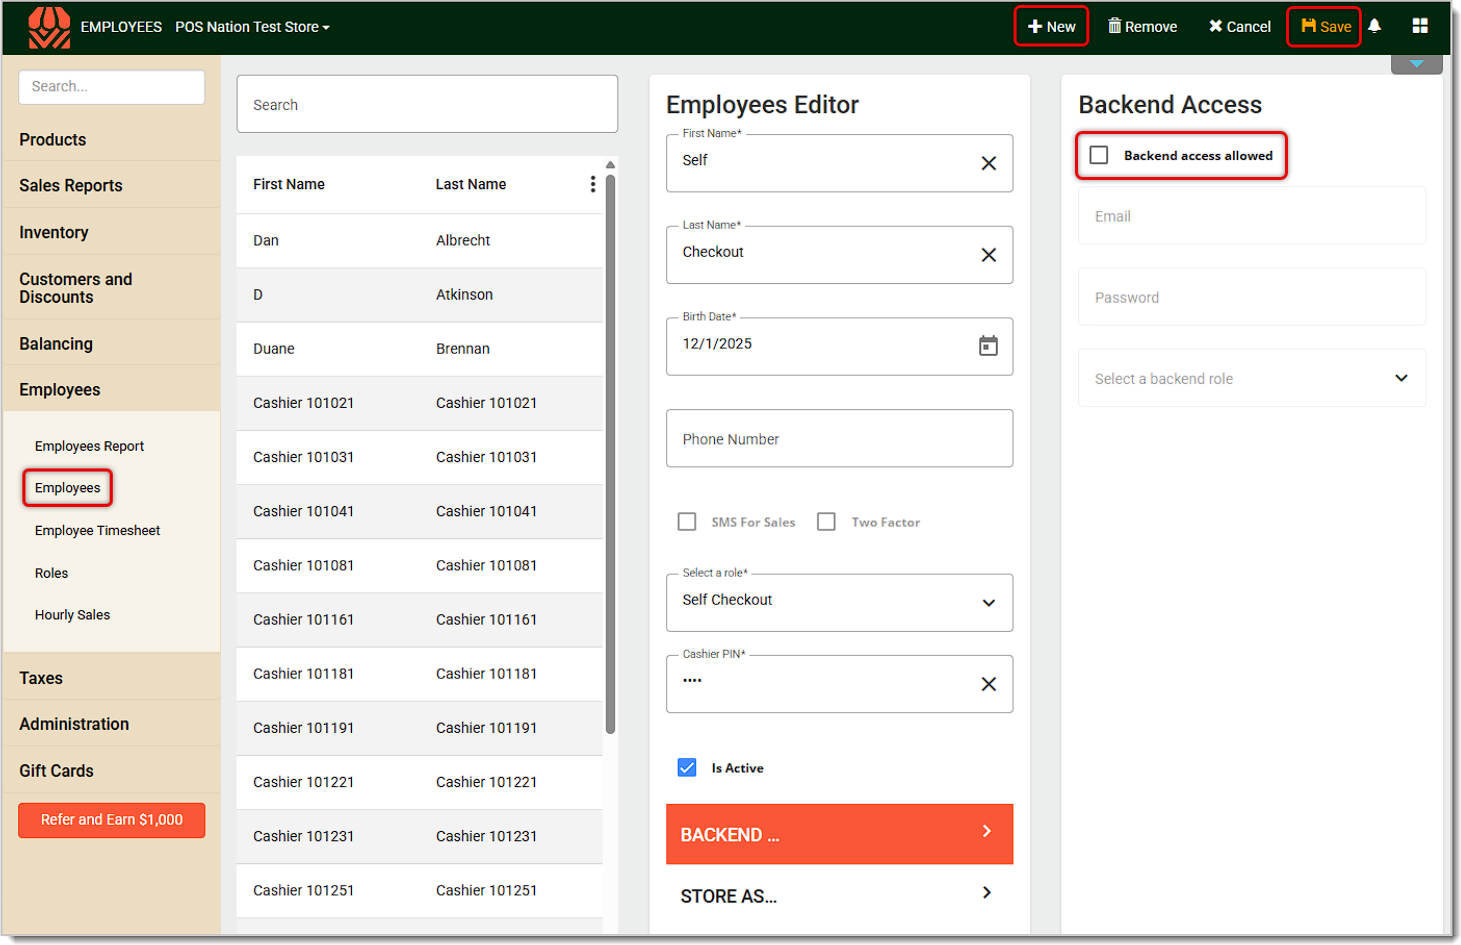
- In the Back End under the Employees menu, open Employees.
- In the upper right, click the New button to create a new employee.
- Enter the First Name and Last Name as pictured below; no Phone Number is necessary.
- Give this 'employee' a very recent Birth Date so checkout for age-restricted items will always require Cashier assistance (the Self-Checkout register will prompt the customer to ask for assistance with such items).
- From the Select a Role drop-list, select the Self-Checkout Role you created in the previous step.
- Enter a Cashier PIN for this employee.
- Make sure the Employee is marked as Active.
- In the Backend Access area, make sure Back End access is NOT allowed.
- In the Store Assignment area, make sure the correct store is selected, if you have multiple stores.
- Click the Save button in the upper right when you're finished.
Self-Checkout Device Setup
Please Note: Before going through the device configuration below, make sure you have set up your peripherals, such as the receipt printer, scanner, and scale for the self-checkout device. If you have not yet set them up, you can contact the IT Retail support team using the information at the bottom of this page and they can assist you.
To set up a device you will use for Self-Checkout in your store, do the following steps:
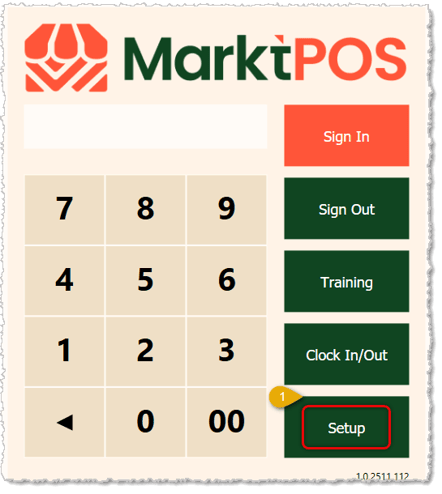
- In the Front End login screen, click or tap the Setup button BEFORE entering a PIN.
- Click or tap the Miscellaneous tab.
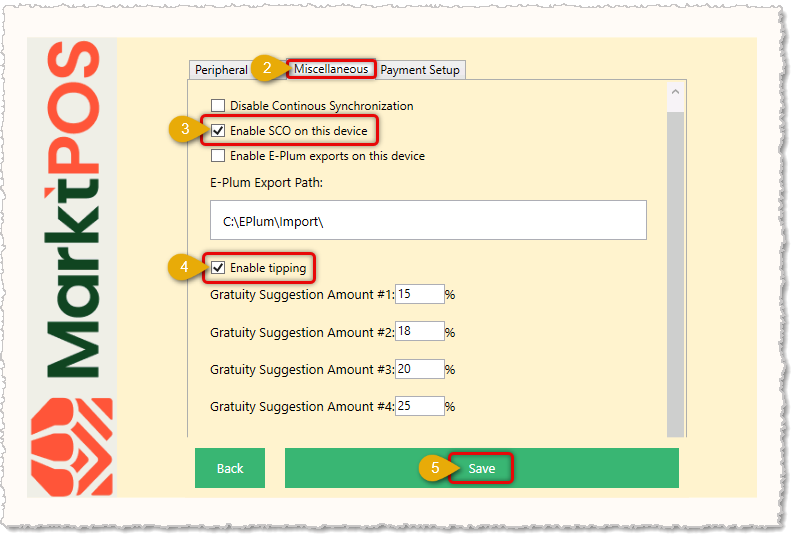
- Check the box for Enable SCO on This Device. (Self Check-Out)
- OPTIONAL: If you accept tips, check the box for Enable Tipping and configure the percentages you want.
- Click the Save button at the bottom to save your device configuration.
- A confirmation screen that your changes have been saved will pop up for you; click OK.
- The system will return you to the Front End login screen. You can now use the Employee PIN you created for the Self Checkout employee to sign into the system.
Your device is now ready to run self-checkout! Customers will be prompted to tap the screen or scan an item to start. Please see the article linked below on How to Use Self Checkout for full details on its operation.
Related Topics
Product Lookup Designer
Employees
Roles
How to Use Self Checkout
Frequently Asked Questions
Q: Where do I go to purchase a Self Checkout Unit?
A: Our Sales team can get you in contact with Pan Oston. It typically takes around 90 days for them to manufacture a unit. Additionally, you can convert any of your traditional registers into a self-checkout unit.
Q: I have a question, but I can't find my answer here. How do I get more assistance?
A: If you need immediate assistance, the IT Retail team is available 24/7. Feel free to contact our support team at: 877-752-0625. You can also email us at support@marktpos.com and we will respond within 24-hours.
Welcome to IT Retail, we’re so glad you’ve chosen our POS for your store! This article will guide yo
Adding products to a customer’s transaction is straightforward. Below is a step-by-step guide on how
You can ring up a product as a Non-Scan item if it doesn’t have a UPC / PLU code or it's not yet reg








Is this page helpful?
×Help us improve our articles