







How to Create Customers in the Front End
If a customer wants to sign up for your store’s membership program, you can add them in the Front En
 January 08, 2026
If you occasionally come across products that should be discountable but aren't, this article provides tips on how to make the discounts work. Take a look!
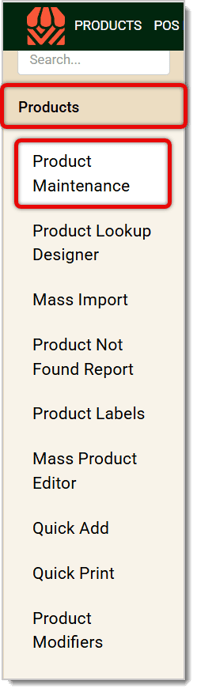
If you're working in the Front End and you find a product that's not allowing a discount, you'll need to log into the Back End to fix it. Click to open the Products menu, then go to Product Maintenance and follow the steps below.
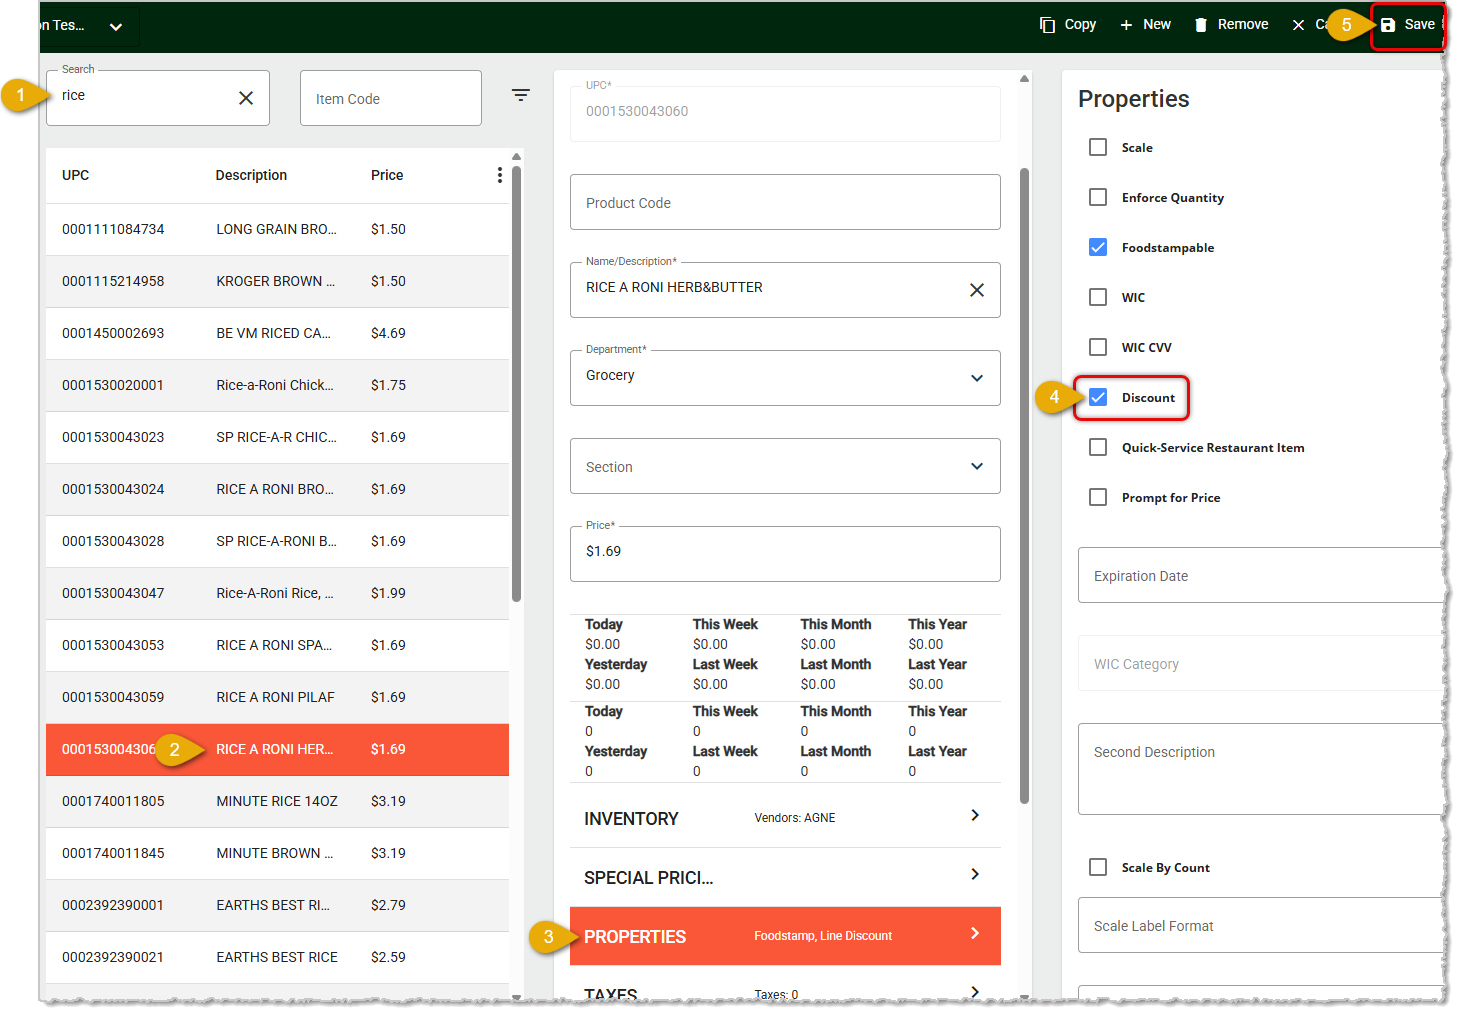
Please Note: Your change will not immediately push to the Front End. You can either log out of the Front End then log back in to refresh, or you can go to the Manager Functions area and click to Synchronize, as pictured below.
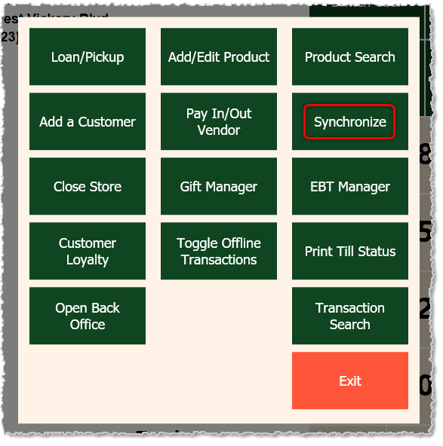
After a fresh login or a synchronization, the product will be discountable in the Front End.
If you see multiple items from the same Department that are not allowing discounts in the Front End but should be doing so, you can use the steps below to fix the Department.
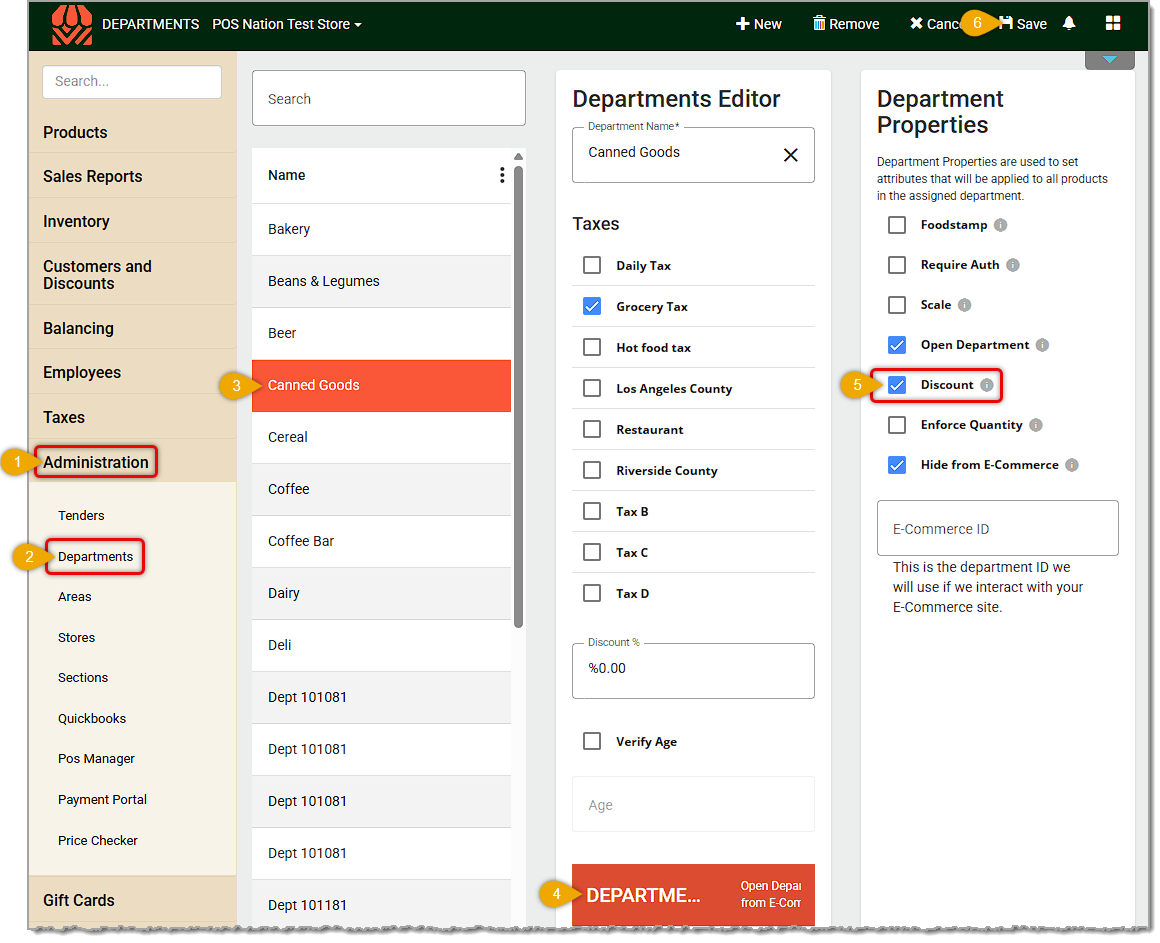
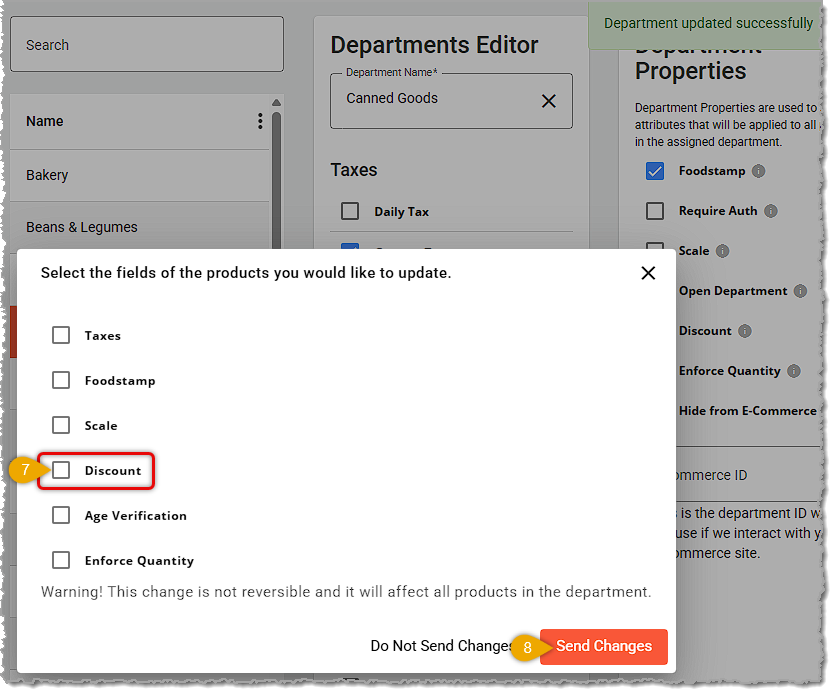
Again, the change won't push to the Front End right away, so you can either log out and then log into the Front End again to refresh, or you can Synchronize from the Manager Functions menu.
How to Apply a Discount in the Front End
Manager Functions in the Front End
Q: I have a question, but I can't find my answer here. How do I get more assistance?
A: If you need immediate assistance, the IT Retail team is available 24/7. Feel free to contact our support team at 877-752-0625. You can also email us at support@marktpos.com, and we will respond within 24 hours.
Is this page helpful?
×Help us improve our articles