Vendors

December 15, 2025
Use the Vendors page to manage vendors and view the products you've associated with your vendors.
When you're managing your store's inventory, it's important that every product you plan to reorder is associated with its respective Vendor. This is very helpful when you are using the Low Inventory Report, as the IT Retail system will allow you to see products you've set up with Low Inventory Alerts and are low in inventory.
This article will show you how to manage the Vendor page, so read on to see everything it provides you with!
Managing Vendors on the Vendors Page
The image below shows an example of the Vendors page. Here's how to access and use this page:
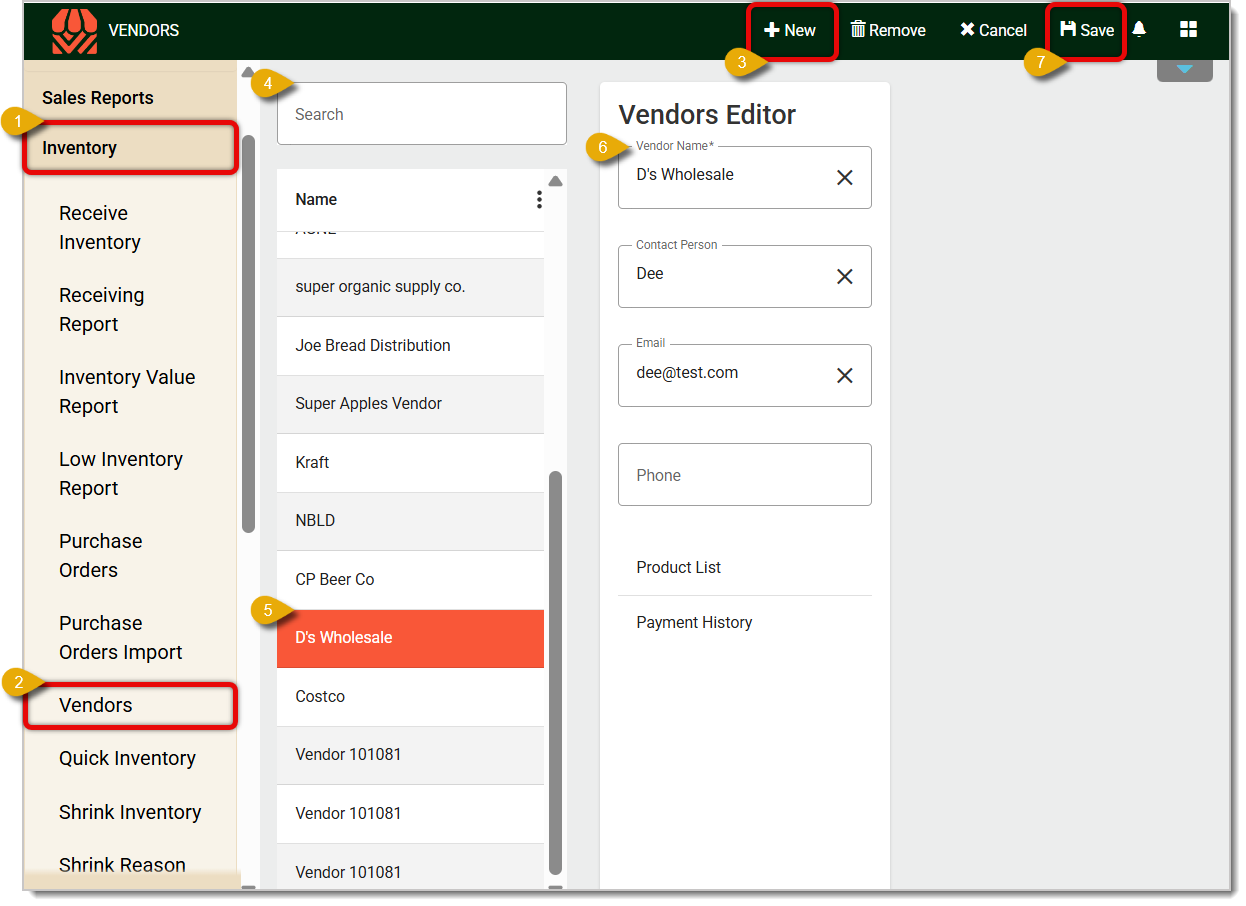
- From the main menu, click on Inventory.
- Click on Vendors.
- If you want to create a new Vendor, click on the New button on the top of the page. Then move to the Vendors Editor panel in step 6.
- If you're instead looking for a specific existing Vendor, use the Search bar by typing in the Vendor Name.
- Click on the Vendor you want to highlight it.
- In the Vendors Editor area, enter the Vendor Name* (If you're editing an existing Vendor, the Vendors Editor area will pre-populate). The other fields in the Editor are optional, but we recommend filling out for reference when creating Purchase Orders.
- Save changes by clicking on the Save button in the upper right.
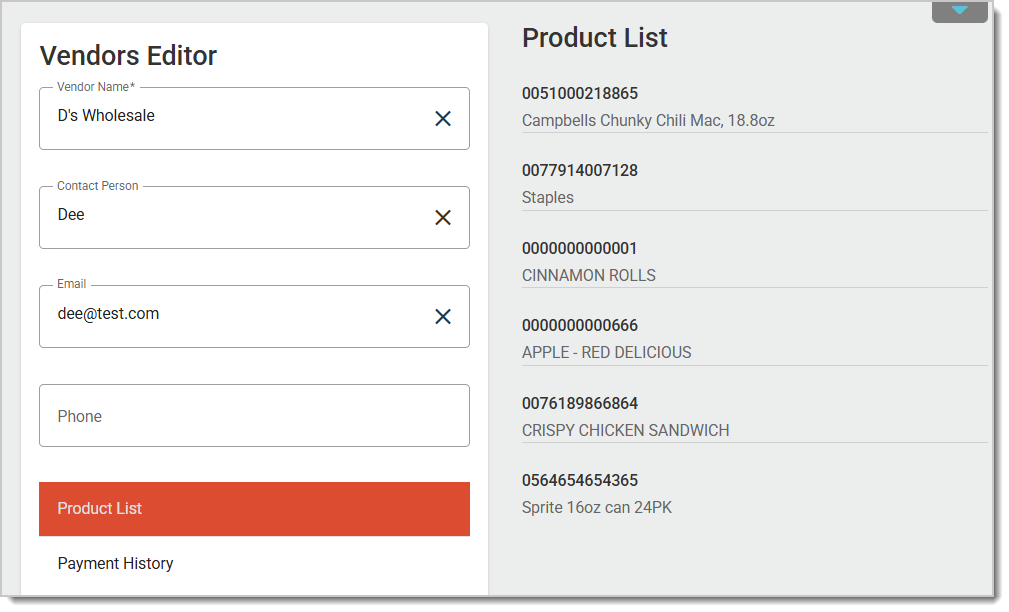
You can also view the Vendor's Product List and Payment History under the Vendors Editor panel:
Adding a Vendor to a Product
To add a Vendor to a product, in the main Products menu, go to Product Maintenance. Here are the full details on how to associate a Vendor with a Product:
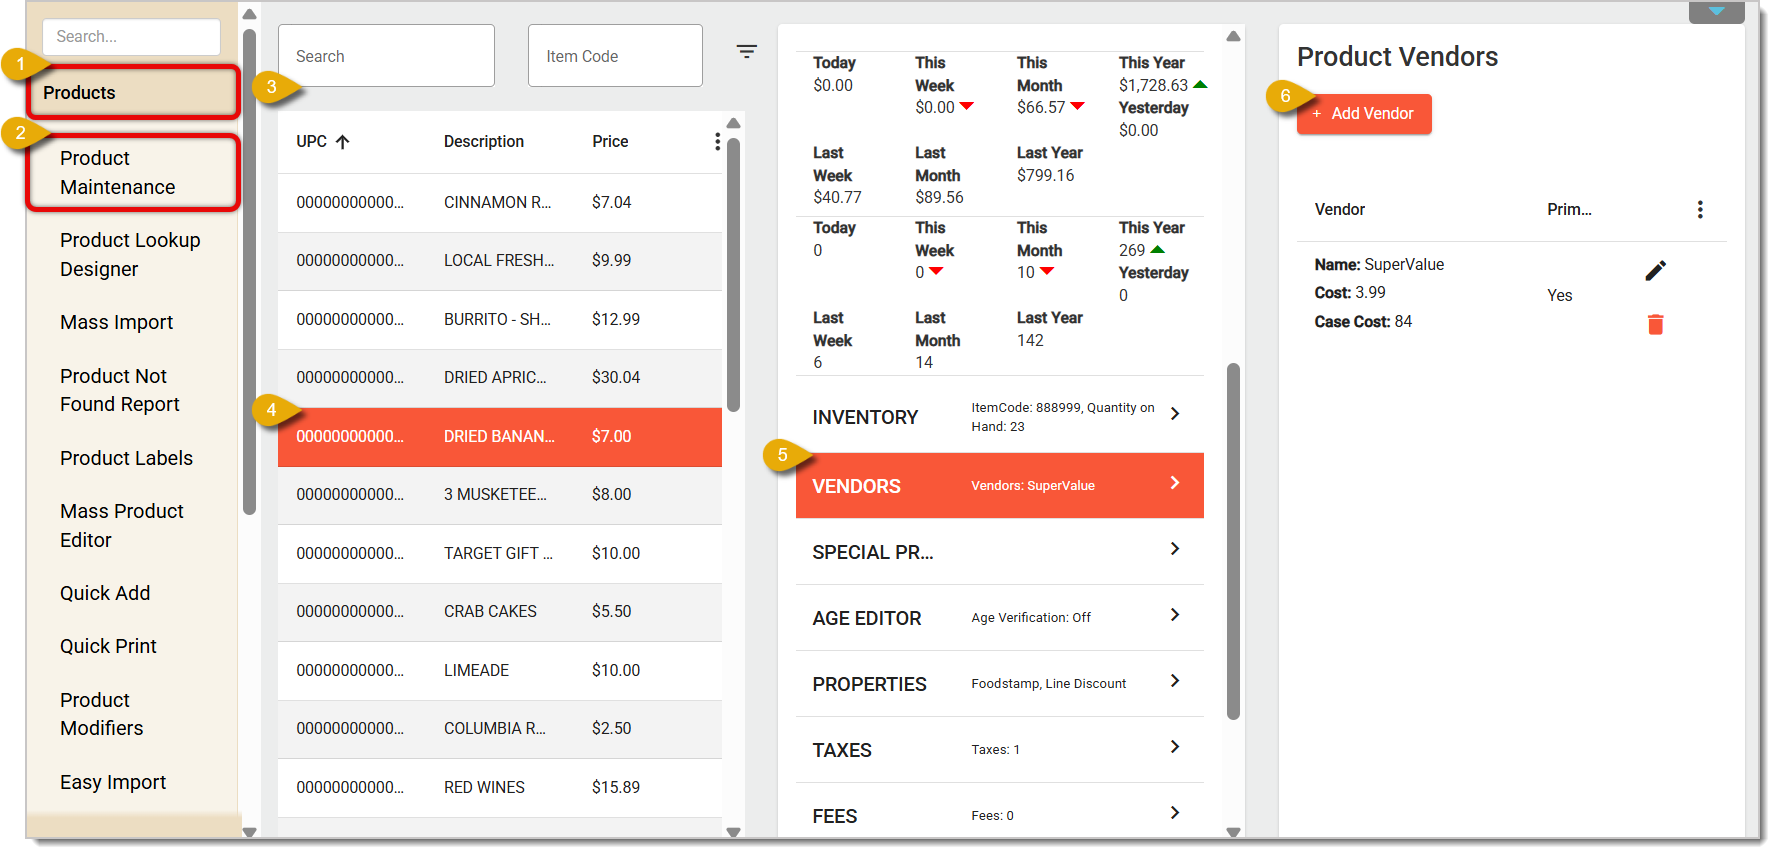
- Click on Products in the main menu.
- Click on Product Maintenance.
- Search for the item using the Description, UPC, or Item Code.
- Select the product by clicking on it. The product will be highlighted.
- In the center panel, scroll down and click on the Inventory tab.
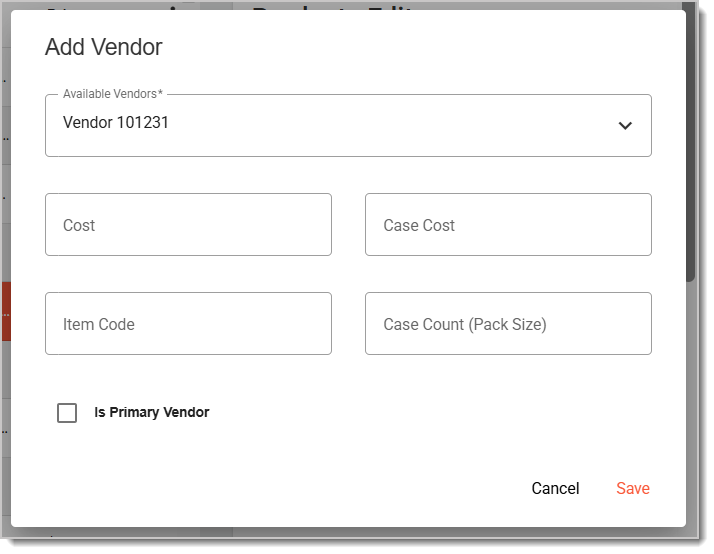
- Click on Add New Vendor. The Add Vendor window will pop up so you can select the Vendor from the drop-list. Other fields in this window are optional.
Related Articles
Purchase Orders
Low Inventory Report
Vendor Price Import
Vendor Price Import Products
Frequently Asked Questions
Q: I have a question, but I can't find my answer here. How do I get more assistance?
A: If you need immediate assistance, the IT Retail team is available 24/7. Feel free to contact our support team at 877-752-0625. You can also email us at support@marktpos.com, and we will respond within 24 hours.
Welcome to IT Retail, we’re so glad you’ve chosen our POS for your store! This article will guide yo
We have worked hard to make our Front End as user-friendly as possible, but there are a lot of movin
There is a wealth of administrative functionality for you in the Manager Functions area of the Front








Is this page helpful?
×Help us improve our articles