







Working With Products in Transactions
Adding products to a customer’s transaction is straightforward. Below is a step-by-step guide on how
 April 24, 2026
The Margin Management feature gives you precise control over how product prices are rounded and maintained relative to your cost. Take a look at how you can automate pricing to preserve your profit margins!
Here is what you will learn in this article:
We have introduced two new fields across Departments, Product Maintenance, Receiving, Quick Add, and Quick Print:
Target Margin — sets the desired gross margin percentage for a product.
Margin Management — controls how the system rounds prices to hit that margin.
When a product's cost changes, the system automatically recalculates and updates the Gross Margin field to match the Target Margin, applying the selected rounding rule. If no settings are configured at the product level, the product inherits the settings from its assigned department.
💡Please Note: Product-level settings always take priority. If a product has its own Target Margin and Margin Management values set, those are used. If those fields are left blank, the product falls back to the department-level defaults.
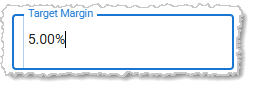
Target Margin defines the gross profit margin percentage you want the product to achieve. It is expressed as a percentage (for example, 5%).
When Cost is updated on a product, the system will use the Target Margin to recalculate the selling Price. Then it will apply the Margin Management rounding rule (see below). The Gross Margin field will automatically update to reflect the result.
💡Please Note: The existing Gross Margin field on a product will be kept in sync with Target Margin whenever cost is changed. You do not need to manually update it.
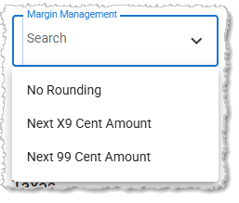
The Margin Management field controls how the Price is rounded after the Target Margin calculation. There are three options:
| Option | Behavior | Example Result |
| No Rounding | Price is calculated exactly to the cent with no rounding applied. | $9.66 |
| Round to Nearest X9 Cents | Price rounds up to the nearest price ending in 9 cents (e.g., $x.x9). Protects margin by always rounding up. | $9.69 |
| Round to Nearest 99 Cents | Price rounds up to the nearest dollar-minus-one-cent ending (e.g., $x.99). Commonly used for whole-dollar pricing strategies. | $9.99 |
💡Important Note: Rounding always rounds up to protect margin. A price will never round down below the calculated target margin price. As a result, when you apply Margin Management rounding, your Gross Margins will always be slightly higher than your Target Margin.
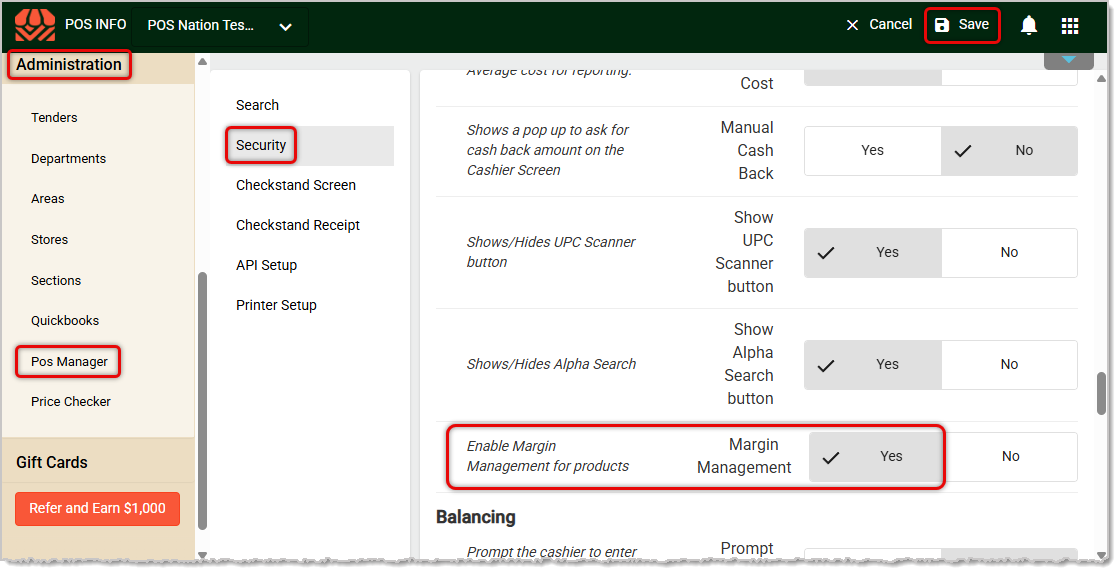
To activate Margin Management so it can be used in your IT Retail system, log into the Back End and go to Administration > POS Manager > Security. Scroll down to the bottom of the Initial Setup section and toggle the Margin Management setting to Yes, as pictured below. Be sure to click the Save button in the upper right when you're finished.
Department-level settings act as the default for all products assigned to a department. Any product without its own Margin Management or Target Margin configured will inherit the values of its Department.
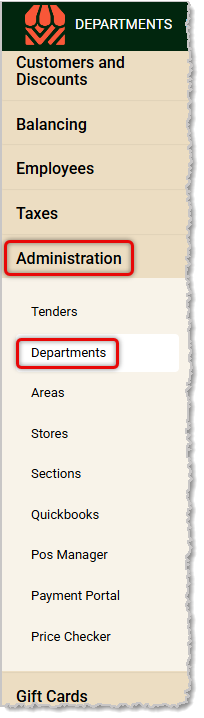
To set your Department defaults for Margin Management, log into the Back Office and go to Administration > Departments.
On the Departments page, follow these steps to set Margin Management for a Department:
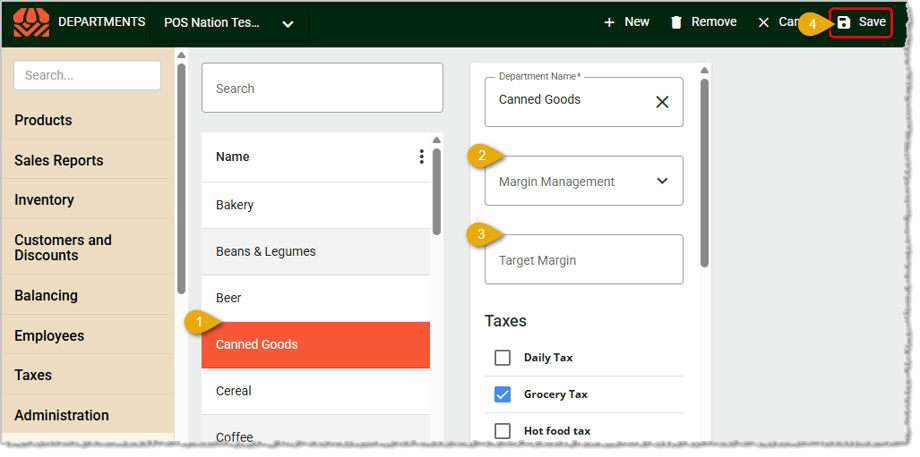
All products in this department without product-level Target Margins (set in Product Maintenance) will now use these Department settings whenever Cost is updated.
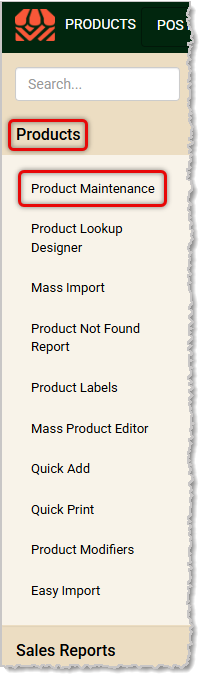
To begin working with Margin Management in Product Maintenance, from the Back End, go to Products > Product Maintenance.
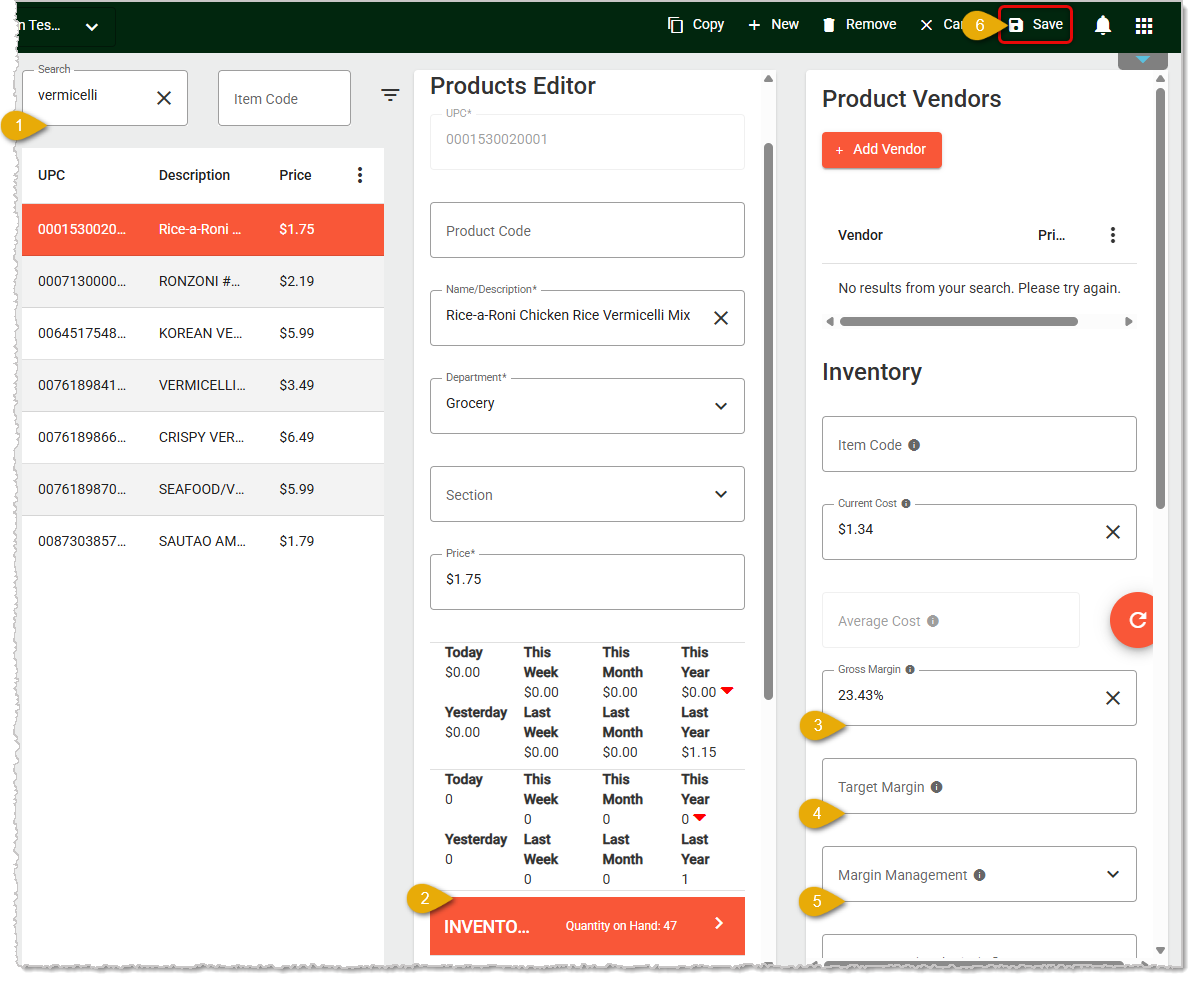
💡Please Note: Product-level settings override department defaults. Use Product Maintenance to set unique margin rules for individual items.
How Cost Changes Affect Pricing:
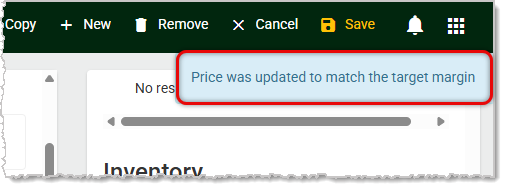
💡Please Note: If both Target Margin and Margin Management are blank at the product level, the Department settings will be used. If neither is set at either level, no automatic price recalculation will occur.
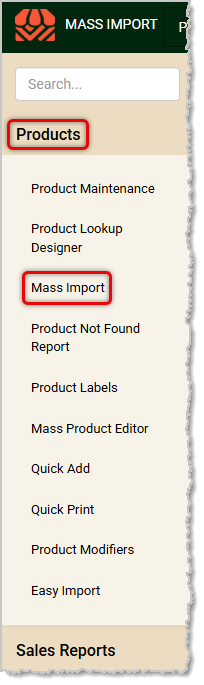
To begin working with Margin Management in the Mass Import tool, from the Back End, go to Products > Mass Import.
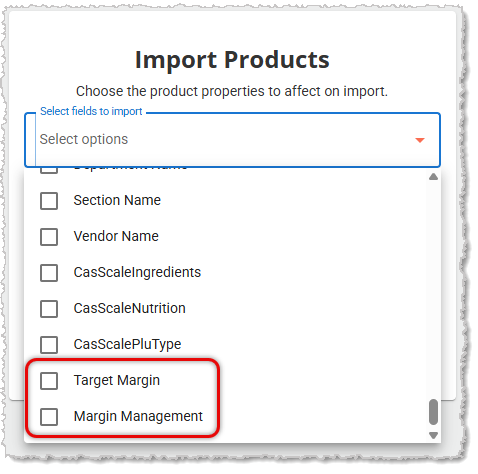
On the Mass Import page, if you have data you are importing for Target Margin percentage and the Margin Management rounding selection, you can click on the Select Fields to Import drop-list and check the boxes for those two fields at the bottom of the list to include them in the import.
When importing products in bulk, you can apply a unified margin and rounding rule to all imported products at once using the Set Prices by Margin button in the Map Import Columns screen.
⚠️Important Note: The Set Prices by Margin option is only available when the import file does not include a Price column. If a Price column is mapped in your import, the Margin Management option will be disabled — the imported price values take precedence and cannot be overridden by the margin calculation.
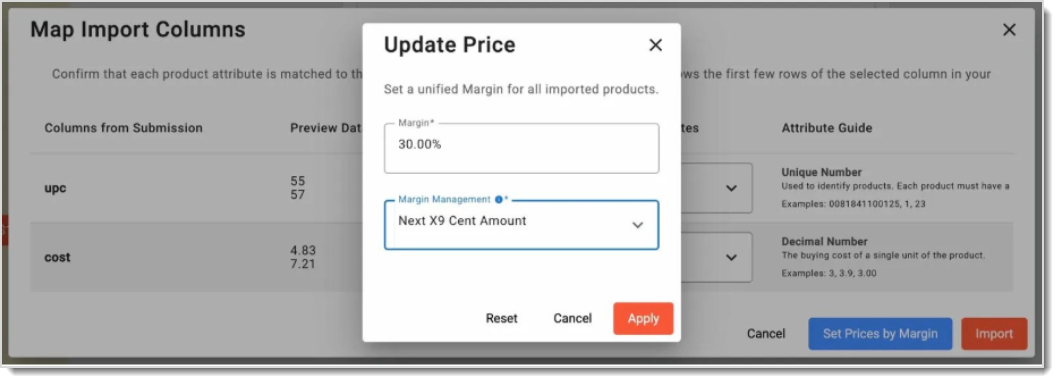
Follow these steps to set prices using Margin Management when doing a Mass Import:
If your import file contains a Price column and you map it during import, those prices are treated as authoritative. Applying a margin-based price recalculation on top of explicit prices would override the intended pricing in your file, so the system prevents this combination.
To use Margin Management for pricing on an import, ensure the import file does not include a Price column, or remove the Price column mapping before clicking Set Prices by Margin.
💡Please Note: Margin and rounding settings applied during import are one-time calculations for that import batch only. They do not automatically save as the product's ongoing Target Margin or Margin Management settings. To persist those settings, configure them in Product Maintenance or at the Department level after import, or import their fields directly.
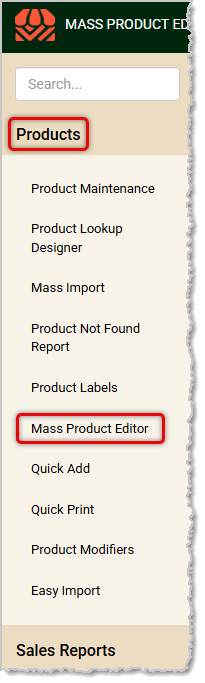
The Mass Product Editor allows you to select multiple products and update their margin settings or prices all at once, saving time when managing large catalogs.
To begin working with Margin Management in the Mass Product Editor, from the Back End, go to Products > Mass Product Editor.
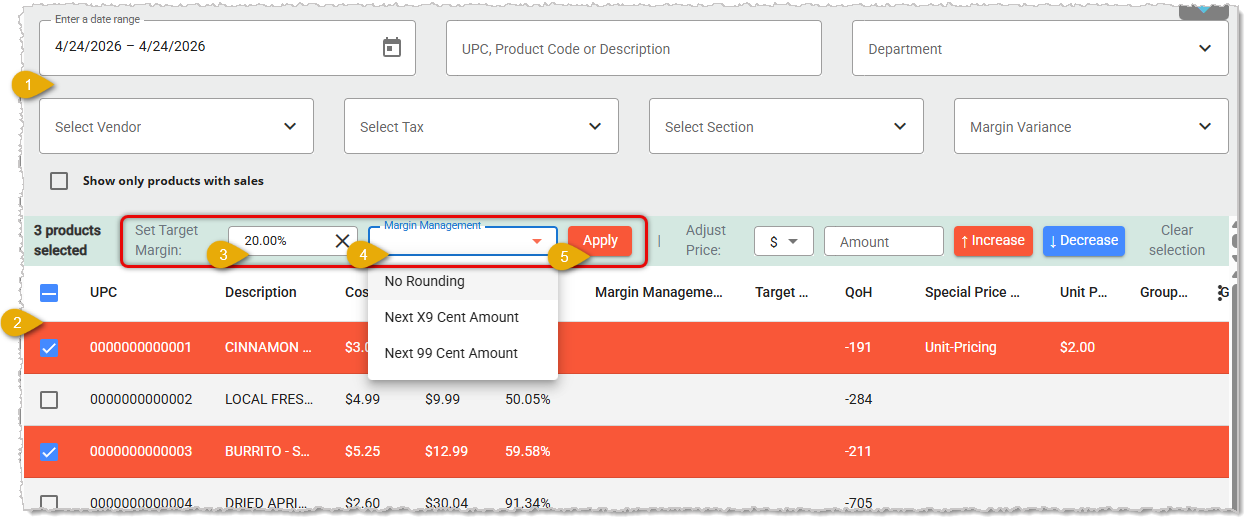
Updating Target Margin and Margin Management in Bulk
You can select any number of products and apply the same Target Margin and Margin Management rounding rule to all of them at once. Follow these steps:
💡Please Note: Applying a Target Margin in the Mass Product Editor updates both the Target Margin and Gross Margin fields for each selected product. It also recalculates prices using the chosen rounding rule — the same logic that applies when you update Cost on a single product.
The Margin Variance filter lets you quickly surface products whose actual margin differs from their target, so you can identify and correct pricing issues at a glance.
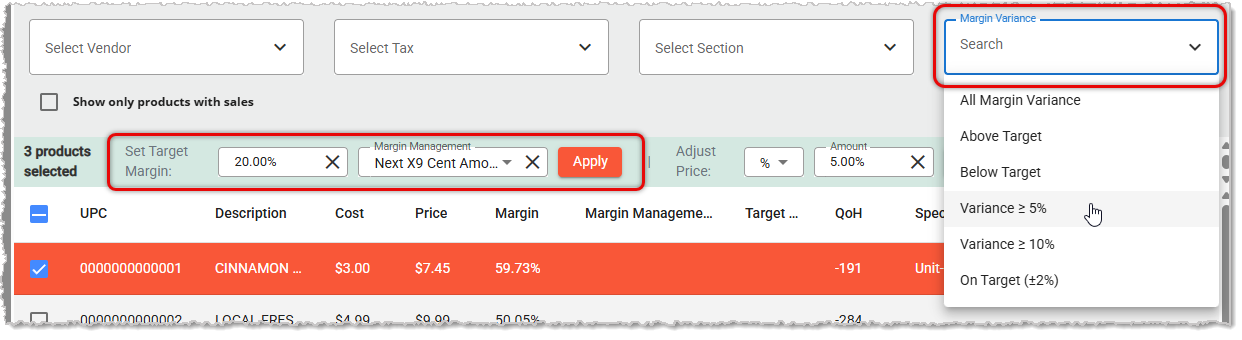
Available Margin Variance Filter Options:
💡Pro Tip: A common workflow: filter by Variance >= 5% or Below Target, select all results, then apply the correct Target Margin and Margin Management rule in bulk to bring those products back in line — all in a single Apply action.
In addition to the Margin Management settings, you can increase or decrease the Price of all selected products by a flat dollar amount or a percentage at once using the Adjust Price toolbar controls.
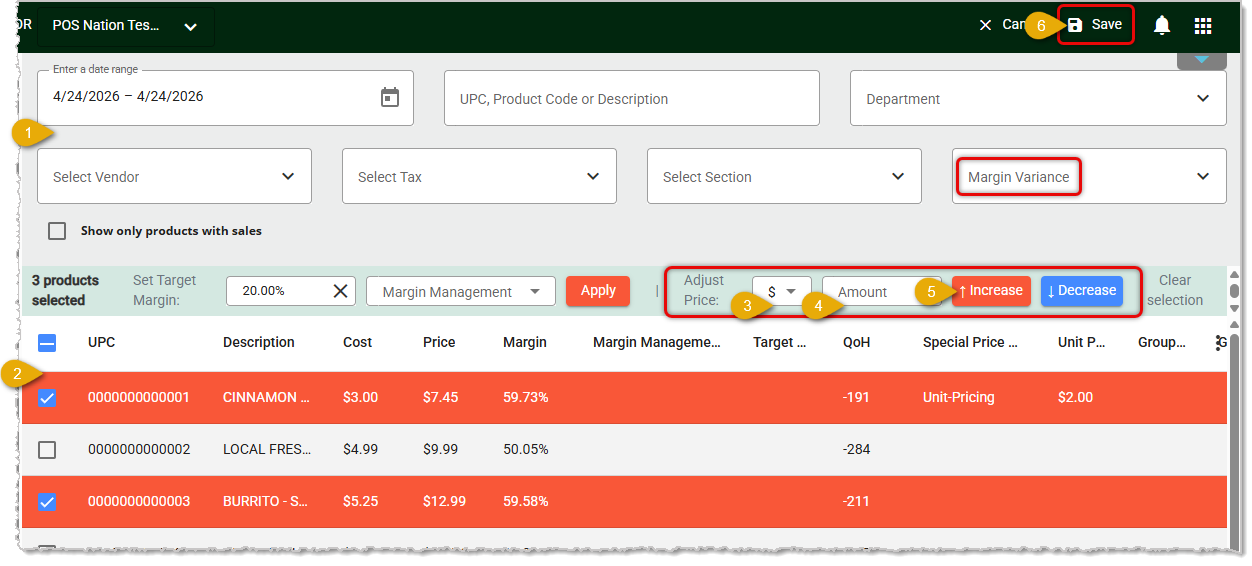
Follow these steps:
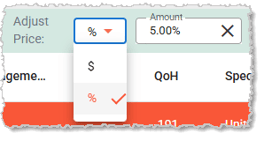
| Adjustment Mode | Increase | Decrease |
| $ (Dollar Amount) | Adds the entered amount to each selected price. E.g., +$0.50 raises a $4.99 item to $5.49. | Subtracts the entered amount. E.g., -$0.50 lowers a $4.99 item to $4.49. |
| % (Percentage) | Increases each price by the entered percentage. E.g., 10% raises a $4.99 item to $5.49. | Decreases by the entered percentage. E.g., 10% lowers a $4.99 item to $4.49. |
Q: I did a Mass Import, and the initial margins were good, but none of the products kept the Margin Management settings. Why didn't they keep the settings?
A: Unless you are importing values for Target Margin and the Margin Management rounding rule within the product data itself, the Mass Import does a one-time calculation that applies to the imported products, but does not save the values in those fields. You can still follow the example given in the Department or the Mass Product Editor sections above to set the products the way you need for Margin Management.
Q: I have a question, but I can't find my answer here. How do I get more assistance?
A: If you need immediate assistance, the IT Retail team is available 24/7. Feel free to contact our support team at: 877-752-0625. Or you can email us at support@marktpos.com and we will respond within 24-hours.
Is this page helpful?
×Help us improve our articles