Setting Up Discounts

January 07, 2026
Discounts are useful since they help encourage shoppers to shop with you. To make Discounts available on the Front End, you'll have to first create them in the IT Retail Back End. Keep reading this article to learn how to create Discounts!
Setting Up Discounts
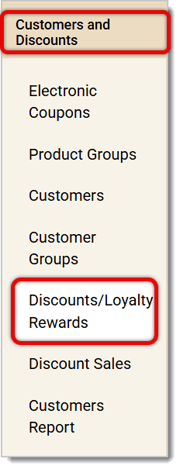
In the Back End main menu, go to Customers and Discounts > Discounts / Loyalty Rewards.
Here is how to work with the Discounts and Loyalty Rewards page:
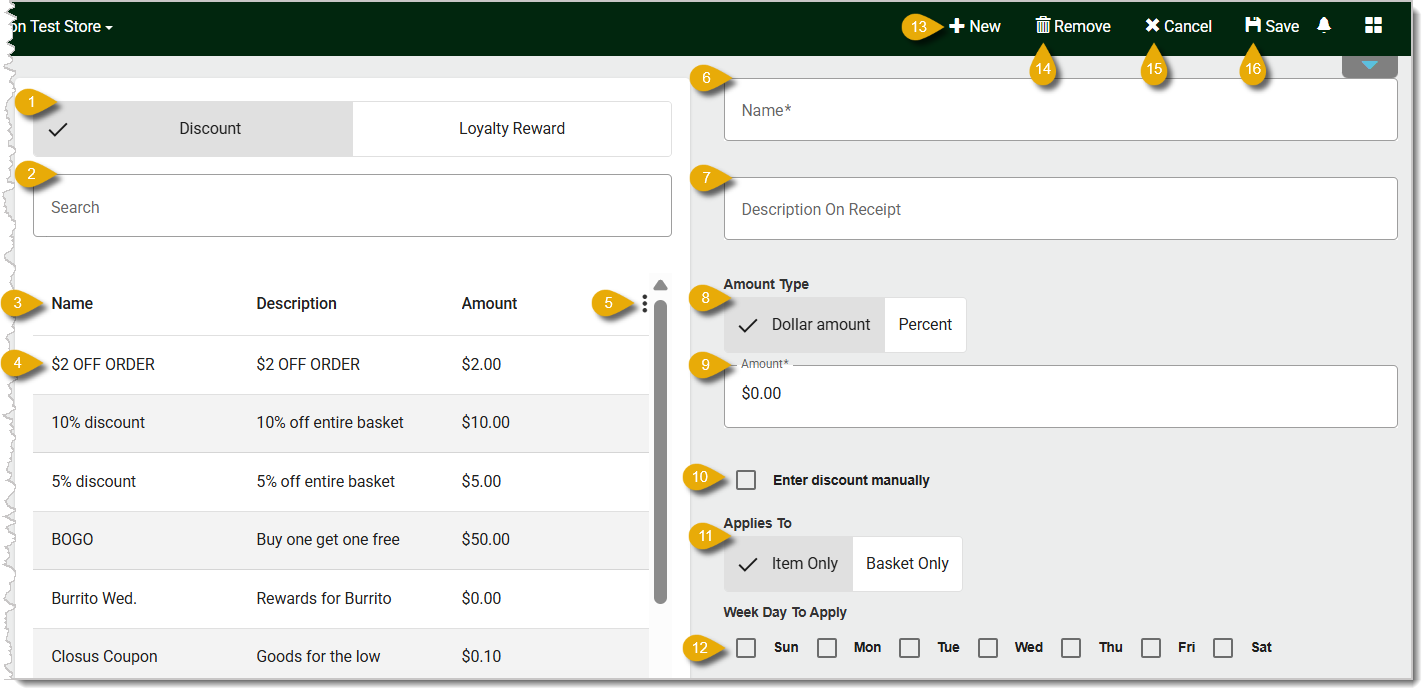
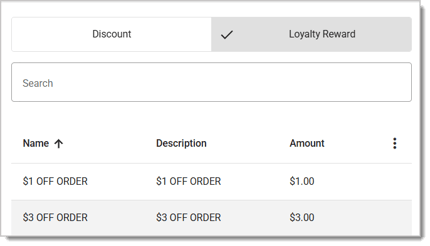
- Discounts / Loyalty Rewards — Click on either tab to toggle between your Discounts and Loyalty Rewards. Loyalty Rewards are for customers with loyalty memberships.
- Search — Enter the Name of a Discount or Loyalty Reward in this Search bar. Matching results will display in the list.
- Columns — Click on a Column name to sort your Discounts according to that column. Click once to sort by ascending order, or twice for descending order.
- Select — To select a specific Discount or Loyalty Reward, click on its list item to highlight it. Its details will load in the fields on the right.
- Action Menu — Click on the Three-Dot Stack icon to open the Action Menu. You can export your Discounts as a CSV or PDF file. You can also select columns to show or hide.
- Name* — Enter the Name of the Discount or Loyalty Reward.
- Description On Receipt — Enter the Description for this Discount or Loyalty Reward; this will display on the customer's receipt.
- Amount Type — Click on Dollar Amount or Percent to set the type of Discount. For example, a discount for 20% off will require you to select Percent.
- Amount — Enter the Discount's dollar amount.
- Enter Discount Manually — Check this box if you want cashiers to manually enter the Discount rather than have it automatically calculated on the Front End.
- Applies To — Select Item Only if the Discount will apply only to one item. Select Basket Only instead if the discount will apply to the entire transaction.
- Week Day To Apply — Check the boxes for each day you want this Discount to be available. For example, a discount for 20% Off Pizza Fridays would have only Friday selected.
- New — Click on New from the top bar to create a new Discount or Loyalty Reward. If there's already one selected, clicking on New will clear out everything from the fields.
- Remove — Select a Discount or Loyalty Reward, then click on Remove to delete it. The system will prompt you to confirm this.
- Cancel — Click this button to cancel changes.
- Save — Click on this to save changes you've made. Note that if you don't click on this, any edits will be lost.
* Required Field
Giving Employee Access to Discounts
Now that you've created your Discount and Loyalty Rewards, you can grant employees access to them. Otherwise, they'll see a security error if they try to work with them on the Front End. Here's how you provide them access:
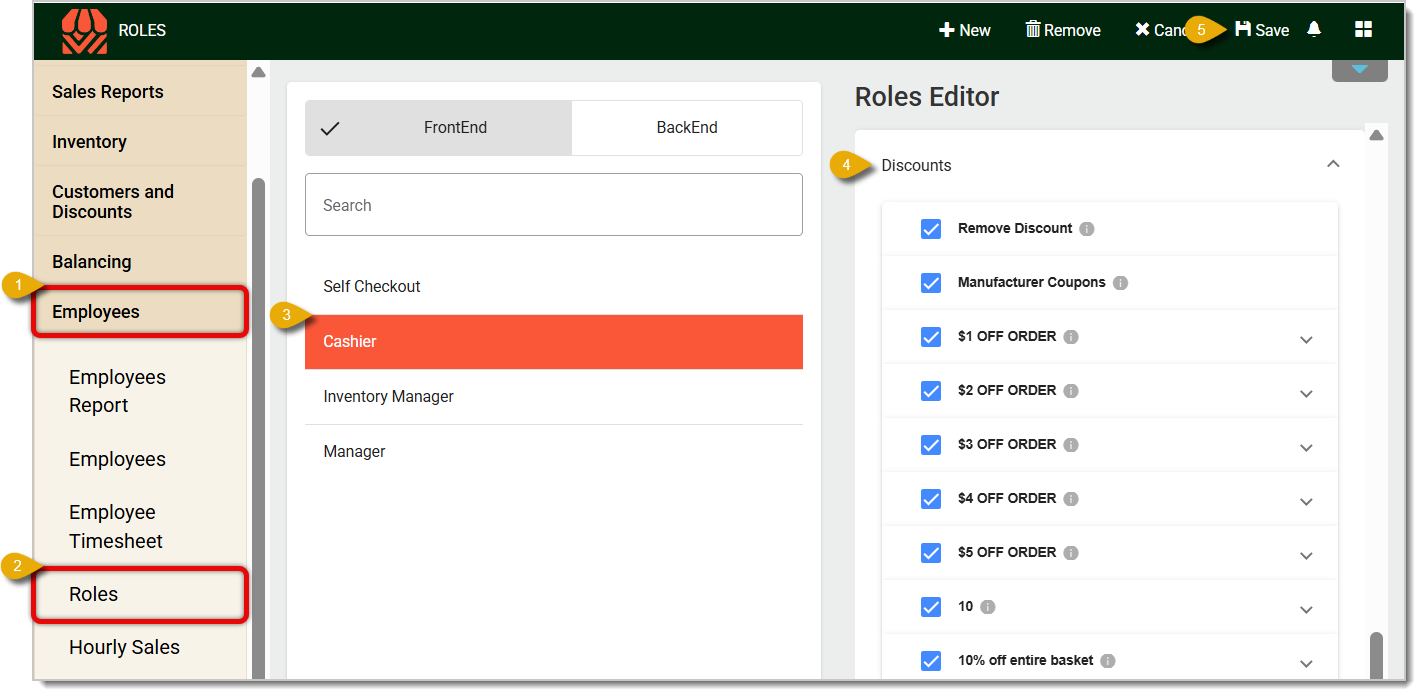
- In the main menu click on Employees.
- In the Employees menu, click on Roles to edit role permissions.
- Select the Role you want to have access to discounts and loyalty rewards. For example, employees with the Cashier role should be able to apply discounts.
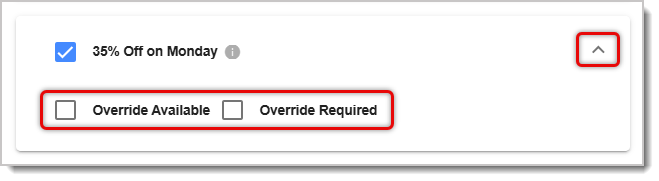
- Under the Roles Editor panel on the far right, scroll down until you see the Discounts section. Check the box for each Discount as necessary. If needed, you can click on the Chevron located on the right of each Discount to see Override options.
- Override Available allows a manager to override the Discount if the customer has reached a limit. For example, a manager can override a limit of 5 if a customer buys 6 of an item, and the discount will still apply. Please Note: This setting is no longer used and will be removed in the future.
- Override Required means a manager must override each time a customer meets the discount's Trigger.
- Click on Save in the upper right. Remember to save your changes, or you'll lose them.
Related Articles
Electronic Coupons
Automatic Coupons
BOGO Coupons
Coupons by Vendor or Department
Cash Back Coupons
Mix & Match Coupons With Product Groups
Frequently Asked Questions
Q: I have a question, but I can't find my answer here. How do I get more assistance?
A: If you need immediate assistance, the IT Retail team is available 24/7. Feel free to contact our support team at 877-752-0625. You can also email us at support@marktpos.com, and we will respond within 24 hours.
There is a wealth of administrative functionality for you in the Manager Functions area of the Front
If you're just getting started in the IT Retail system you will want to set up your Departments befo
The IT Retail Tenders page allows you to create and edit Tender Types like cash, debit cards, and EB








Is this page helpful?
×Help us improve our articles