







Cashier Training
Welcome to IT Retail, we’re so glad you’ve chosen our POS for your store! This article will guide yo
 December 08, 2025
Some states require bottle deposits to encourage recycling. This means there’s an additional fee that gets charged for purchases of bottles of alcoholic beverages, water, juices, and more. Here’s a list of each U.S. state and territory that requires bottle deposits:
You can also independently conduct bottle returns even it's not required, where you take bottles back for recycling and pay back the bottle deposit to customers.
This article will show you how to conduct bottle returns with IT Retail, so read on to see how easy it is!
We first recommend creating a Paid Out function from the Back End and naming it something like Bottle Return. Here’s how to create a new one:
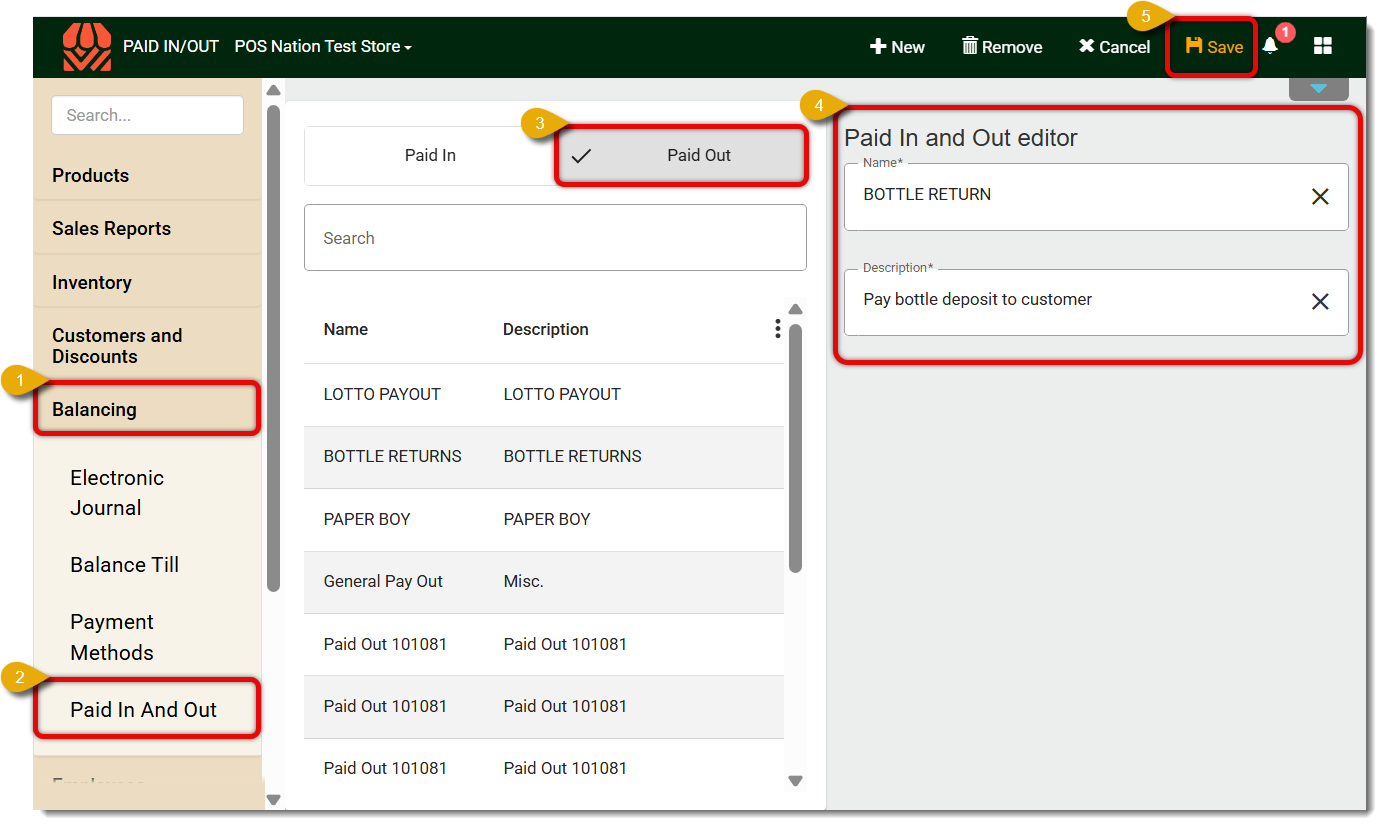
Click on Balancing in the main menu.
Click on Paid In And Out to create a new Paid Out function.
Click on Paid Out. You will see a check mark on the left of the Paid Out tab.
From the Paid In And Out Editor, enter the Name of the Paid Out function and its Description. Both fields are required.
Save your new Paid Out function by clicking on the Save button in upper right.
Now that you’ve created the Bottle Return Paid Out function, it’s time to give your store employees the ability to apply it. You can do so in the Roles Editor, which we’ll explain below in more detail.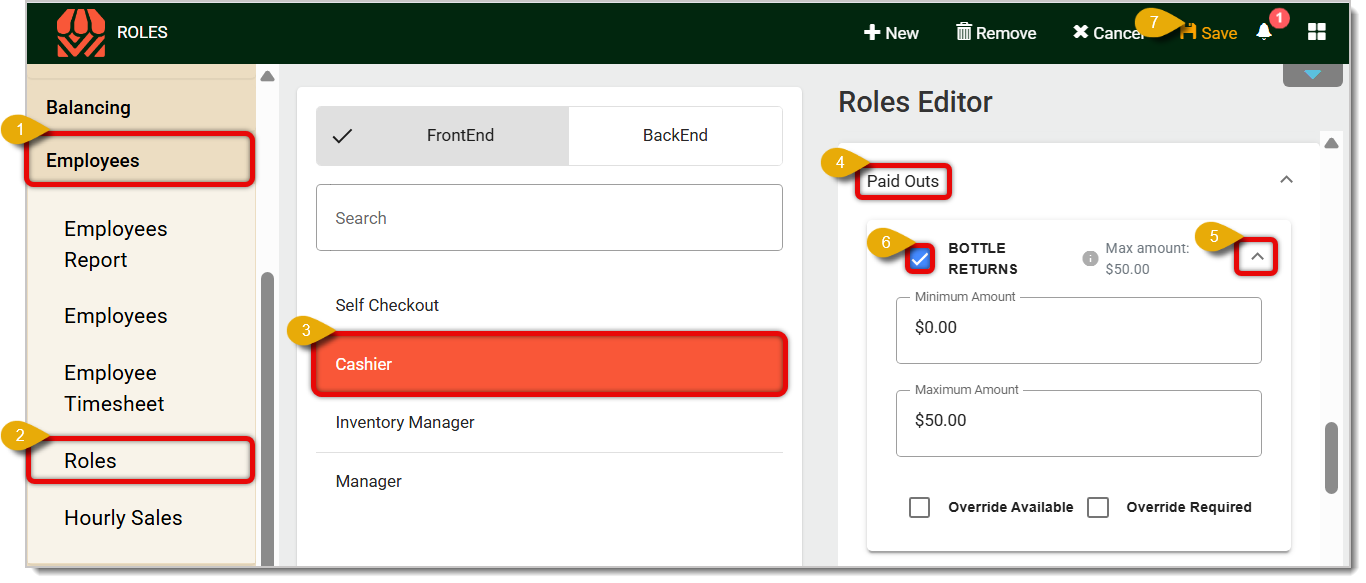
In the main menu, click on Employees.
Click on Roles to edit Front End and Back End permissions. By default, the Front End roles will load, and we’ll start there.
Click on Cashier or whatever you have named that role so you can edit permissions.
On the right side in the Roles Editor, scroll down to Paid Outs.
Check the box for your Bottle Returns Paid Out function to give your cashiers the ability to pay out on bottle returns in the Front End.
Click on the Downward Arrow to the right of the Paid Out to open more options. (The direction of this arrow will switch to Upward when you open the menu, as in the image above). You can set a Minimum Amount or Maximum Amount allowable to be paid out, and you can select if an Override will be Available or Required.
Click Save in the upper right to set the permission.
We also recommend enabling access to Paid Out Reports to the owner. 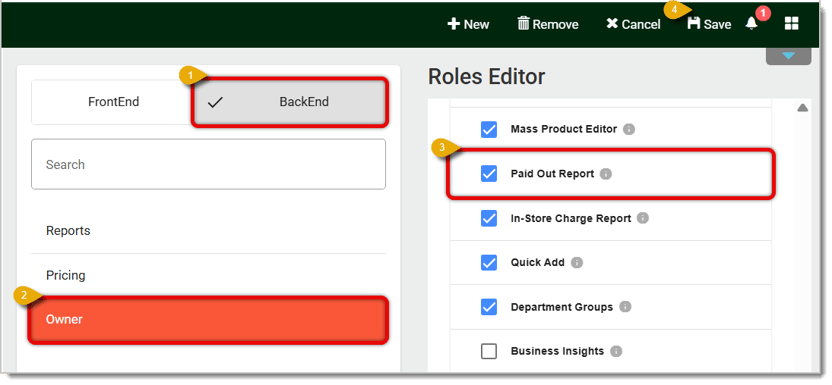
Click on the Back End tab to view your saved Roles that have access to the Back End.
Click on Owner, Manager, or whatever role will need to review Paid Outs for bottle deposits.
In the Roles Editor on the right, check the box next to Paid Out Report.
Click the Save button in the upper right to save your changes.
To access the report and review Paid Out amounts, click on Sales Reports in the left panel, then Paid Out Report.
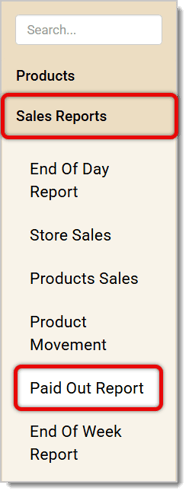
Here is what bottle deposit Paid Outs look like in the Paid Out Report:

Now you’ll be able to perform bottle deposit payouts from the Front End.
Click or tap on Manager Functions in the Front End.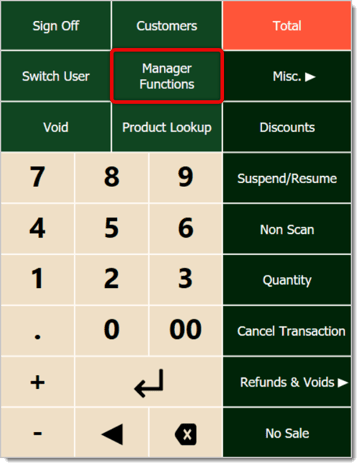
The Manager Functions window will open. Click or tap on Pay In / Out Vendor.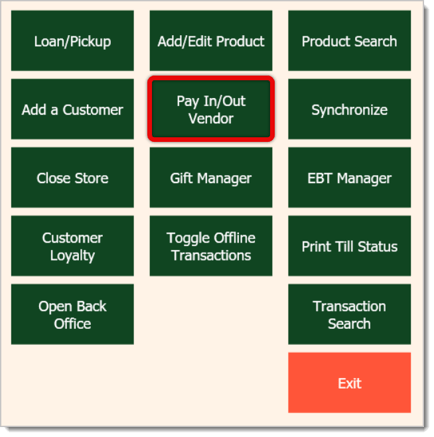
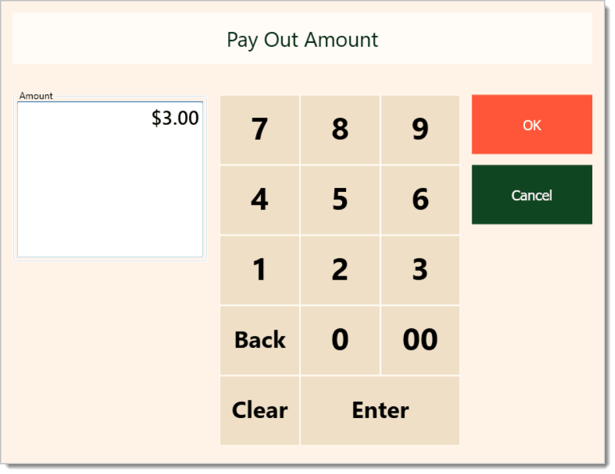
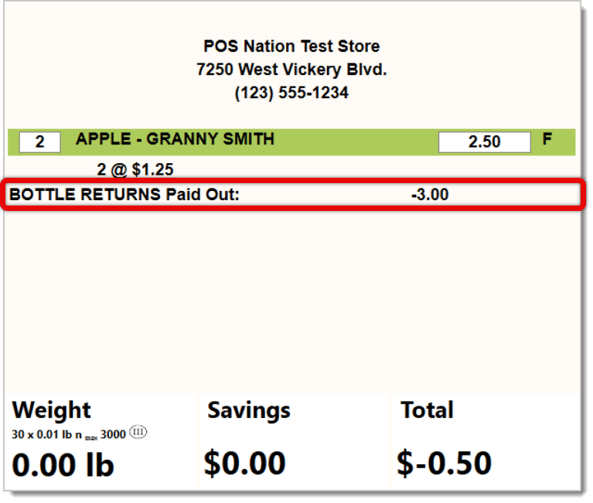
Click or tap on Pay Out.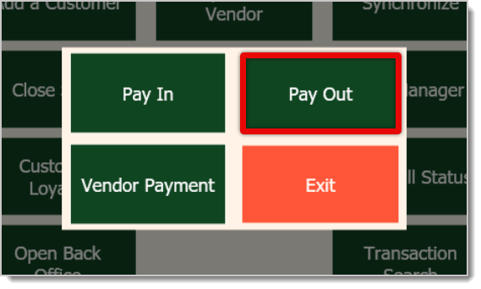
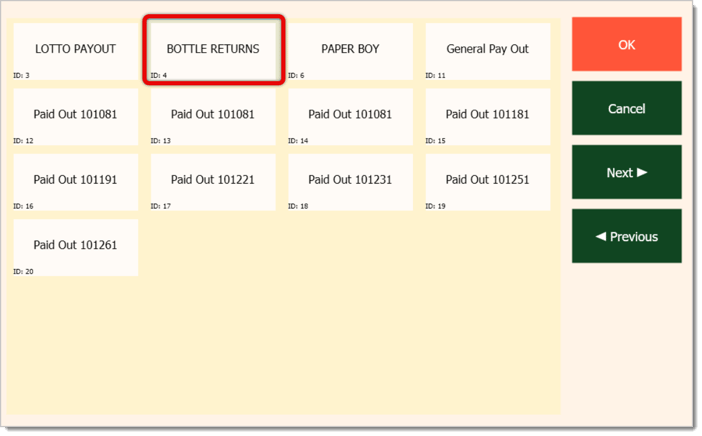
Price Overrides in the Front End
Refunds and Returns in the Register
Manager Functions in the Front End
Q: I have a question, but I can't find my answer here. How do I get more assistance?
A: If you need immediate assistance, the IT Retail team is available 24/7. Feel free to contact our support team at 877-752-0625. You can also email us at support@marktpos.com, and we will respond within 24 hours.
Is this page helpful?
×Help us improve our articles